Kitchen design and planning mistakes

Kitchen Design Mistakes that Everyone Should Avoid

Last Updated: 2021-08-12By

The kitchen is an essential place in the house, needs adequate and realistic planning that will not jeopardize the functionality of kitchen remodeling and interior decoration. All interiors and aesthetics of the kitchen must not be void of the remote intension of making it conformable, hence to avoid having a good intension while execution is bad then you need to put some basic elements in mind when planning to as to prevent or forestall double spend and rework.

It is important to put this in mind since the kitchen is of the home. While designing basic things like space, measurement among others that will be discussed in these helpful tips will guide. That all that you need to know about effective and productive kitchen design mistakes to avoid.

  • Nonrealistic Budgeting
  • A Poorly Design Kitchen Island
  • Bad Lighting
  • Inconsistency or Inadequate Measurement
  • Not Employing the Service of Professional Kitchen Designer
  • Wrong Sized of Appliance
  • Workflow Issue
  • Ignoring Handle
  • The Wrong Placing of Plumbing and Electrical Terminals
  • Not Buying Good Quality Cabinet Hardware
  • Island too Big
  • Poor Ventilation
  • Ignoring Recycling

These tips outline some basic kitchen design mistakes that you should look watch out for when planning for your kitchen.

[instagram-feed]

1.Nonrealistic Budgeting as Kitchen Design Mistakes

The number one factor that may lead to an inefficient or planning mistake is when there is no real budget to actualize the potential kitchen design that you have in mind to its full actuality, this can frustrate your dream kitchen remodeling vision, as well as the possibility of, have a result.

It also good not to under budget the cost of cash you need to execute the project. It is good to overestimate the cost than underestimate it. This is the first thing you need to watch out for. Remember, an unrealistic budget can be one of the roughest kitchen design mistakes.

2.A Poorly Design Kitchen Island

Inappropriate kitchen island design

The kitchen island must match the overall design.

Kitchen islands are advantageous from a design perspective but if it is not properly executed to fit into fit space then an error is inevitable. The kitchen island is a way to increase the preparation area or section and doing a kitchen island is a very small place that will be channelizing thereby making the kitchen to be stuffy. Thus, since there is quite a lot of thing to add to your kitchen make sure there is enough bench space to accommodate them.

3.Bad Lighting

Lighting the kitchen should anything that would badly or poorly design. Proper kitchen lighting is safety is important when it comes to handling sharp knives and other kitchen tools. The lighter you have in the room, the better you can show off your design elements, hence it is advisable to evaluate the work area and add lighting directly above the main area.

The use of pendants like in the work area will be the best thing to do. Rooms generally need three types of lighting that is general lighting for overall illumination, task lighting for comfortable cooking, and accent lighting to enhance the aesthetic appearance of your kitchen.

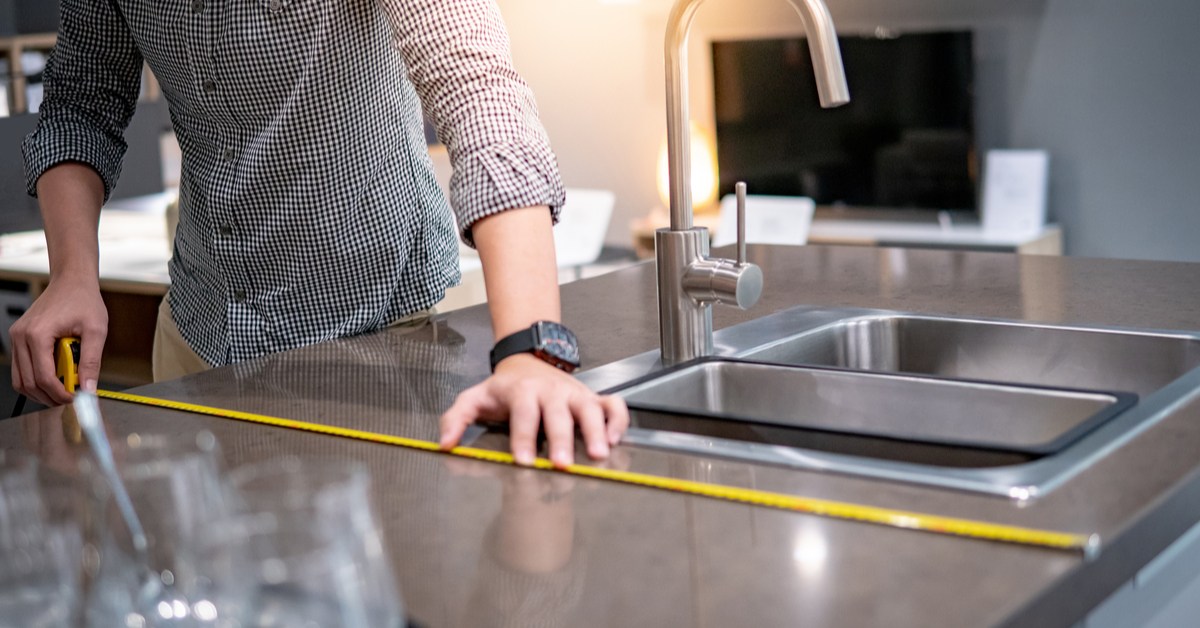
4.Inconsistency or Inadequate Measurement

Correct measurements when renovating a kitchen

Accurate renovation measurements affect quality.

It is advisable to before you start executing your plans and ideas for your kitchen design, it is very important to known the size of your kitchen. This is because if there is the cause of inadequate measurement and you have ordered or purchase kitchen tools or equipment that does not fit in into the kitchen space a big mistake has been committed and the organization of your kitchen is gradual going to error.

When you are doing your planning make sure your measurement is correct to prevent difficulties of distorting the aesthetic, comfortability, and functionality which your kitchen ought to give your home.

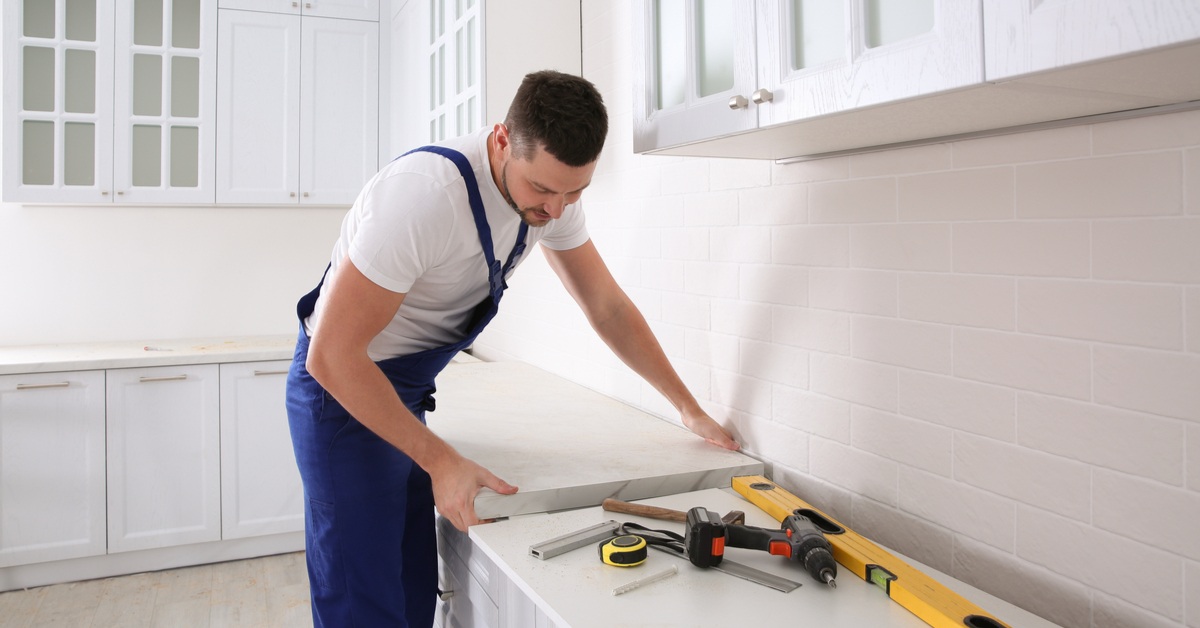
5.Not Employing the Service of Professional Kitchen Designer

Trying to save money by not employing a professional designer is one common mistake that people make which can lead to a waste of time, recourses, and energy if it is not properly done. Employing the service of professional designers helps you to translate your ideas effectively to fit into your taste as well as your budget.

6.Wrong Sized of Appliance

In choosing an appliance for your new kitchen you need to be realistic and consider the numbers of the people living in that house to know the right type of appliance that is needed. Aside from the numbers of the family that much match with the appliance that is been purchased, space is very important to be put into consideration because buying a big fridge for a small kitchen will be improper and inadequate. Hence, the appliance been purchase for the kitchen must fit perfectly into your design and budget.
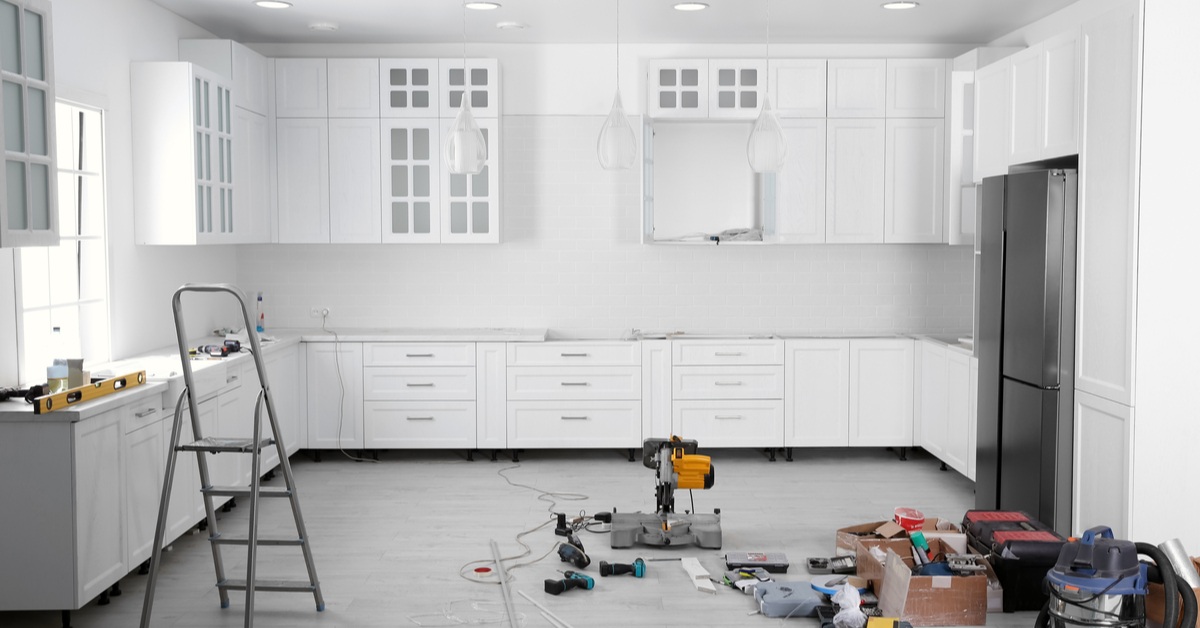
7.Workflow Issue

An excellent workflow planning should not be forgotten, because poor planning can make one kitchen to be impractical and subsequently turns cooking into chaos. By implication of their coherence in the arrangement of kitchen equipment. For instance, your cooker, sink, and fridge should be closer to each other and not several meters apart off.

8.Ignoring Handle

Installing cabinets handles

Correctly selected cabinet handles enhance ease of use.

There is a need to carefully select a handle that works for your family, that is selecting handles that are not difficult to access by everyone in the family. Handles pull or knobs that are too hard to use is prone to damage and replace it at all time will lead to incurring more expenses.

9.The Wrong Placing of Plumbing and Electrical Terminals

If the proper design is not being done before implementation through a draw of sketch and diagrams having a wrong placing or shortage of plumbing and electrical switch bus cannot be averted simply.

To fix such a key mistake, you will have to dismantle the installed furniture, floors, and walls to get to the electrics or the pipeline. Such an oversight can almost double the cost of work.

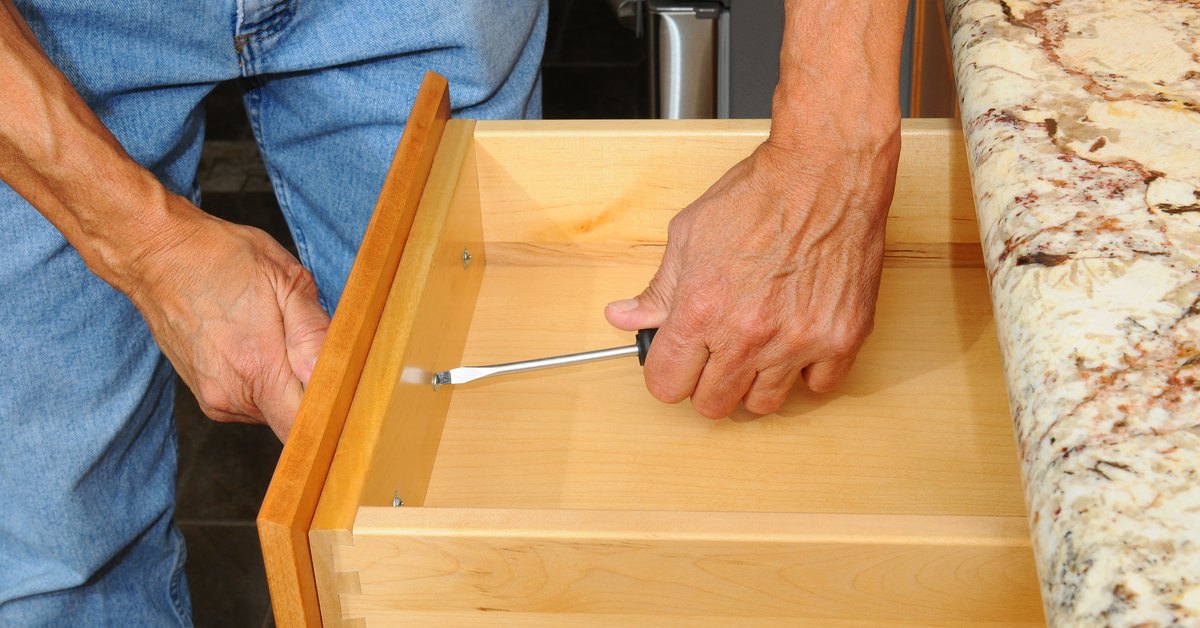
10.Not Buying Good Quality Cabinet Hardware

Good quality cabinet hardware

Cabinets hardware quality is very important.

In other to maximize cost some people might decide to go for less expensive cabinet hardware, thus, good quality hardware lasts longer and they are durable. And it will not make sense to have other kitchen interiors being of high quality while the cabinet hardware will fall short of the standard.

11.Island too Big

Making an island too big for a nice-sized kitchen will make it cramped. The rule that applies to size is that you need at least 42 to 48 inches of open space for your island. Otherwise, it will be very inconvenient and you will get serious discomfort trying to squeeze between the installed kitchen furniture.

12.Poor Ventilation

It is very important when designing a kitchen plan adequate provision should be made for ventilation that is, the air that comes in and air that goes out as well as the cooking smoke in other to reduce heat in the kitchen and stuffiness. It makes your kitchen cleaner and extends life to your appliance.

13.Ignoring Recycling

How effective to manage waste determines neat your kitchen will be, thus, you shouldn’t neglect the adequate right positioning of your kitchen waste bin and. So, this should not be ignored when you are designing from scratch.

Conclusion

Not any kind of planning alone will do but effective working planning that brings about productive results is the type of planning that should be subscribed to. So the first thing to do is to consult or hire a professional to prevent kitchen design mistakes.

Secondly, get a suitable design that fits into your kitchen area and make sure you have an adequate measurement of your kitchen.

Thirdly, never think you can successfully execute a plan without adequate budgeting, if you don’t want your project to be half baked you need to adopt a good budgeting style. While budgeting always makes provision for miscellaneous and overestimation to make sure your kitchen design plan produces the expected result.

Above all pay attention to details don’t try to cut corners in executing your plans in other to save cost, what you need to know is that your kitchen deserves the best as well as you do too.

editor's pick

latest video

news via inbox

Nulla turp dis cursus. Integer liberos  euismod pretium faucibua

Each building has some sort of driveway or at least should have. The main reason is for vehicles to come closer without need to walk all the way. Some homes are residential with small driveway for their car to come in and park before garage or front entrance, and others can be large commercial buildings with loading docks, delivery entrances and casual parking entrances. On Point Remodeling was asked for suggestions on residential driveway for new home construction, and we decided to write detailed article for all our readers. Using this guide you can select the material for your driveway and see what works for your budget. Here are the materials for driveway we will be discussing in our guide:
  • Asphalt
  • Concrete
  • Paver Stone
  • Crushed stone
  • Brick
  • Seashell
  • Gravel
To find good contractor for your driveway, you can either ask our team by email or try to find someone local that worked with neighbors or nearby buildings.

Installation process of any material surface on your driveway

a) Demolition and Excavation – Before anything is done, your contractor will get heavy machinery and scratch off old layer of driveway. They need to go down at least 5-6 inches to insure proper layering before your final layer of material is installed. b) Material Purchase and Delivery – At this point your contract is signed and you already know how the surface will look. Contracting company purchases necessary materials and delivers them to site. Double check if material is correct and not damaged. c) Preparation of Sublevel – Whatever you place as final material, it cannot just be installed directly on top soil. Gravel is the first choice of material that goes down at this stage. Other preferred material is screen sand that can go on top of gravel and works better with stone and bricks. d) Compaction of Ground – To prevent your driveway from moving and changing shapes, all the layers from bottom up have to be properly compacted. Do not leave any spot untouched while doing this or you can get small holes and cracks in driveway after installation. E) Final Installation – This is when all the magic happens. After all preparations and dirty work the final installation is made literally within hours and you can enjoy new driveway. Stone and brick is set up by hand, while other materials require some sort of machinery with manual labor to even out surface.

1. Asphalt

Probably the most used material for road top surfaces as well as driveways is asphalt. This is a mix of gravel and sand that is mixed in and combined by asphalt cement with crude oil. Pros of Asphalt Driveway
  • Very popular and easy to find materials/contractor
  • Completed in 1 day and you can drive on it after
  • Patches and small holes can be fixed fast
Cons of Asphalt Driveway
  • Easy to damage and cracks appear in few years
  • Almost everyone else has same surface
  • Oily surface and chemicals used in mix
Prepared for asphalt driveway will cost you around $5 per square foot to finish. The contractors that take care of entire process from taking out old driveway surface, install subsurface and compact the ground with new asphalt on top, will charge on average $5500 per regular size driveway at single home property.

2. Concrete

What we call concrete is a mixture of Portland cement, aggregate as well as sand with gravel. Suggested thickness of concrete for driveway is 6 inches. The mixture needs to cure without being touched or driven on top for several days. Pros of Concrete Driveway
  • Durable material for large weights
  • Long lifespan if installed properly
  • Winter and summer friendly
Cons of Concrete Driveway
  • Has marks and stains over time
  • Hard to repair without replacement
  • Super hard to DIY
To hire contractors for concrete driveway it will cost around $7-$9 per square foot. This will include site preparation with gravel spread and new concrete installation. They will order full truck of concrete (or several for larger driveways) to pour inside forming. Smoothening and curing is required after installation.

3. Paver Stone

The most luxurious material that you can use to create driveway path with is paver stone. It is made out of natural stone with uneven rough shapes that have different line patterns. Paver stones are very heavy and are perfect for weights on top of them. Almost every city in Europe has roads and walks made out of stone that were installed centuries ago. Pros of Paver Stone Driveway
  • Creative designs can be done
  • Personal looks, can match the house
  • Can replace single stone in minutes
Cons of Paver Stone Driveway
  • Weeds growing through
  • Stone can move over time
  • Most expensive material
There is wide selection of stone that can be purchased for your driveway. On average we recommend settling with $17-$20 per square foot for stone with installation included. Working with this material is very intense labor and we recommend hiring professionals that do this type of work every day.

4. Crushed Stone

Our readers sometimes mistake crushed stone with gravel, but this is not the same material. Crushed stone material is achieved when machine is mechanically crushing larger pieces of unused stone for this specific purpose. It is larger than gravel and can have smooth finish. Crushed stone can also have a mix of colors, which is much pleasant to eyes than gravel. Pros of Crushed Stone Driveway
  • Low maintenance required
  • Fits rural area style
  • Can be reused for other purposes
Cons of Crushed Stone Driveway
  • Gets very hot during summer
  • Can be messy after many drives
  • Hard to remove snow and ice
Buying crushed stone and installing it on your driveway is as easy as it gets. Similar to other rough materials discussed in this post, only small tools like shovels, dolly and buckets are required to spread it on the road. The cost of crushed stone driveway is between $4 and $6 per square foot from professional local contractors that can finish the job in several days.

5. Brick

The same brick we see being used in wall construction can be installed as top driveway surface. Brick is manufactured by compressing clay with plastic mass. It is heated to extreme temperature and dried up to become as solid as you know it. Pros of Brick Driveway
  • Variety of selections in shapes and shades
  • Bricks are recyclable
  • Slip resistant with rough top part
Cons of Brick Driveway
  • Needs regular maintenance
  • Change color over time
  • Old fashion looking
Installing brick on driveway costs $10 per square foot, which is not too far from masonry brick laying as part of the wall. To save money you can use or purchase old brick, that was part of a wall before. Do not mix these two jobs and contact landscaping professionals instead of masonry contractors that work with bricks.

6. Seashell

This material is popular on the coast line where shells can be found near the water. Construction companies use seashells to add in other materials as well as spread them on driveway in rough condition, without adding anything else. It usually comes in white or pearl color and darkens within year because of mixing with sand and dirt. Pros of Seashell Driveway
  • Environmentally friendly
  • Has natural drainage
  • Creates worm vibe of beach house
Cons of Seashell Driveway
  • Break and crack under light weight
  • Sharp and very hard to walk on
  • Gets stuck in shoes and tires
To deliver and spread seashells on driveways costs below $4, which is only slightly more expensive than rough gravel. As you go further from coast line, cost of material increases due to delivery. This material is elegant and very soft. We recommend adding edge lines with darker color landscape material to create visual path.

7. Gravel

This material is used in other construction mixes and underlayment systems. It’s literally fragments and small crushed stones that are put on top of soil. It is easily spread out by hands and anyone can do it. Pros of Gravel Driveway
  • Cheapest of them all
  • Easy DIY Job
  • Can install another material on top
Cons of Gravel Driveway
  • Needs to be graded very often
  • Will mix with dirt and leaves
  • Washes up with heavy rains
It is rough material and can be purchased in bulk (by metric tons or cubic meters). The cost of driveway with gravel should not exceed $3 per square foot, but you can save tons of money by purchasing materials and doings installation by yourself. You do not require specific tools or heavy equipment for the job and delivery of gravel can be arranged directly to your project.

Conclusion

To properly finish any and all of these driveways requires skills and experience. There is no way you can complete any of these projects without heavy equipment and tools that regular home owner’s just store in their garages. Most of those who will read this post will prefer to install asphalt driveway, because of its popularity and low costs. We want to encourage home owners to go for personal preference and what matches your house, rather than getting the most affordable and popular items. Driveway jobs have to be completed fast; otherwise you will need to park elsewhere while the project is running. To not overpay, ask us for quotation sample on material you prefer in specific region where the work need to be done and our team can provide some numbers.

Leave A Comment