Varieties of lighting for the kitchen

Types of Kitchen Lights Ideas Used for Upgrades

Last Updated: 2021-08-12By

Lighting is a very important part of every room. How to organize types of kitchen lights, the most common lighting mistakes in the kitchen, how to choose the right lamps, and save on electricity, you can find answers to such questions in this article.

The main secret of good kitchen lighting is layering. Each functional zone, where you wash dishes, cut food, eat food should have its light sources.

  • Pendant Lights
  • Chandelier
  • Pot Lights
  • LED Lights
  • Rack Lights

Let us consider in more detail these types of lamps, with their advantages and disadvantages.
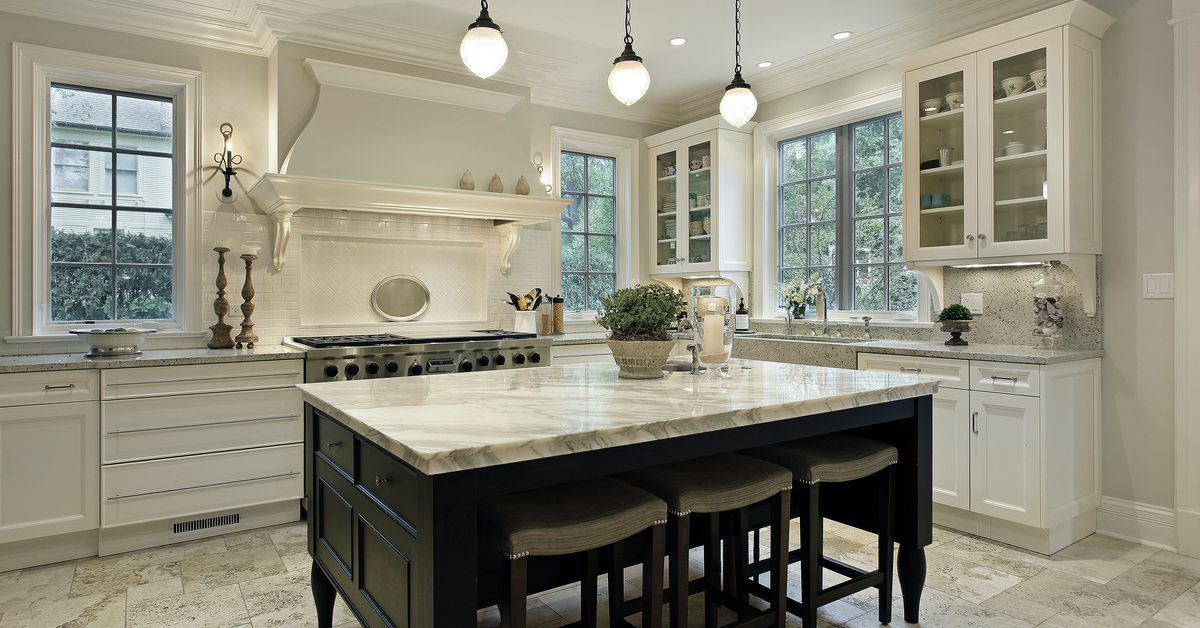
1.Pendant Lights

Pendant lights for a kitchen

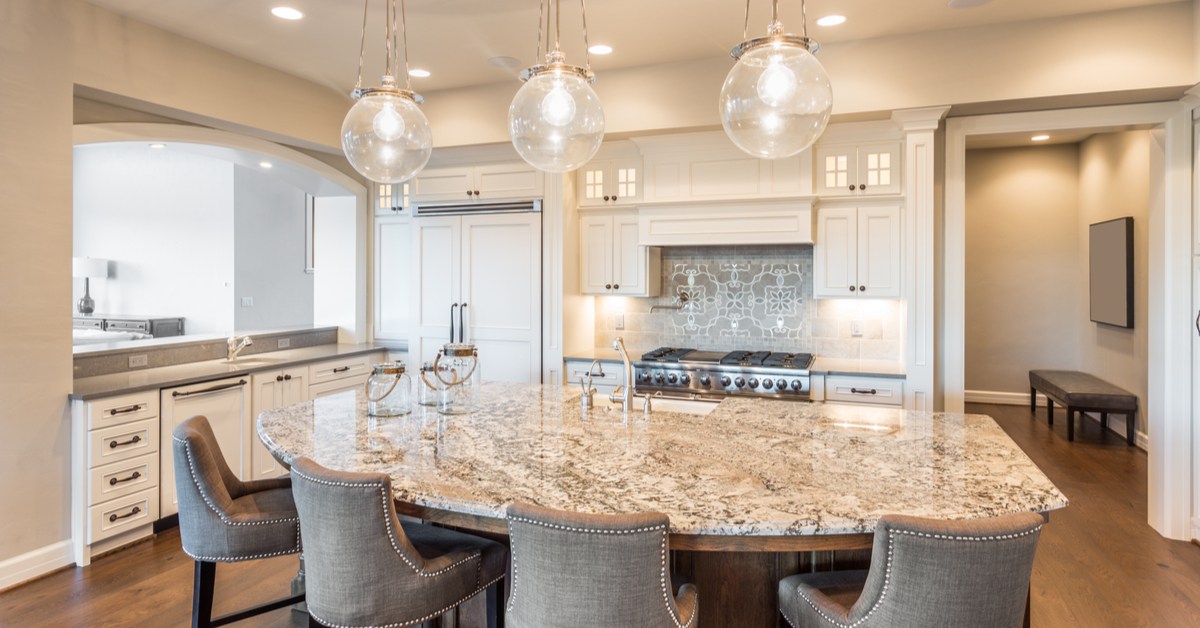
Pendant lights are placed above the school table in the kitchen.

Pendant lights are very common in kitchens because they are great for kitchens of various sizes and styles. Well-chosen pendant lights can provide the right amount of light for kitchens of any size, and a wide variety of designs will allow you to match the fixture to any style of the room.

To provide the right amount of light in a room, you may need several pendant lights, which makes it difficult to install them yourself. On Point Remodeling recommends seeking professional contractors for this. Having correctly measured all the distances, contractors will be able to arrange them, observing the correct geometry of your room, and reliable fixings to the ceiling will not allow the lamps to fall to the floor.

The cost of fixtures can vary from various factors, but on average it is $ 300 – $ 400. The price depends on what material they are made of, it can be various metal alloys, wood, or glass. Pendant lamps have an average price compared to other types of kitchen lights but do not forget that there is more than one required for a room.

The maintenance of pendant lamps is not very laborious, they are not cumbersome, which makes it easy to wipe off dust without even removing them. Most of the lamps of this type use incandescent lamps, the replacement of which is quite simple because you can access the light bulb without disassembling the lamp. But do not forget that electricity must be handled carefully.

2.Classic Kitchen Chandelier

Chandelier in the classic kitchen

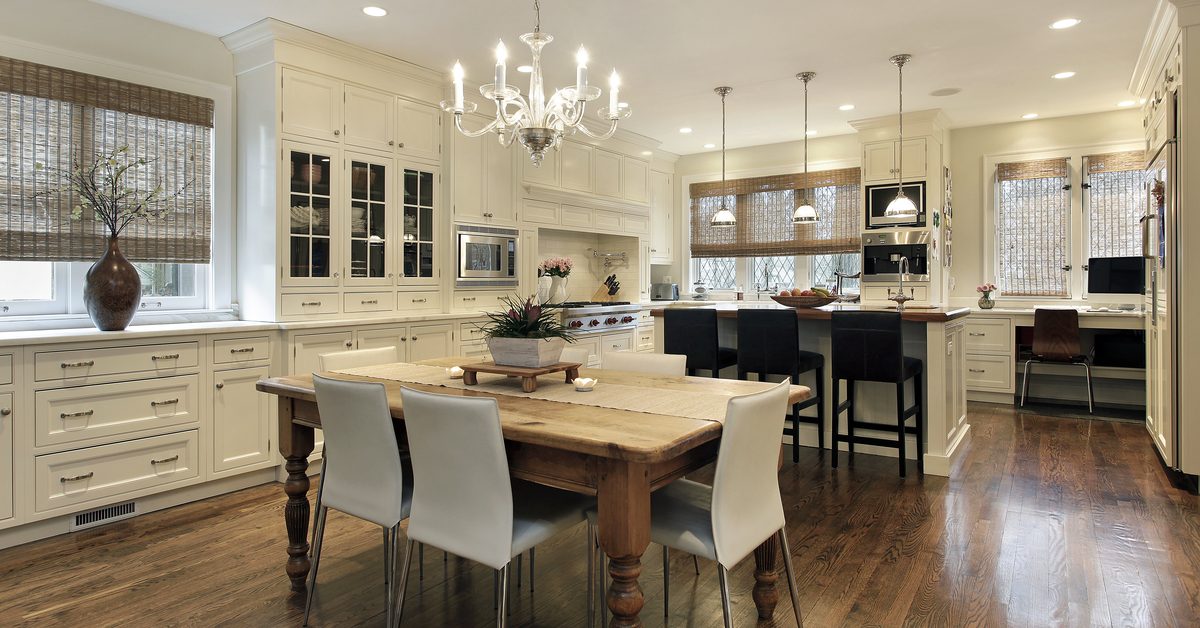
Installing a beautiful chandelier in a classic style kitchen.

Chandeliers are one of the oldest types of chandeliers used in the beautiful halls of palaces and luxury homes. They vary in size and can add elegance to any room. Most often they are used in luxury and traditional styles, but the modern variety allows them to be used in almost any room.

Due to their impressive size, chandeliers are quite difficult to install, for example, a luxurious crystal chandelier with many details and lamps can be installed by professionals for a couple of days. Since the chandeliers connect directly to wires in the ceiling, you cannot do without a qualified electrician.

The complexity of the design and details make the chandeliers quite expensive, the average price of which varies in the aisles of $ 400 – $ 700. The price is influenced by many factors, its size, the complexity of the design, the materials used, and much more. If you want to make a custom-made chandelier so that it is exclusive and emphasizes your interior, then the price can exceed $ 1000.

Replacing burned-out bulbs and cleaning dust will take much longer than conventional lamps. The difficulty lies in the fact that the chandelier is attached to the ceiling and it is more difficult to get to it. Cleaning should be done with care, as it is done by weight and for this I use a ladder or chair, depending on the height of your room.

3.Pot Lights

Pot lights for kitchen

Pot lights as the main light source in the kitchen.

Pot lights have grown in popularity over the past decades. Small lamps recessed into the ceiling provide the necessary amount of light for your kitchen without being noticed. They are great for small kitchens with low ceilings, where space is important, and are used in many styles to create primary or secondary lighting.

Accurate counting and correct placement are key in installing pot lights. For each lamp, wires are carried out and the installation of this type of lighting is carried out only during the repair of the room and only by professional electricians.

The small size of the pot lights and the rather simple design keep them at $ 20-40 apiece. It sounds very cheap, but do not forget that one lamp will not be enough for you to create the necessary lighting, the number depends on the project and the room, there may be 5, maybe 15, which significantly increases the cost.

Daily maintenance of pot lights is one of the easiest, as they are ceiling mounted and virtually dust-free, and the lamps used in them can last up to 10 years depending on their quality.

4.LED Lights for Work Space

Kitchen with LED lights

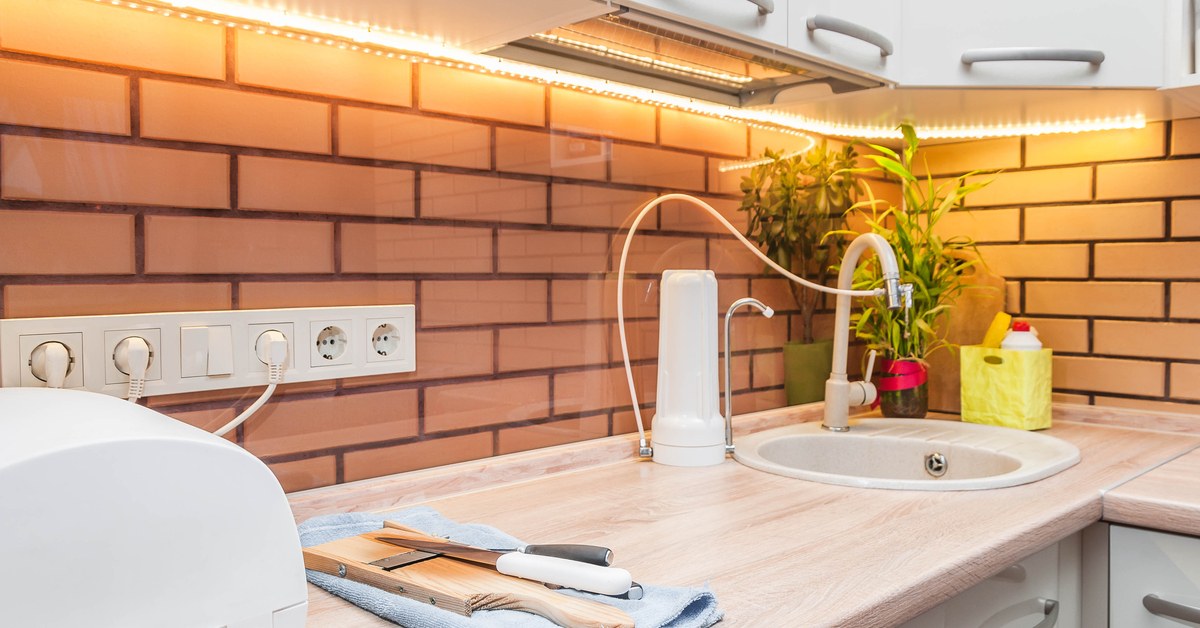
LED lights for the kitchen countertops

LED Lights can be called an innovative type of kitchen lighting. The light is emitted by a variety of miniature bulbs located on a diode strip. Distinctive features of such lighting are soft light, with a variety of colors. LED lights can be placed in the curves of the ceiling or installed in kitchen furniture, used in modern styles, or by combining innovative technologies with luxury style.

Installing LED lights is easier than installing chandeliers, but it requires precise design calculations for your kitchen to be filled with enough light. This type of lighting is often combined with pot lights and you will not see the tape itself, but only the soft light emitted by it. Due to these difficulties, it is not recommended to try to install this type of lighting yourself.

The cost of the used LED lights directly depends on their number used in the room and only a contractor can make a detailed calculation, but you should also know that they use a very small amount of electricity, which will significantly reduce your electricity costs.

Like pot lights, this type of lighting is very easy to maintain, because a high-quality tape will serve you for many years, but if some of the bulbs fail, then you will have to replace the entire tape and this work can only be performed by a qualified electrician.
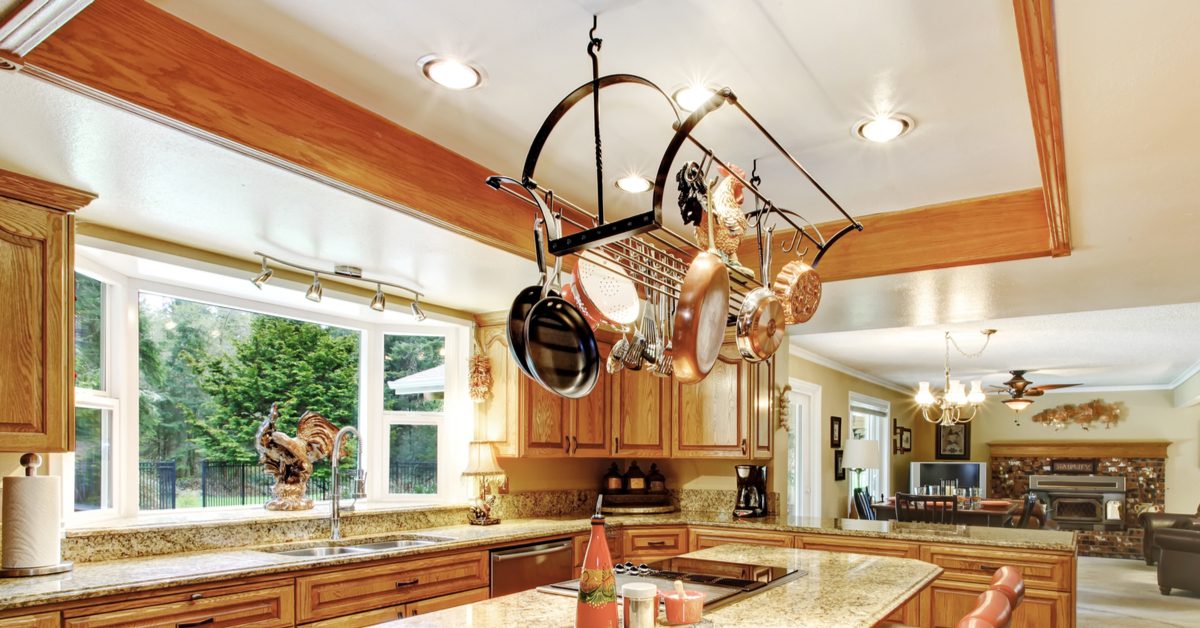
5.Rack Lights

The main difference between Rack lights and other types of kitchen lights is that they are mounted on vertical surfaces. They can be made in a variety of styles and complement any design. Rack lights are rarely used as the main lighting, in most cases, they provide additional light in the necessary areas, or to create a pleasant semi-darkness atmosphere.

The wide variety of this type of lighting creates a significant range of prices. The price is influenced by the number of lamps, decorative parts, materials used, and the size of the lamp. On average, the price ranges from $ 100 – $ 250, but there are also exquisite pieces, the price of which significantly exceeds these amounts.

Installation of this type of lighting is quite simple if you already have an electrician and sockets installed. You just need to choose the right place for the location of the lamp and connect it to the electrical network, but if the lighting option you have chosen is connected directly to the wires, then you cannot do without the help of a specialist.

Rack lights are easy to maintain. In most cases, they are not mounted high and you can easily wipe off the dust from them, or replace out-of-order lamps, the duration of which depends on the type used. It is enough to make sure that the luminaire is disconnected from the electricity before replacing it.

Conclusion

A combination of different types of kitchen lights, great for new remodeling. The balance between cooking convenience and a beautiful ambiance is essential for every homeowner. A huge selection of fixtures will allow you to find the right lighting for any style and size of the kitchen.

Since you need to choose lighting for the kitchen not only beautiful and convenient but also reliable, you should focus on proven brands, only they guarantee you the durability of products in difficult operating conditions: with an abundance of steam, drops of fat, and other contaminants.

editor's pick

latest video

news via inbox

Nulla turp dis cursus. Integer liberos  euismod pretium faucibua

Each building has some sort of driveway or at least should have. The main reason is for vehicles to come closer without need to walk all the way. Some homes are residential with small driveway for their car to come in and park before garage or front entrance, and others can be large commercial buildings with loading docks, delivery entrances and casual parking entrances. On Point Remodeling was asked for suggestions on residential driveway for new home construction, and we decided to write detailed article for all our readers. Using this guide you can select the material for your driveway and see what works for your budget. Here are the materials for driveway we will be discussing in our guide:
  • Asphalt
  • Concrete
  • Paver Stone
  • Crushed stone
  • Brick
  • Seashell
  • Gravel
To find good contractor for your driveway, you can either ask our team by email or try to find someone local that worked with neighbors or nearby buildings.

Installation process of any material surface on your driveway

a) Demolition and Excavation – Before anything is done, your contractor will get heavy machinery and scratch off old layer of driveway. They need to go down at least 5-6 inches to insure proper layering before your final layer of material is installed. b) Material Purchase and Delivery – At this point your contract is signed and you already know how the surface will look. Contracting company purchases necessary materials and delivers them to site. Double check if material is correct and not damaged. c) Preparation of Sublevel – Whatever you place as final material, it cannot just be installed directly on top soil. Gravel is the first choice of material that goes down at this stage. Other preferred material is screen sand that can go on top of gravel and works better with stone and bricks. d) Compaction of Ground – To prevent your driveway from moving and changing shapes, all the layers from bottom up have to be properly compacted. Do not leave any spot untouched while doing this or you can get small holes and cracks in driveway after installation. E) Final Installation – This is when all the magic happens. After all preparations and dirty work the final installation is made literally within hours and you can enjoy new driveway. Stone and brick is set up by hand, while other materials require some sort of machinery with manual labor to even out surface.

1. Asphalt

Probably the most used material for road top surfaces as well as driveways is asphalt. This is a mix of gravel and sand that is mixed in and combined by asphalt cement with crude oil. Pros of Asphalt Driveway
  • Very popular and easy to find materials/contractor
  • Completed in 1 day and you can drive on it after
  • Patches and small holes can be fixed fast
Cons of Asphalt Driveway
  • Easy to damage and cracks appear in few years
  • Almost everyone else has same surface
  • Oily surface and chemicals used in mix
Prepared for asphalt driveway will cost you around $5 per square foot to finish. The contractors that take care of entire process from taking out old driveway surface, install subsurface and compact the ground with new asphalt on top, will charge on average $5500 per regular size driveway at single home property.

2. Concrete

What we call concrete is a mixture of Portland cement, aggregate as well as sand with gravel. Suggested thickness of concrete for driveway is 6 inches. The mixture needs to cure without being touched or driven on top for several days. Pros of Concrete Driveway
  • Durable material for large weights
  • Long lifespan if installed properly
  • Winter and summer friendly
Cons of Concrete Driveway
  • Has marks and stains over time
  • Hard to repair without replacement
  • Super hard to DIY
To hire contractors for concrete driveway it will cost around $7-$9 per square foot. This will include site preparation with gravel spread and new concrete installation. They will order full truck of concrete (or several for larger driveways) to pour inside forming. Smoothening and curing is required after installation.

3. Paver Stone

The most luxurious material that you can use to create driveway path with is paver stone. It is made out of natural stone with uneven rough shapes that have different line patterns. Paver stones are very heavy and are perfect for weights on top of them. Almost every city in Europe has roads and walks made out of stone that were installed centuries ago. Pros of Paver Stone Driveway
  • Creative designs can be done
  • Personal looks, can match the house
  • Can replace single stone in minutes
Cons of Paver Stone Driveway
  • Weeds growing through
  • Stone can move over time
  • Most expensive material
There is wide selection of stone that can be purchased for your driveway. On average we recommend settling with $17-$20 per square foot for stone with installation included. Working with this material is very intense labor and we recommend hiring professionals that do this type of work every day.

4. Crushed Stone

Our readers sometimes mistake crushed stone with gravel, but this is not the same material. Crushed stone material is achieved when machine is mechanically crushing larger pieces of unused stone for this specific purpose. It is larger than gravel and can have smooth finish. Crushed stone can also have a mix of colors, which is much pleasant to eyes than gravel. Pros of Crushed Stone Driveway
  • Low maintenance required
  • Fits rural area style
  • Can be reused for other purposes
Cons of Crushed Stone Driveway
  • Gets very hot during summer
  • Can be messy after many drives
  • Hard to remove snow and ice
Buying crushed stone and installing it on your driveway is as easy as it gets. Similar to other rough materials discussed in this post, only small tools like shovels, dolly and buckets are required to spread it on the road. The cost of crushed stone driveway is between $4 and $6 per square foot from professional local contractors that can finish the job in several days.

5. Brick

The same brick we see being used in wall construction can be installed as top driveway surface. Brick is manufactured by compressing clay with plastic mass. It is heated to extreme temperature and dried up to become as solid as you know it. Pros of Brick Driveway
  • Variety of selections in shapes and shades
  • Bricks are recyclable
  • Slip resistant with rough top part
Cons of Brick Driveway
  • Needs regular maintenance
  • Change color over time
  • Old fashion looking
Installing brick on driveway costs $10 per square foot, which is not too far from masonry brick laying as part of the wall. To save money you can use or purchase old brick, that was part of a wall before. Do not mix these two jobs and contact landscaping professionals instead of masonry contractors that work with bricks.

6. Seashell

This material is popular on the coast line where shells can be found near the water. Construction companies use seashells to add in other materials as well as spread them on driveway in rough condition, without adding anything else. It usually comes in white or pearl color and darkens within year because of mixing with sand and dirt. Pros of Seashell Driveway
  • Environmentally friendly
  • Has natural drainage
  • Creates worm vibe of beach house
Cons of Seashell Driveway
  • Break and crack under light weight
  • Sharp and very hard to walk on
  • Gets stuck in shoes and tires
To deliver and spread seashells on driveways costs below $4, which is only slightly more expensive than rough gravel. As you go further from coast line, cost of material increases due to delivery. This material is elegant and very soft. We recommend adding edge lines with darker color landscape material to create visual path.

7. Gravel

This material is used in other construction mixes and underlayment systems. It’s literally fragments and small crushed stones that are put on top of soil. It is easily spread out by hands and anyone can do it. Pros of Gravel Driveway
  • Cheapest of them all
  • Easy DIY Job
  • Can install another material on top
Cons of Gravel Driveway
  • Needs to be graded very often
  • Will mix with dirt and leaves
  • Washes up with heavy rains
It is rough material and can be purchased in bulk (by metric tons or cubic meters). The cost of driveway with gravel should not exceed $3 per square foot, but you can save tons of money by purchasing materials and doings installation by yourself. You do not require specific tools or heavy equipment for the job and delivery of gravel can be arranged directly to your project.

Conclusion

To properly finish any and all of these driveways requires skills and experience. There is no way you can complete any of these projects without heavy equipment and tools that regular home owner’s just store in their garages. Most of those who will read this post will prefer to install asphalt driveway, because of its popularity and low costs. We want to encourage home owners to go for personal preference and what matches your house, rather than getting the most affordable and popular items. Driveway jobs have to be completed fast; otherwise you will need to park elsewhere while the project is running. To not overpay, ask us for quotation sample on material you prefer in specific region where the work need to be done and our team can provide some numbers.

Leave A Comment