Kitchen remodeling order of steps

Kitchen Renovation Steps in Order from Start to Finish

Last Updated: 2021-08-12By

Kitchen remodeling is a major task that requires careful planning. A remodeled kitchen makes your home more livable and also helps to boost the value of your home as other remodeling projects can do.  Kitchen remodeling is a project worth the money effort, and time. One can easily get carried away or overwhelmed while sourcing for ideas online. Below are some kitchen renovation steps in order.

  • Understand What You Want
  • Design
  • Permits/Drawings
  • Demolition
  • Framing
  • Rough ins
  • Drywall
  • Flooring
  • Kitchen Cabinets
  • Countertops / Backsplash
  • Appliances
  • Lights
  • Paint

Understanding the steps that make up the process before you begin saves you from being overwhelmed. It is essential to look at the bigger picture before embarking on the journey. You need to put into consideration the space you’re working with, the workability of your existing layout, and the cost of the overall remodeling to map out a plan that you can adhere to.

[instagram-feed]

1.Understand What You Want

You need to know what you want. You can start by asking yourself what your current kitchen lack, or the problems you are experiencing. It might be too little space to cook effectively, too little space to store food and dishes, lack dining areas, too old appliances, or maybe the kitchen just makes you wince because it is so outdated and so ugly.

The most overwhelming task in the project is weighing out the expenses of a remodel. Therefore, it’s the one you should handle first. Remodeling a kitchen can be a major expense, therefore, the first concern is to consider your budget when deciding how big you want to go.

Employ the assistance of a local real estate professional for counsel on the additional worth your endeavor will add to your home. Conduct a study on your favorite kitchen and remodeling magazines and websites for hints on budgeting.

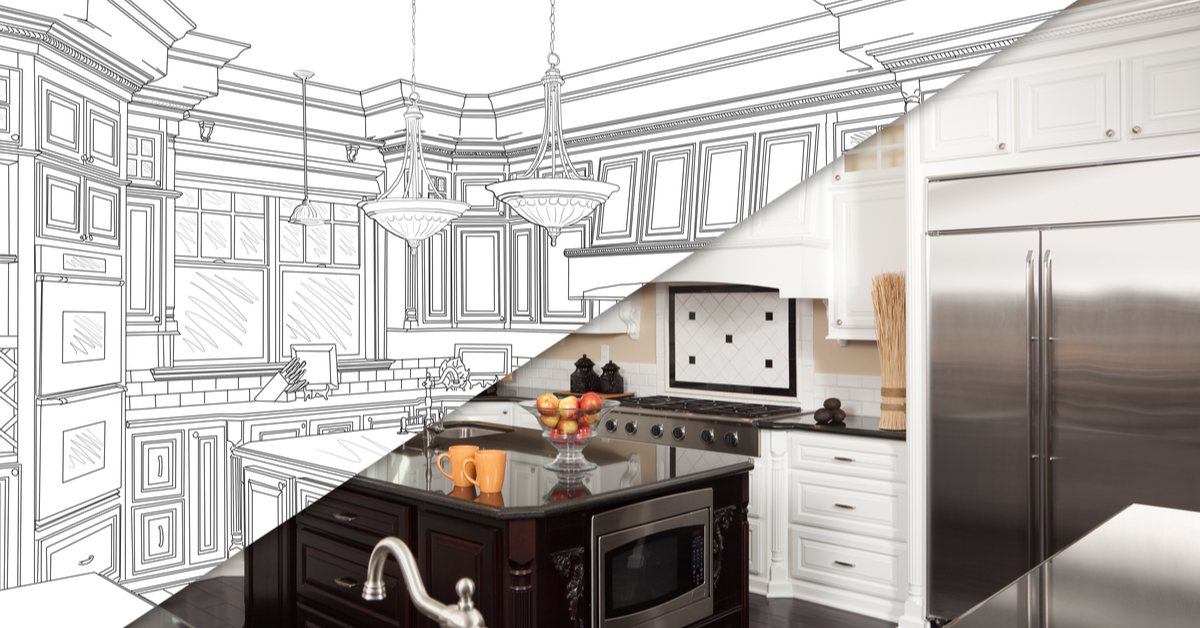
2.Kitchen Design Creation

Drawing kitchen design

The designer creates the look of the future kitchen.

When remodeling a kitchen, updating appliances, countertops, and cabinets mostly comes to the mind first. To get to the very core and essence of a kitchen, there is a need for you and your contractor to map out the entire plan and flow of the kitchen. On point remodeling, experts can design layouts that will suit your taste. A major kitchen remodeling often involves revamping the entire layout. When discussing floor-plan options for kitchen remodels, design layouts come into the context. Some of the commonly used design layouts include One-Wall Kitchen Layout, Corridor (Galley-Style) Kitchen Layout, L-Shaped Kitchen Layout, Double-L Design Kitchen Layout, and more.

3.Confirmation of Drawings and Obtaining Permits

Permits must be gotten from various organizations. Your city or county may administer the electrical, plumbing, and building permits. Your water company may also need to permit any work relating to water supply and drainage. A general contractor will obtain all the necessary permits if he is handling the remodeling. If you are doing it yourself, start by contacting your local permitting agency.

4.Demolition Old Kitchen

Step by step kitchen remodel starts from demolition. That’s the first stage in the repair where manual labor is involved. During this process, old renovations are dismantled, old furniture, appliances, floors, and walls are disposed of. All this is done to clear up space for a new project.

This is hard physical work, but if you want, you can do it yourself. While doing this work, you should take care of several things, such as temporary power outages and plumbing, to avoid problems. You should also agree in advance with a company that carries out the removal of construction waste, which will not be enough.

5.Framing Instalation

After the completion of demolition, remodeling begins with the installation of the necessary framing work needed for the project. This stage may involve some very major construction tasks depending on your new kitchen’s configuration. Tasks may include adding or replacing windows, increasing cabinet space, taking down walls, and so on.

6.Rough ins

After the framing work, the next stage has to do with rerouting or installing new plumbing pipes, wiring, and HVAC duct-work. This process is known as the mechanical rough-in stage, and it is normally done by professionally licensed plumbers, electricians, and HVAC hired either by a general contractor or by the homeowner serving that role.

7.Drywall

Drywall installation stage

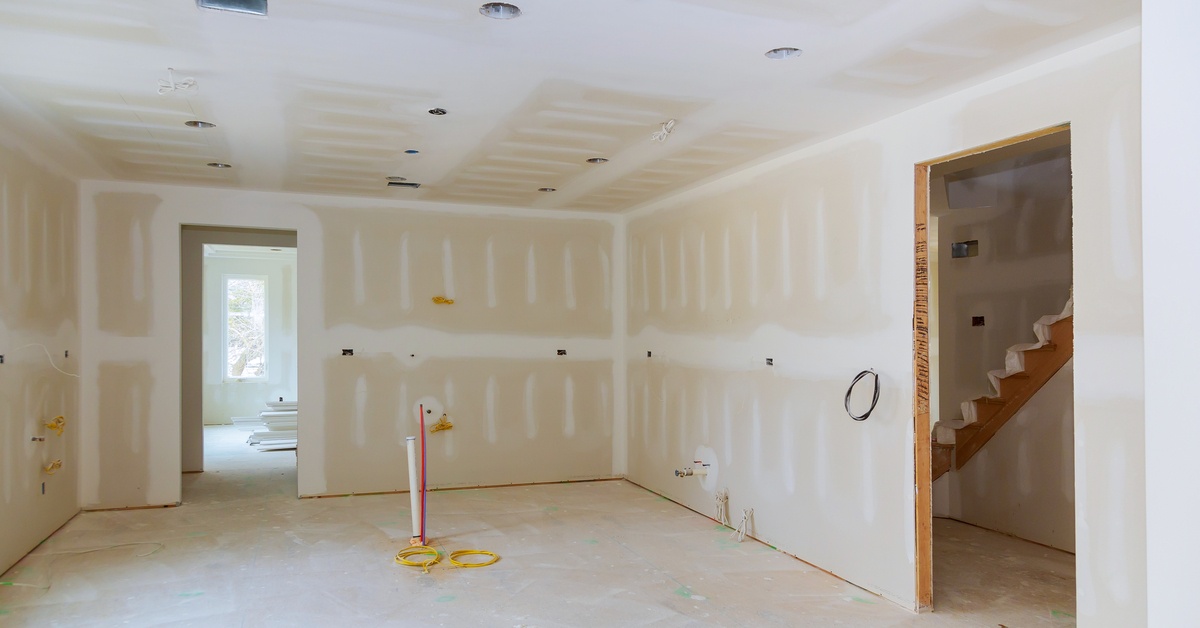
The next stage is sheathing the metal frame with drywall. After installation, your room will acquire the walls and outlines of the future room, and you will be able to assess the future space live.

Attaching drywall sheets to a metal frame seems to be an easy process and sometimes it seems that you can do it yourself. But at the same time, the sheets are very heavy and fragile to break. Without proper work experience, the drywall may not be installed evenly, and during the installation process a significant part of the material will be damaged, so it is better to entrust this work to your contractor.

8.Choose Flooring Coating

Installing the floor covering is the final part before installing the kitchen furniture. The complexity of this work will not allow you to make the floor yourself and renting the necessary tools will cost a lot. Entrust this to professionals who will cope with the task in a few days.

The various types of flooring include ceramic tiles, laminate flooring, engineering wood, solid hardwood, sheet vinyl, rubber flooring, etc. Choose which type of flooring to use based on your budget and overall kitchen style.

9.Kitchen Cabinets

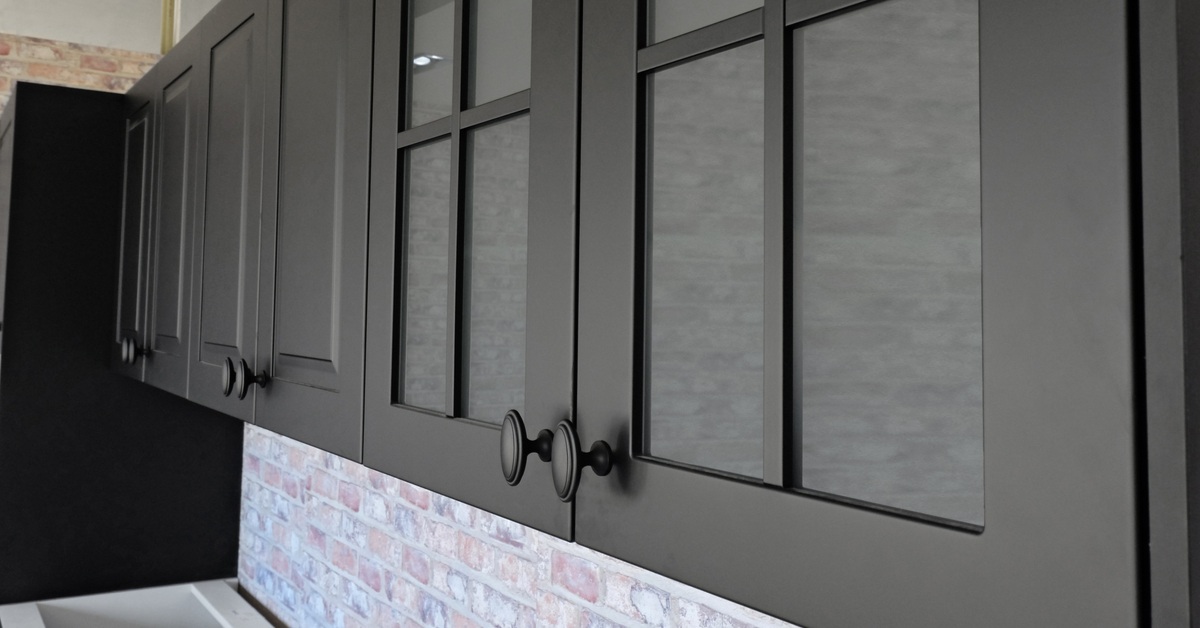
Kitchen cabinets are the first item people see in a kitchen. There are far more kitchen cabinets than anything else and they set the standard. It is a norm for guests to expect the cooker, sink, and every other appliance in the space to match, therefore, it would be nice to do beyond their expectation by carefully choosing the type and color of wood to use.

The cabinet door’s style is the most important decision when remodeling a kitchen. You could opt for self-closing drawers that quietly closes when they are about an inch from closing.

10.Countertops / Backsplash

Installation of the kitchen countertop being one of the most important parts of the kitchen is harder than it looks. Countertops are mostly best installed by professionals because countertops must be perfectly level and flat.

There are various choices of kitchen countertop material. They include granite, marble, soapstone, ceramic tiles, laminates, quartz, and more. Each material has its advantages and disadvantages. Some of the materials are very strong while others can be scratched or marred. And some materials cost a lot more than others.

11.New Kitchen Appliances

After installation of the cabinets and plumbing fixtures, the setting up of new appliances comes up next. These appliances may include items such as microwave, dishwasher, sinks, stove, refrigerator, water filtration system, and more. This is also the time to complete these installations, as well.

12.Lights

Employing an incredible lighting plan can differentiate between an ordinary and a spectacular kitchen remodel. Step by step kitchen remodel includes installing recessed ceiling lighting, new pendant lights, or breakfast nook lighting, and so on.

13.Finishing Paint

Painting the walls in the kitchen

A worker paints the walls in the remodeled kitchen.

Painting is easy and enjoyable if you do it the right way. There is a need to first choose a color. Working with a kitchen designer makes your work easier because they’ll help you deliberate and find the right color for your home. If you decide to do the painting yourself, a quality semi-gloss paint will make the work easier for you because it is cleanable and does not retain moisture.

Conclusion

After kitchen renovation steps in order, we would advise you to employ the services of a kitchen designer. He can help to draw a design to scale, purchase your cabinets, appliances, flooring, lighting fixtures, sink, faucet, tiles, baseboards, paint, and then obtain building permits if required.

A remodeled kitchen will increase the equity value of your real estate like few other remodeling projects can do. It will make your home more livable. A great new kitchen will be the focus of family life and can be the center of social gatherings. A completely remodeled kitchen is most certainly a project worth the time, money, and effort, and you can avoid being overwhelmed if you fully understand the steps that go into the process before you begin.

editor's pick

latest video

news via inbox

Nulla turp dis cursus. Integer liberos  euismod pretium faucibua

Each building has some sort of driveway or at least should have. The main reason is for vehicles to come closer without need to walk all the way. Some homes are residential with small driveway for their car to come in and park before garage or front entrance, and others can be large commercial buildings with loading docks, delivery entrances and casual parking entrances. On Point Remodeling was asked for suggestions on residential driveway for new home construction, and we decided to write detailed article for all our readers. Using this guide you can select the material for your driveway and see what works for your budget. Here are the materials for driveway we will be discussing in our guide:
  • Asphalt
  • Concrete
  • Paver Stone
  • Crushed stone
  • Brick
  • Seashell
  • Gravel
To find good contractor for your driveway, you can either ask our team by email or try to find someone local that worked with neighbors or nearby buildings.

Installation process of any material surface on your driveway

a) Demolition and Excavation – Before anything is done, your contractor will get heavy machinery and scratch off old layer of driveway. They need to go down at least 5-6 inches to insure proper layering before your final layer of material is installed. b) Material Purchase and Delivery – At this point your contract is signed and you already know how the surface will look. Contracting company purchases necessary materials and delivers them to site. Double check if material is correct and not damaged. c) Preparation of Sublevel – Whatever you place as final material, it cannot just be installed directly on top soil. Gravel is the first choice of material that goes down at this stage. Other preferred material is screen sand that can go on top of gravel and works better with stone and bricks. d) Compaction of Ground – To prevent your driveway from moving and changing shapes, all the layers from bottom up have to be properly compacted. Do not leave any spot untouched while doing this or you can get small holes and cracks in driveway after installation. E) Final Installation – This is when all the magic happens. After all preparations and dirty work the final installation is made literally within hours and you can enjoy new driveway. Stone and brick is set up by hand, while other materials require some sort of machinery with manual labor to even out surface.

1. Asphalt

Probably the most used material for road top surfaces as well as driveways is asphalt. This is a mix of gravel and sand that is mixed in and combined by asphalt cement with crude oil. Pros of Asphalt Driveway
  • Very popular and easy to find materials/contractor
  • Completed in 1 day and you can drive on it after
  • Patches and small holes can be fixed fast
Cons of Asphalt Driveway
  • Easy to damage and cracks appear in few years
  • Almost everyone else has same surface
  • Oily surface and chemicals used in mix
Prepared for asphalt driveway will cost you around $5 per square foot to finish. The contractors that take care of entire process from taking out old driveway surface, install subsurface and compact the ground with new asphalt on top, will charge on average $5500 per regular size driveway at single home property.

2. Concrete

What we call concrete is a mixture of Portland cement, aggregate as well as sand with gravel. Suggested thickness of concrete for driveway is 6 inches. The mixture needs to cure without being touched or driven on top for several days. Pros of Concrete Driveway
  • Durable material for large weights
  • Long lifespan if installed properly
  • Winter and summer friendly
Cons of Concrete Driveway
  • Has marks and stains over time
  • Hard to repair without replacement
  • Super hard to DIY
To hire contractors for concrete driveway it will cost around $7-$9 per square foot. This will include site preparation with gravel spread and new concrete installation. They will order full truck of concrete (or several for larger driveways) to pour inside forming. Smoothening and curing is required after installation.

3. Paver Stone

The most luxurious material that you can use to create driveway path with is paver stone. It is made out of natural stone with uneven rough shapes that have different line patterns. Paver stones are very heavy and are perfect for weights on top of them. Almost every city in Europe has roads and walks made out of stone that were installed centuries ago. Pros of Paver Stone Driveway
  • Creative designs can be done
  • Personal looks, can match the house
  • Can replace single stone in minutes
Cons of Paver Stone Driveway
  • Weeds growing through
  • Stone can move over time
  • Most expensive material
There is wide selection of stone that can be purchased for your driveway. On average we recommend settling with $17-$20 per square foot for stone with installation included. Working with this material is very intense labor and we recommend hiring professionals that do this type of work every day.

4. Crushed Stone

Our readers sometimes mistake crushed stone with gravel, but this is not the same material. Crushed stone material is achieved when machine is mechanically crushing larger pieces of unused stone for this specific purpose. It is larger than gravel and can have smooth finish. Crushed stone can also have a mix of colors, which is much pleasant to eyes than gravel. Pros of Crushed Stone Driveway
  • Low maintenance required
  • Fits rural area style
  • Can be reused for other purposes
Cons of Crushed Stone Driveway
  • Gets very hot during summer
  • Can be messy after many drives
  • Hard to remove snow and ice
Buying crushed stone and installing it on your driveway is as easy as it gets. Similar to other rough materials discussed in this post, only small tools like shovels, dolly and buckets are required to spread it on the road. The cost of crushed stone driveway is between $4 and $6 per square foot from professional local contractors that can finish the job in several days.

5. Brick

The same brick we see being used in wall construction can be installed as top driveway surface. Brick is manufactured by compressing clay with plastic mass. It is heated to extreme temperature and dried up to become as solid as you know it. Pros of Brick Driveway
  • Variety of selections in shapes and shades
  • Bricks are recyclable
  • Slip resistant with rough top part
Cons of Brick Driveway
  • Needs regular maintenance
  • Change color over time
  • Old fashion looking
Installing brick on driveway costs $10 per square foot, which is not too far from masonry brick laying as part of the wall. To save money you can use or purchase old brick, that was part of a wall before. Do not mix these two jobs and contact landscaping professionals instead of masonry contractors that work with bricks.

6. Seashell

This material is popular on the coast line where shells can be found near the water. Construction companies use seashells to add in other materials as well as spread them on driveway in rough condition, without adding anything else. It usually comes in white or pearl color and darkens within year because of mixing with sand and dirt. Pros of Seashell Driveway
  • Environmentally friendly
  • Has natural drainage
  • Creates worm vibe of beach house
Cons of Seashell Driveway
  • Break and crack under light weight
  • Sharp and very hard to walk on
  • Gets stuck in shoes and tires
To deliver and spread seashells on driveways costs below $4, which is only slightly more expensive than rough gravel. As you go further from coast line, cost of material increases due to delivery. This material is elegant and very soft. We recommend adding edge lines with darker color landscape material to create visual path.

7. Gravel

This material is used in other construction mixes and underlayment systems. It’s literally fragments and small crushed stones that are put on top of soil. It is easily spread out by hands and anyone can do it. Pros of Gravel Driveway
  • Cheapest of them all
  • Easy DIY Job
  • Can install another material on top
Cons of Gravel Driveway
  • Needs to be graded very often
  • Will mix with dirt and leaves
  • Washes up with heavy rains
It is rough material and can be purchased in bulk (by metric tons or cubic meters). The cost of driveway with gravel should not exceed $3 per square foot, but you can save tons of money by purchasing materials and doings installation by yourself. You do not require specific tools or heavy equipment for the job and delivery of gravel can be arranged directly to your project.

Conclusion

To properly finish any and all of these driveways requires skills and experience. There is no way you can complete any of these projects without heavy equipment and tools that regular home owner’s just store in their garages. Most of those who will read this post will prefer to install asphalt driveway, because of its popularity and low costs. We want to encourage home owners to go for personal preference and what matches your house, rather than getting the most affordable and popular items. Driveway jobs have to be completed fast; otherwise you will need to park elsewhere while the project is running. To not overpay, ask us for quotation sample on material you prefer in specific region where the work need to be done and our team can provide some numbers.

Leave A Comment