Pool in the Winter

How to Take Care of a Pool in the Winter Right?

Last Updated: 2022-02-16By

We all love to swim in the pool on hot summer days. Nevertheless, when autumn comes, the question arises of how to take care of a pool in the winter. This is undoubtedly a very important question because if you mishandle your pools during the cold season, you can face many problems.

  1. Garbage collection
  2. Correct pool water level
  3. Chemical composition of water
  4. Cleaning pool equipment
  5. Cover swimming pool
  6. Install alarm system

By the onset of spring, you may find that part of the pool system is not working, the water supply pipes have burst, or some of the pool finishes have fallen off and the pool needs significant repairs. Since each of us would not like to face such problems, let’s figure out how to avoid this and how to properly prepare your pool for the winter cold.

[instagram-feed]

Garbage Collection and Pool Cleaning

The first question homeowners often face is when to start preparing their pool for winter. There is no exact answer to this question, because in each climatic zone there are different temperatures and, for example, in the north at the end of August it is already cool, but in the south, the heat can last all year round.

Therefore, it is worth concentrating on a simple answer, start preparing your pool for the winter period as soon as you realize that you will no longer use it this year.

First of all, you need to clean the pool. Remove any debris that might have gotten into it. Typically, these are leaves, small twigs, and other little things that fall into the pool from the surrounding backyard.

Then it is worth looking at the waterline of the pool. Most likely, stains and small deposits have accumulated on the tiles over the season. In most cases, handy tools such as vinegar and baking soda will be sufficient to clean them. Wipe the tiles gently, taking care to keep the substances as little as possible in the pool water. They are not harmful to humans, but they can disrupt the acidity of your pool water.

If more stubborn stains have formed on the pool tiles, you should use special cleaning agents. Before choosing a cleaning agent, you need to understand what type of tiles you are using. For a more detailed selection, we recommend that you consult with the supplier so that cleaning does not spoil the appearance of your pool.

Correct Pool Water Level

A common question that arises from homeowners is what level of water to leave for the winter. In most cases, everything will depend on what temperature zone you live in.

The first case is if you live in a rather cold climate and in winter you have a temperature below zero. In this case, it is recommended to drain some of the water so that it is 4 to 6 inches below the skimmer. This will allow you to protect the equipment from water ingress and subsequent freezing. Otherwise, the pump in your pool may be damaged.

If you live in a warm enough climate and there is no subzero temperature in winter, then you can leave the pool almost full. All you have to do is remove a few inches of water so that there is air space between the level and the blanket.

Remember, it is not recommended to completely drain your pool. In winter, water can also have some protective functions. Firstly, if you take care of the pool properly, the water will be in excellent condition and you will not have to refill it.

Secondly, the proper level of the pool allows you to reduce the load on the blanket, which will keep it intact. And thirdly, it is very important to understand that water protects the finish of your pool from drying out, keeping tiles and other elements from cracking and weathering.

Maintaining the Water Chemistry

After cleaning the pool itself, it is worth taking care of the water that remains in it throughout the winter season. It is important to keep the PH level in the water at a safe level. Determining the PH level in water is very easy with the PH test strip.

This simple device will be enough to understand the level in the water and balance it. It is recommended to check the PH level in the water every two weeks.

It is also worth taking care of water chlorination. For the winter period, 1 to 2 parts of salt chlorate per million particles will be sufficient. Do not exceed this amount if the pool is covered. This is because the cover material will not allow chemicals to pass through and excessive chlorine levels can damage your pool equipment.

By maintaining the correct chlorine levels in your water, you will keep your water clean throughout the winter. This will keep your pool safe from algae. Remember that maintaining the condition of the pool water plays an important role in how to take care of a pool in the winter.

Cleaning Pool Equipment before Winter

Before preparing for the winter season, it is also important to take care of all the equipment used in the pool. The first thing to do is to clean all used filters and pumps so that no accumulated dirt and debris remains in them.

It is also worth understanding that even when you are not using your equipment, from time to time it needs to be checked for serviceability. Check heating equipment, filters, and pumps at least once a month to keep equipment in good condition.

Also, make sure that no water remains in the pipes. This is especially important if you live in cold climates and there are severe frosts. Frozen water can cause pipes to burst, leading to costly repairs.

If you are not sure how to properly shut down the equipment before winter, you should contact a professional company. The staff of the company will carry out all the necessary procedures and give you useful advice on how to take care of a pool in the winter.

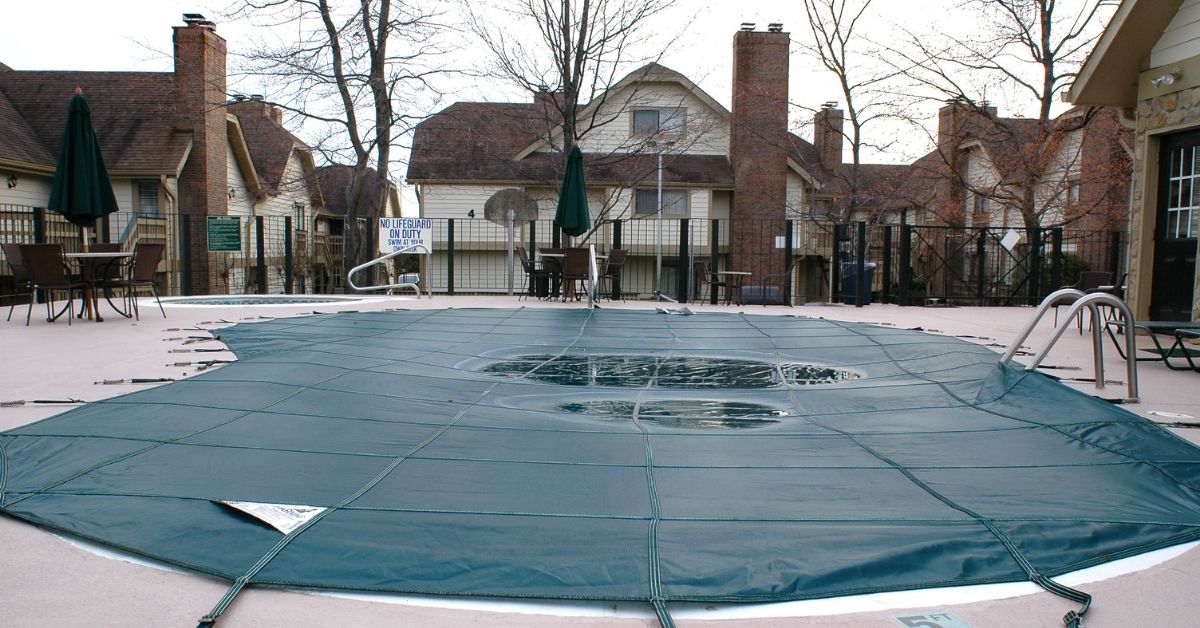
Swimming Pool Covering

After carrying out all the checks and cleaning, it is worth taking care of covering the pool. The cover is a natural barrier from various debris and precipitation entering the pool water. The special material must be fixed over the entire pool area. Since each pool has its shape and size, the order of such a cover is usually made individually, according to the size of your pool.

There are also automatic systems. If you install such a system in a pool, then the process of covering the pool will be much easier and you only need to press a couple of buttons. Automatic pool cover systems are very convenient, but you will have to pay a lot for such a device. Depending on the equipment and the size of the pool, prices can vary in the region of $ 5000 – $ 15000.

Pool Alarm Systems

After carrying out all the preparatory work, you should also remember to install an alarm on your pool. This is a very useful device that beeps when something or someone enters the pool.

It is especially important to use a pool alarm when you have small children in your home. Walking in the backyard, they may not notice the covered pool and fall into it, especially when it is snowing outside. Such a device will allow you to react immediately and will not allow tragedy to happen.

How to Take Care of a Pool in the Winter with Professionals Help

Compliance with all of these steps will serve you well. I would also like to remind you that there can be very strong differences in how to take care of a pool in the winter. The care of the pool can be influenced by climatic features, the size, and location of the pool, as well as many other nuances.

Based on this, we would recommend that you, at least in the first year of operation, contact a company that maintains swimming pools. You can find out a lot of useful information exclusively about your equipment and what subtleties in handling it should be observed. Well, if you do not want to deal with this whole process, you can completely shift these concerns onto professional employees.

editor's pick

latest video

news via inbox

Nulla turp dis cursus. Integer liberos  euismod pretium faucibua

Each building has some sort of driveway or at least should have. The main reason is for vehicles to come closer without need to walk all the way. Some homes are residential with small driveway for their car to come in and park before garage or front entrance, and others can be large commercial buildings with loading docks, delivery entrances and casual parking entrances. On Point Remodeling was asked for suggestions on residential driveway for new home construction, and we decided to write detailed article for all our readers. Using this guide you can select the material for your driveway and see what works for your budget. Here are the materials for driveway we will be discussing in our guide:
  • Asphalt
  • Concrete
  • Paver Stone
  • Crushed stone
  • Brick
  • Seashell
  • Gravel
To find good contractor for your driveway, you can either ask our team by email or try to find someone local that worked with neighbors or nearby buildings.

Installation process of any material surface on your driveway

a) Demolition and Excavation – Before anything is done, your contractor will get heavy machinery and scratch off old layer of driveway. They need to go down at least 5-6 inches to insure proper layering before your final layer of material is installed. b) Material Purchase and Delivery – At this point your contract is signed and you already know how the surface will look. Contracting company purchases necessary materials and delivers them to site. Double check if material is correct and not damaged. c) Preparation of Sublevel – Whatever you place as final material, it cannot just be installed directly on top soil. Gravel is the first choice of material that goes down at this stage. Other preferred material is screen sand that can go on top of gravel and works better with stone and bricks. d) Compaction of Ground – To prevent your driveway from moving and changing shapes, all the layers from bottom up have to be properly compacted. Do not leave any spot untouched while doing this or you can get small holes and cracks in driveway after installation. E) Final Installation – This is when all the magic happens. After all preparations and dirty work the final installation is made literally within hours and you can enjoy new driveway. Stone and brick is set up by hand, while other materials require some sort of machinery with manual labor to even out surface.

1. Asphalt

Probably the most used material for road top surfaces as well as driveways is asphalt. This is a mix of gravel and sand that is mixed in and combined by asphalt cement with crude oil. Pros of Asphalt Driveway
  • Very popular and easy to find materials/contractor
  • Completed in 1 day and you can drive on it after
  • Patches and small holes can be fixed fast
Cons of Asphalt Driveway
  • Easy to damage and cracks appear in few years
  • Almost everyone else has same surface
  • Oily surface and chemicals used in mix
Prepared for asphalt driveway will cost you around $5 per square foot to finish. The contractors that take care of entire process from taking out old driveway surface, install subsurface and compact the ground with new asphalt on top, will charge on average $5500 per regular size driveway at single home property.

2. Concrete

What we call concrete is a mixture of Portland cement, aggregate as well as sand with gravel. Suggested thickness of concrete for driveway is 6 inches. The mixture needs to cure without being touched or driven on top for several days. Pros of Concrete Driveway
  • Durable material for large weights
  • Long lifespan if installed properly
  • Winter and summer friendly
Cons of Concrete Driveway
  • Has marks and stains over time
  • Hard to repair without replacement
  • Super hard to DIY
To hire contractors for concrete driveway it will cost around $7-$9 per square foot. This will include site preparation with gravel spread and new concrete installation. They will order full truck of concrete (or several for larger driveways) to pour inside forming. Smoothening and curing is required after installation.

3. Paver Stone

The most luxurious material that you can use to create driveway path with is paver stone. It is made out of natural stone with uneven rough shapes that have different line patterns. Paver stones are very heavy and are perfect for weights on top of them. Almost every city in Europe has roads and walks made out of stone that were installed centuries ago. Pros of Paver Stone Driveway
  • Creative designs can be done
  • Personal looks, can match the house
  • Can replace single stone in minutes
Cons of Paver Stone Driveway
  • Weeds growing through
  • Stone can move over time
  • Most expensive material
There is wide selection of stone that can be purchased for your driveway. On average we recommend settling with $17-$20 per square foot for stone with installation included. Working with this material is very intense labor and we recommend hiring professionals that do this type of work every day.

4. Crushed Stone

Our readers sometimes mistake crushed stone with gravel, but this is not the same material. Crushed stone material is achieved when machine is mechanically crushing larger pieces of unused stone for this specific purpose. It is larger than gravel and can have smooth finish. Crushed stone can also have a mix of colors, which is much pleasant to eyes than gravel. Pros of Crushed Stone Driveway
  • Low maintenance required
  • Fits rural area style
  • Can be reused for other purposes
Cons of Crushed Stone Driveway
  • Gets very hot during summer
  • Can be messy after many drives
  • Hard to remove snow and ice
Buying crushed stone and installing it on your driveway is as easy as it gets. Similar to other rough materials discussed in this post, only small tools like shovels, dolly and buckets are required to spread it on the road. The cost of crushed stone driveway is between $4 and $6 per square foot from professional local contractors that can finish the job in several days.

5. Brick

The same brick we see being used in wall construction can be installed as top driveway surface. Brick is manufactured by compressing clay with plastic mass. It is heated to extreme temperature and dried up to become as solid as you know it. Pros of Brick Driveway
  • Variety of selections in shapes and shades
  • Bricks are recyclable
  • Slip resistant with rough top part
Cons of Brick Driveway
  • Needs regular maintenance
  • Change color over time
  • Old fashion looking
Installing brick on driveway costs $10 per square foot, which is not too far from masonry brick laying as part of the wall. To save money you can use or purchase old brick, that was part of a wall before. Do not mix these two jobs and contact landscaping professionals instead of masonry contractors that work with bricks.

6. Seashell

This material is popular on the coast line where shells can be found near the water. Construction companies use seashells to add in other materials as well as spread them on driveway in rough condition, without adding anything else. It usually comes in white or pearl color and darkens within year because of mixing with sand and dirt. Pros of Seashell Driveway
  • Environmentally friendly
  • Has natural drainage
  • Creates worm vibe of beach house
Cons of Seashell Driveway
  • Break and crack under light weight
  • Sharp and very hard to walk on
  • Gets stuck in shoes and tires
To deliver and spread seashells on driveways costs below $4, which is only slightly more expensive than rough gravel. As you go further from coast line, cost of material increases due to delivery. This material is elegant and very soft. We recommend adding edge lines with darker color landscape material to create visual path.

7. Gravel

This material is used in other construction mixes and underlayment systems. It’s literally fragments and small crushed stones that are put on top of soil. It is easily spread out by hands and anyone can do it. Pros of Gravel Driveway
  • Cheapest of them all
  • Easy DIY Job
  • Can install another material on top
Cons of Gravel Driveway
  • Needs to be graded very often
  • Will mix with dirt and leaves
  • Washes up with heavy rains
It is rough material and can be purchased in bulk (by metric tons or cubic meters). The cost of driveway with gravel should not exceed $3 per square foot, but you can save tons of money by purchasing materials and doings installation by yourself. You do not require specific tools or heavy equipment for the job and delivery of gravel can be arranged directly to your project.

Conclusion

To properly finish any and all of these driveways requires skills and experience. There is no way you can complete any of these projects without heavy equipment and tools that regular home owner’s just store in their garages. Most of those who will read this post will prefer to install asphalt driveway, because of its popularity and low costs. We want to encourage home owners to go for personal preference and what matches your house, rather than getting the most affordable and popular items. Driveway jobs have to be completed fast; otherwise you will need to park elsewhere while the project is running. To not overpay, ask us for quotation sample on material you prefer in specific region where the work need to be done and our team can provide some numbers.

Leave A Comment