7 Layouts of Kitchen Cabinets Positions

7 Optimal Kitchen Layout Positions and Ways to Place Cabinets

Last Updated: 2021-08-12By

There are many details to consider when building a home. Particular attention should be paid to the layout of your future kitchen. There are many types of locations and it is worth knowing about them before making a choice.

  • L-Shaped Kitchen
  • G-Shaped Kitchen
  • U-Shaped Kitchen
  • One Wall Kitchen
  • One Wall with Island
  • Round Shape Kitchen
  • Random Positions

Let’s take a closer look at the pros and cons of these types of kitchen furniture positioning so that you can decide what suits your needs and desires.

1.L-Shaped Layout of Kitchen

L-shaped kitchen layout

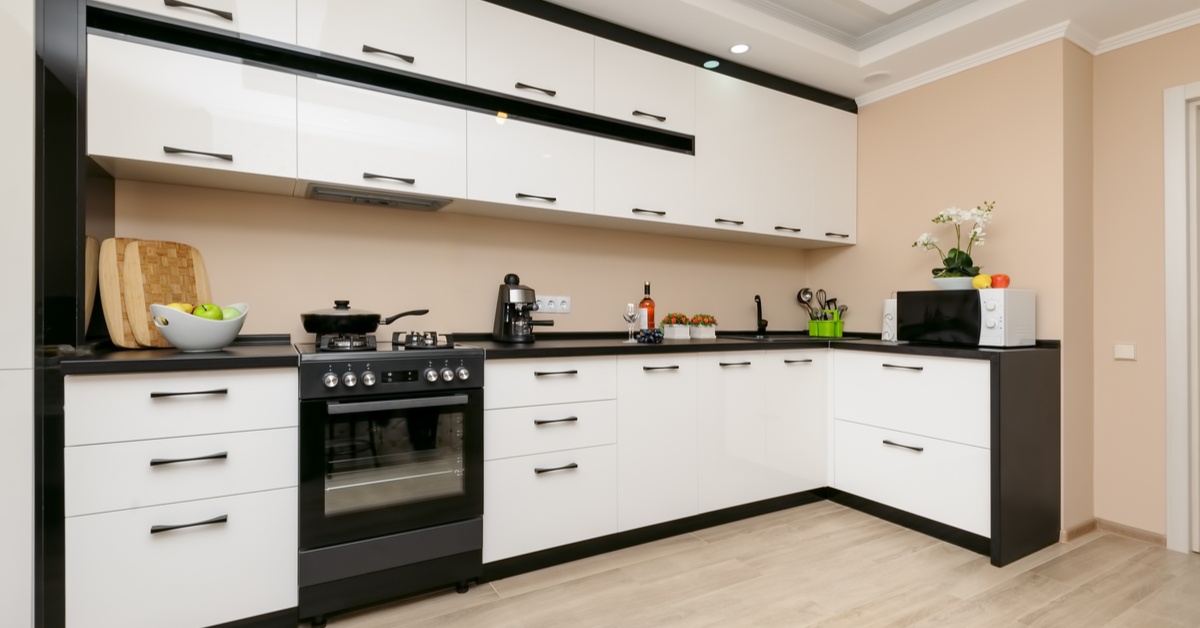
White cabinets located in the kitchen in L-shape.

L-shaped is an optimal kitchen layout that the most common in America. This positioning has gained its popularity for its functionality and convenience, which is suitable for almost all types of kitchen styles. With this type of kitchen positioning, you will have a lot of free space and you will not have to huddle, being shackled between countertops.

One of the advantages of this layout is the division of jobs. Zones for washing, cutting, and cooking are separated from each other, which makes it convenient to work in the kitchen, allowing you to control all processes.

In addition to the workspace, this design includes a variety of cabinets for storing all the necessary kitchen tools. This arrangement is great for medium-sized kitchens, allowing you to save space.

Among the inconveniences, one can single out the fact that this type of kitchen is not suitable for joint cooking by several people. Also, since the work surfaces are located along two walls, you will have to constantly move around making additional movements.

2.G-Shaped Kitchen Cabinets Position

The G-Shaped Kitchen is a modern take on the U-Shaped Kitchen with the addition of a peninsula to create more work surfaces. This location is great for those who want to use every fit in the kitchen to their advantage.

You can fully immerse yourself in the cooking process, and everything you need will be at your fingertips. Being surrounded on three sides by working surfaces, cooking will be much more efficient without spending extra time on movement.

Even though such planning separates the kitchen from the guest room by a peninsula, it is not blocked by a wall, so you can easily maintain a dialogue with guests who are not involved in cooking.

Of the disadvantages of this kitchen position, one can note that there are one entrance and a small amount of free space, which will not allow several people to effectively use the kitchen at the same time. A design like this is best used if you like to cook a lot and use a lot of kitchen utensils.

3.U-Shaped Style Kitchen

U-Shaped Kitchens were very popular in the 20th century in homes with limited space. The economical placement of all kitchen utensils and work surfaces was an important part of this style. Nevertheless, this style is also used in modern houses with several advantages.

The U-Shaped Kitchen has three walls along which work surfaces and cabinets are located, but it also has enough space for several people on it. This contributes to the convenience of cooking together, making food preparation easier.

This design is perfect for people who don’t like modern fashion for open kitchens. You can even install a door, for optimal kitchen layout. That will be a full-fledged separate space where you only enter when needed.

The disadvantages of this kitchen can be a small amount of free space. You should design the dimensions correctly during the construction phase to avoid such problems. This style is not recommended for people who experience discomfort in enclosed spaces.

4.One Wall layout of Kitchen

Spacious one wall kitchen

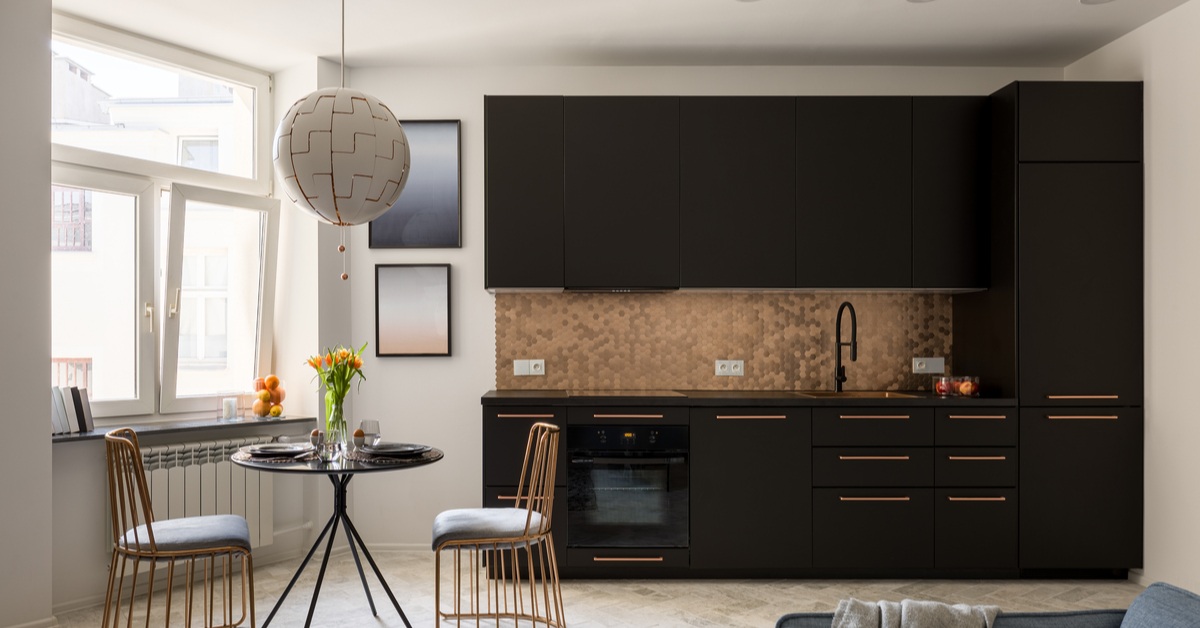
Spacious bright kitchen with dark cabinets.

One wall kitchen is a great solution for small families. The simplicity of such a kitchen is that it does not take up much space and for the most part complements the dining room. If you don’t plan on spending a lot of time cooking, this might be a great choice for you.

This design does not include an installed island, which allows it to be more flexible in use. In these kitchens, I use tables that can be easily moved or removed after cooking, which will save a lot of open space.

One wall kitchen style has gained its popularity in modern lofts that are full of minimalism with a minimum of fixed furniture.

The disadvantages of this style are the small amount of workspace. Also, since you only use one wall for the kitchen, you will not have much space to store kitchen utensils.

5.One Wall with Island Cabinets

One wall kitchen with Island is an improvement over the previous style. With the addition of a layout of kitchen with island, extra space appears in the form of work surfaces, which avoids the inconvenience of steam cooking.

Since the kitchen island can be used as a table for dining and gathering with friends and family, it can be a great addition to your kitchen. With this addition, the disadvantages of one wall kitchen are almost eliminated, which makes this type of kitchen style more popular than the one described above.

6.Round Shape Kitchen

Round shape kitchens have gained their popularity in homes with large kitchens. The essence of this style is that in the center of the kitchen there is a round island, around which kitchen furniture and appliances are located along the walls. This style can be combined with both the L-shaped kitchen and the U-shaped kitchen, the main thing is the correct and optimal kitchen layout.

In addition to a large number of work surfaces and cabinets, this style is convenient because everyone who is currently in the kitchen is opposite and you can comfortably keep up a conversation while performing the cooking processes.

The rounded shape of the island is safer, without sharp corners that you can catch or bump into. It will be very convenient for families with small children running around the house.

The disadvantages of the round shape kitchen are that the round island has significantly fewer seats, which can be inconvenient if many guests come to your house. The second drawback is that this style takes up a lot of space and is not well suited for small kitchens.

7.Random Positions

Kitchen with many cabinets

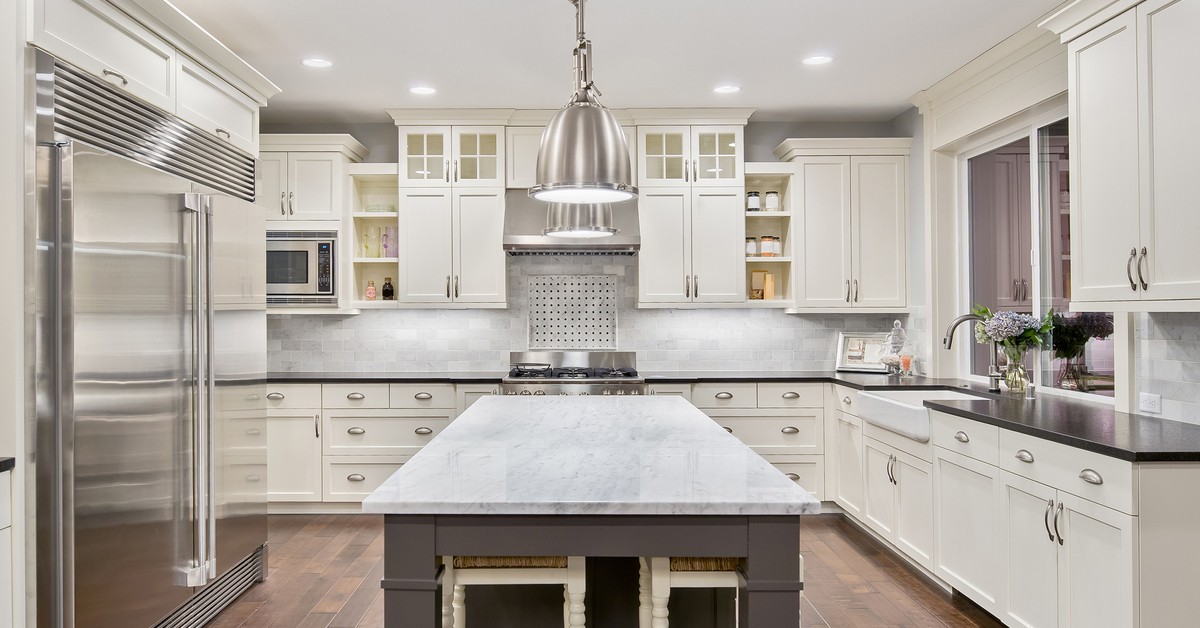
The luxurious table in a furnished bright kitchen.

There are cases when your non-standard shape and the usual types of furniture arrangements do not fit, in such cases random positions are used. The essence of this method lies in the fact that the furniture is placed without a template version, but it is planned exclusively for this kitchen.

The second option for using this type of arrangement maybe when a person does it for the first time and simply arranges everything as he pleases. Most often, this is done by the owners of the house, who do not want to contact the designer.

Inexperience in design can have a negative effect. It may happen that after placing the furniture, you will feel some discomfort due to the small amount of free space or inconvenience in cooking.

Any project should be approached wisely, and if you want your kitchen to have a special shape, then you should take the time to plan it.

Conclusion for Optimal Kitchen Layouts and Cabinet Positions

When planning kitchen renovations, it is important to understand in advance in what style the design will be made. It is worth considering all the available options for placing kitchen furniture for maximum comfort and functionality.

A description of the main advantages of On Point Remodeling basic kitchen utensil positioning styles will help you make the right choice. The main thing is to remember that there is no clear standard and something is suitable for everyone.

Ask for advice from a designer, try experimenting, and bring something new to established standards for maximum results.

editor's pick

latest video

news via inbox

Nulla turp dis cursus. Integer liberos  euismod pretium faucibua

Each building has some sort of driveway or at least should have. The main reason is for vehicles to come closer without need to walk all the way. Some homes are residential with small driveway for their car to come in and park before garage or front entrance, and others can be large commercial buildings with loading docks, delivery entrances and casual parking entrances. On Point Remodeling was asked for suggestions on residential driveway for new home construction, and we decided to write detailed article for all our readers. Using this guide you can select the material for your driveway and see what works for your budget. Here are the materials for driveway we will be discussing in our guide:
  • Asphalt
  • Concrete
  • Paver Stone
  • Crushed stone
  • Brick
  • Seashell
  • Gravel
To find good contractor for your driveway, you can either ask our team by email or try to find someone local that worked with neighbors or nearby buildings.

Installation process of any material surface on your driveway

a) Demolition and Excavation – Before anything is done, your contractor will get heavy machinery and scratch off old layer of driveway. They need to go down at least 5-6 inches to insure proper layering before your final layer of material is installed. b) Material Purchase and Delivery – At this point your contract is signed and you already know how the surface will look. Contracting company purchases necessary materials and delivers them to site. Double check if material is correct and not damaged. c) Preparation of Sublevel – Whatever you place as final material, it cannot just be installed directly on top soil. Gravel is the first choice of material that goes down at this stage. Other preferred material is screen sand that can go on top of gravel and works better with stone and bricks. d) Compaction of Ground – To prevent your driveway from moving and changing shapes, all the layers from bottom up have to be properly compacted. Do not leave any spot untouched while doing this or you can get small holes and cracks in driveway after installation. E) Final Installation – This is when all the magic happens. After all preparations and dirty work the final installation is made literally within hours and you can enjoy new driveway. Stone and brick is set up by hand, while other materials require some sort of machinery with manual labor to even out surface.

1. Asphalt

Probably the most used material for road top surfaces as well as driveways is asphalt. This is a mix of gravel and sand that is mixed in and combined by asphalt cement with crude oil. Pros of Asphalt Driveway
  • Very popular and easy to find materials/contractor
  • Completed in 1 day and you can drive on it after
  • Patches and small holes can be fixed fast
Cons of Asphalt Driveway
  • Easy to damage and cracks appear in few years
  • Almost everyone else has same surface
  • Oily surface and chemicals used in mix
Prepared for asphalt driveway will cost you around $5 per square foot to finish. The contractors that take care of entire process from taking out old driveway surface, install subsurface and compact the ground with new asphalt on top, will charge on average $5500 per regular size driveway at single home property.

2. Concrete

What we call concrete is a mixture of Portland cement, aggregate as well as sand with gravel. Suggested thickness of concrete for driveway is 6 inches. The mixture needs to cure without being touched or driven on top for several days. Pros of Concrete Driveway
  • Durable material for large weights
  • Long lifespan if installed properly
  • Winter and summer friendly
Cons of Concrete Driveway
  • Has marks and stains over time
  • Hard to repair without replacement
  • Super hard to DIY
To hire contractors for concrete driveway it will cost around $7-$9 per square foot. This will include site preparation with gravel spread and new concrete installation. They will order full truck of concrete (or several for larger driveways) to pour inside forming. Smoothening and curing is required after installation.

3. Paver Stone

The most luxurious material that you can use to create driveway path with is paver stone. It is made out of natural stone with uneven rough shapes that have different line patterns. Paver stones are very heavy and are perfect for weights on top of them. Almost every city in Europe has roads and walks made out of stone that were installed centuries ago. Pros of Paver Stone Driveway
  • Creative designs can be done
  • Personal looks, can match the house
  • Can replace single stone in minutes
Cons of Paver Stone Driveway
  • Weeds growing through
  • Stone can move over time
  • Most expensive material
There is wide selection of stone that can be purchased for your driveway. On average we recommend settling with $17-$20 per square foot for stone with installation included. Working with this material is very intense labor and we recommend hiring professionals that do this type of work every day.

4. Crushed Stone

Our readers sometimes mistake crushed stone with gravel, but this is not the same material. Crushed stone material is achieved when machine is mechanically crushing larger pieces of unused stone for this specific purpose. It is larger than gravel and can have smooth finish. Crushed stone can also have a mix of colors, which is much pleasant to eyes than gravel. Pros of Crushed Stone Driveway
  • Low maintenance required
  • Fits rural area style
  • Can be reused for other purposes
Cons of Crushed Stone Driveway
  • Gets very hot during summer
  • Can be messy after many drives
  • Hard to remove snow and ice
Buying crushed stone and installing it on your driveway is as easy as it gets. Similar to other rough materials discussed in this post, only small tools like shovels, dolly and buckets are required to spread it on the road. The cost of crushed stone driveway is between $4 and $6 per square foot from professional local contractors that can finish the job in several days.

5. Brick

The same brick we see being used in wall construction can be installed as top driveway surface. Brick is manufactured by compressing clay with plastic mass. It is heated to extreme temperature and dried up to become as solid as you know it. Pros of Brick Driveway
  • Variety of selections in shapes and shades
  • Bricks are recyclable
  • Slip resistant with rough top part
Cons of Brick Driveway
  • Needs regular maintenance
  • Change color over time
  • Old fashion looking
Installing brick on driveway costs $10 per square foot, which is not too far from masonry brick laying as part of the wall. To save money you can use or purchase old brick, that was part of a wall before. Do not mix these two jobs and contact landscaping professionals instead of masonry contractors that work with bricks.

6. Seashell

This material is popular on the coast line where shells can be found near the water. Construction companies use seashells to add in other materials as well as spread them on driveway in rough condition, without adding anything else. It usually comes in white or pearl color and darkens within year because of mixing with sand and dirt. Pros of Seashell Driveway
  • Environmentally friendly
  • Has natural drainage
  • Creates worm vibe of beach house
Cons of Seashell Driveway
  • Break and crack under light weight
  • Sharp and very hard to walk on
  • Gets stuck in shoes and tires
To deliver and spread seashells on driveways costs below $4, which is only slightly more expensive than rough gravel. As you go further from coast line, cost of material increases due to delivery. This material is elegant and very soft. We recommend adding edge lines with darker color landscape material to create visual path.

7. Gravel

This material is used in other construction mixes and underlayment systems. It’s literally fragments and small crushed stones that are put on top of soil. It is easily spread out by hands and anyone can do it. Pros of Gravel Driveway
  • Cheapest of them all
  • Easy DIY Job
  • Can install another material on top
Cons of Gravel Driveway
  • Needs to be graded very often
  • Will mix with dirt and leaves
  • Washes up with heavy rains
It is rough material and can be purchased in bulk (by metric tons or cubic meters). The cost of driveway with gravel should not exceed $3 per square foot, but you can save tons of money by purchasing materials and doings installation by yourself. You do not require specific tools or heavy equipment for the job and delivery of gravel can be arranged directly to your project.

Conclusion

To properly finish any and all of these driveways requires skills and experience. There is no way you can complete any of these projects without heavy equipment and tools that regular home owner’s just store in their garages. Most of those who will read this post will prefer to install asphalt driveway, because of its popularity and low costs. We want to encourage home owners to go for personal preference and what matches your house, rather than getting the most affordable and popular items. Driveway jobs have to be completed fast; otherwise you will need to park elsewhere while the project is running. To not overpay, ask us for quotation sample on material you prefer in specific region where the work need to be done and our team can provide some numbers.

Leave A Comment