Paint a Room

How Long does it Take to Paint a Room – Remodel On Point

Last Updated: 2022-02-16By

Painting rooms in each house can have characteristics that affect the speed of the process. To have a rough idea of the timing of painting, you need to know all the factors that can affect this.

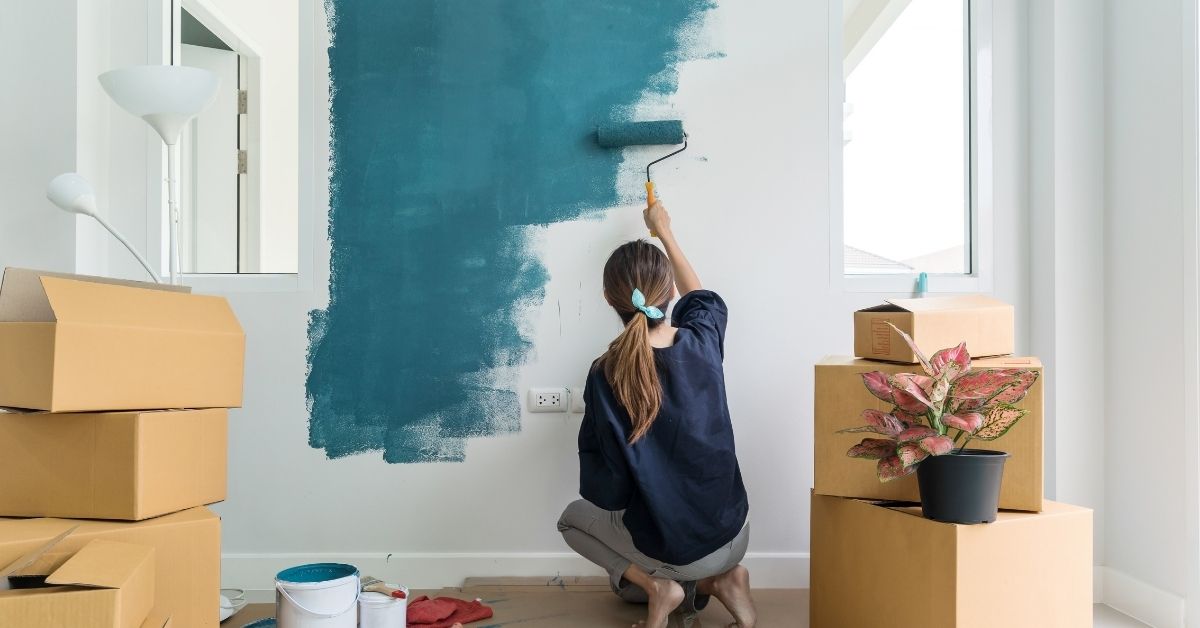
Two professional painters will paint a 250 sq ft room in 3 days. If you decide to paint such a room yourself, then you will need up to 5 days. Even for painting the smallest room, it will take at least 2 days due to the drying process of the paint.

Let’s take a closer look at what stages of the painting exist and you can understand how long does it take to paint a room. Since the painting process for each room will be the same, consider using typical room sizes as an example.

100 sq ft250 sq ft500 sq ft
DIY with Friend4 Days5 Days6 Days
2 Professionals3 Days3 Days4 Days
4 Professionals2 Days2 Days3 Days
[instagram-feed]

What affects the complexity of painting a room

The interior of each room can have its unique features, which can affect the speed of painting. Here are some popular examples that can increase the time required to paint a room.

  • A lot of trims, crown moldings
  • Painting around the kitchen and existing cabinets
  • High ceilings
  • Several colors on walls
  • High Humidity or temperature

When giving you an approximate working time, painters take into account the possibility of these delays. So, you shouldn’t worry about extended repair times when done by professionals.

Trims and Moldings

In modern interiors, decorative curly inserts such as trims and moldings are very common. Undoubtedly they are very beautiful, but you should understand that painting them is much more difficult than painting a flat surface. It may take additional time to paint over such elements with high quality.

Kitchen Painting with Cabinets

If you decide to paint the kitchen in which the cabinets are installed, then several difficulties await you. In order not to spoil the appearance of the cabinets, it will be necessary to dismantle them or protect them from paint ingress.

This will complicate the preparatory process and will take more time. Also, if you leave the cabinets in the kitchen, it will complicate the painting process, because you will need to carefully trace every detail.

High Ceilings

If your home has a high ceiling of 10 feet or more, this will affect your paint rate. To work with high walls, you will need to use a ladder, which will significantly slow down the work process.

Several Colors on Walls

Another reason that can increase the time it takes to paint a room is the use of multiple colors. If you have planned two-color or multi-colored walls, then you should understand that such work is much more difficult.

If you want to know how long does it take to paint a room using several colors, then it is better to ask the masters who will do this work. Depending on the complexity of the drawing, the process may take a different amount of time.

High Humidity

Most of the time in painting a room is spent drying the paint. If the room has a low temperature and high humidity, the paint will take much longer to dry. To prevent this from happening, provide ventilation and a comfortable temperature in the room.

Stages of Painting a Room

Painting a room is a complex process consisting of several stages. To understand why painting a room takes so long, it is worth understanding the features of each of them.

100 sq ft250 sq ft500 sq ft
Room Preparation1-2 hours2-3 hours3 – 4 hours
Cutting and Filling2-3 hours3 – 4 hours4 – 5 hours
Priming and Painting3-5 hours4 – 6 hours6 – 7 hours
Cleaning1 hour2 hours3 hours
The time indicated in the table will be required by two professional painters.

It should also be noted that the time indicated in the table does not take into account the drying time of the paint, after each of the stages, this is only an approximate time required to complete each stage of painting.

Room Preparation

Paint can give a room a beautiful look, but it can also stain everything around it during the painting process. To prevent this from happening, it is necessary to take care of all furniture and surfaces that cannot be painted.

Before painting, all furniture is removed from the rooms, and if it is too massive, then it is covered with a special canvas cloth and the edges are glued.

Also at this stage, all cracks and dents in the walls are sealed with putty. Skirting boards and window frames are covered with molar tape so that no drops of paint fall on them. All these preparatory steps create space for work, without the danger of staining other surfaces with paint.

Cutting and Filling

Each surface has its boundaries, and when you use a roller to paint the walls, it is very difficult to keep them. In order not to lick beyond the boundaries of the painting zone, cutting is done before the main painting.

Cutting is the delineation of the boundaries of the paint. Using a medium-sized brush, paint is applied to the edges of walls, along with windows, and around doorways. You kind of outline the painting area, and in the future, it will be very convenient to use a roller to paint the main part of the walls.

Priming and Painting

This is followed by the main process, at the same time it is the most laborious. Having outlined the boundaries, all that remains is to prime and paint the walls. Experienced professionals will complete this stage of the work rather quickly, even though it is associated with physical difficulties.

For the speed of work, it is very wise to choose the right tools. For example, using a wider roller will allow you to paint over a larger section of the wall. Also, since it is not convenient to use a ladder inside the house, it is worth taking care of extension cords, which allow you to easily reach the top of the wall.

Cleaning

Cleaning is considered the last stage of work. During cleaning, employees bring the room to its proper form. Furniture is brought back in and all protective materials such as masking tape and canvas are removed. After cleaning, the room is ready for use.

Time Delays

Having examined in detail each stage of painting a room, it is also worthwhile to understand that between each of them it is necessary to allocate time for the paint to dry. Painting a room of this size will take about 10 hours of work, but it will take 2 to 4 days.

As the paint dries, painters can prepare and paint other rooms in the house. Because of this, painting the whole house will be much faster than painting a separate room, because the work will be more productive.

How to Speed Up a Room Painting Process

It often happens that the question of how long does it take to paint a room is very important to the homeowner. For example, you have little time for repairs and you need to quickly move into the house. It is also possible that repairs are done before the sale of a house where time plays a significant role.

For such cases, there are several ways you can speed up your painting at home.

  • Remove all Furniture
  • Provide Room Ventilation
  • Hire more Painters

Using these tips can save a lot of time while painting the walls. This plays a special role when you paint the room yourself.

Remove all Furniture

Even if you do not paint the rooms yourself, you can prepare the rooms before starting work. Take out the furniture and make sure the rooms in the house are empty. This will significantly save the time required for painting the interior.

It will be convenient for painters to work in a vacant room, without constantly moving furniture from room to room. This will also speed up the preparatory process and paint the rooms one by one.

Provide Room Ventilation

As we mentioned earlier, an important factor that slows down the process of painting rooms is the time it takes for the paint to dry. To speed up this process, you need to take care of the temperature and humidity in the rooms.

If the rooms are well ventilated and have a temperature of 23 – 27 degrees Celsius, then the paint will dry much faster. If you decide to ventilate the rooms with open windows, make sure that dust does not enter through them. Dust can settle on fresh paint and ruin its appearance.

Hire more Painters

As in any type of work, the number of employees affects the speed of execution. If the timing of the completion of the repair is important to you and you are in a hurry, then you can simply hire more painters.

It is also not worth hiring painters from different companies, since their interaction plays an important role. Inconsistency between workers can slow down the painting process at home.

editor's pick

latest video

news via inbox

Nulla turp dis cursus. Integer liberos  euismod pretium faucibua

Each building has some sort of driveway or at least should have. The main reason is for vehicles to come closer without need to walk all the way. Some homes are residential with small driveway for their car to come in and park before garage or front entrance, and others can be large commercial buildings with loading docks, delivery entrances and casual parking entrances. On Point Remodeling was asked for suggestions on residential driveway for new home construction, and we decided to write detailed article for all our readers. Using this guide you can select the material for your driveway and see what works for your budget. Here are the materials for driveway we will be discussing in our guide:
  • Asphalt
  • Concrete
  • Paver Stone
  • Crushed stone
  • Brick
  • Seashell
  • Gravel
To find good contractor for your driveway, you can either ask our team by email or try to find someone local that worked with neighbors or nearby buildings.

Installation process of any material surface on your driveway

a) Demolition and Excavation – Before anything is done, your contractor will get heavy machinery and scratch off old layer of driveway. They need to go down at least 5-6 inches to insure proper layering before your final layer of material is installed. b) Material Purchase and Delivery – At this point your contract is signed and you already know how the surface will look. Contracting company purchases necessary materials and delivers them to site. Double check if material is correct and not damaged. c) Preparation of Sublevel – Whatever you place as final material, it cannot just be installed directly on top soil. Gravel is the first choice of material that goes down at this stage. Other preferred material is screen sand that can go on top of gravel and works better with stone and bricks. d) Compaction of Ground – To prevent your driveway from moving and changing shapes, all the layers from bottom up have to be properly compacted. Do not leave any spot untouched while doing this or you can get small holes and cracks in driveway after installation. E) Final Installation – This is when all the magic happens. After all preparations and dirty work the final installation is made literally within hours and you can enjoy new driveway. Stone and brick is set up by hand, while other materials require some sort of machinery with manual labor to even out surface.

1. Asphalt

Probably the most used material for road top surfaces as well as driveways is asphalt. This is a mix of gravel and sand that is mixed in and combined by asphalt cement with crude oil. Pros of Asphalt Driveway
  • Very popular and easy to find materials/contractor
  • Completed in 1 day and you can drive on it after
  • Patches and small holes can be fixed fast
Cons of Asphalt Driveway
  • Easy to damage and cracks appear in few years
  • Almost everyone else has same surface
  • Oily surface and chemicals used in mix
Prepared for asphalt driveway will cost you around $5 per square foot to finish. The contractors that take care of entire process from taking out old driveway surface, install subsurface and compact the ground with new asphalt on top, will charge on average $5500 per regular size driveway at single home property.

2. Concrete

What we call concrete is a mixture of Portland cement, aggregate as well as sand with gravel. Suggested thickness of concrete for driveway is 6 inches. The mixture needs to cure without being touched or driven on top for several days. Pros of Concrete Driveway
  • Durable material for large weights
  • Long lifespan if installed properly
  • Winter and summer friendly
Cons of Concrete Driveway
  • Has marks and stains over time
  • Hard to repair without replacement
  • Super hard to DIY
To hire contractors for concrete driveway it will cost around $7-$9 per square foot. This will include site preparation with gravel spread and new concrete installation. They will order full truck of concrete (or several for larger driveways) to pour inside forming. Smoothening and curing is required after installation.

3. Paver Stone

The most luxurious material that you can use to create driveway path with is paver stone. It is made out of natural stone with uneven rough shapes that have different line patterns. Paver stones are very heavy and are perfect for weights on top of them. Almost every city in Europe has roads and walks made out of stone that were installed centuries ago. Pros of Paver Stone Driveway
  • Creative designs can be done
  • Personal looks, can match the house
  • Can replace single stone in minutes
Cons of Paver Stone Driveway
  • Weeds growing through
  • Stone can move over time
  • Most expensive material
There is wide selection of stone that can be purchased for your driveway. On average we recommend settling with $17-$20 per square foot for stone with installation included. Working with this material is very intense labor and we recommend hiring professionals that do this type of work every day.

4. Crushed Stone

Our readers sometimes mistake crushed stone with gravel, but this is not the same material. Crushed stone material is achieved when machine is mechanically crushing larger pieces of unused stone for this specific purpose. It is larger than gravel and can have smooth finish. Crushed stone can also have a mix of colors, which is much pleasant to eyes than gravel. Pros of Crushed Stone Driveway
  • Low maintenance required
  • Fits rural area style
  • Can be reused for other purposes
Cons of Crushed Stone Driveway
  • Gets very hot during summer
  • Can be messy after many drives
  • Hard to remove snow and ice
Buying crushed stone and installing it on your driveway is as easy as it gets. Similar to other rough materials discussed in this post, only small tools like shovels, dolly and buckets are required to spread it on the road. The cost of crushed stone driveway is between $4 and $6 per square foot from professional local contractors that can finish the job in several days.

5. Brick

The same brick we see being used in wall construction can be installed as top driveway surface. Brick is manufactured by compressing clay with plastic mass. It is heated to extreme temperature and dried up to become as solid as you know it. Pros of Brick Driveway
  • Variety of selections in shapes and shades
  • Bricks are recyclable
  • Slip resistant with rough top part
Cons of Brick Driveway
  • Needs regular maintenance
  • Change color over time
  • Old fashion looking
Installing brick on driveway costs $10 per square foot, which is not too far from masonry brick laying as part of the wall. To save money you can use or purchase old brick, that was part of a wall before. Do not mix these two jobs and contact landscaping professionals instead of masonry contractors that work with bricks.

6. Seashell

This material is popular on the coast line where shells can be found near the water. Construction companies use seashells to add in other materials as well as spread them on driveway in rough condition, without adding anything else. It usually comes in white or pearl color and darkens within year because of mixing with sand and dirt. Pros of Seashell Driveway
  • Environmentally friendly
  • Has natural drainage
  • Creates worm vibe of beach house
Cons of Seashell Driveway
  • Break and crack under light weight
  • Sharp and very hard to walk on
  • Gets stuck in shoes and tires
To deliver and spread seashells on driveways costs below $4, which is only slightly more expensive than rough gravel. As you go further from coast line, cost of material increases due to delivery. This material is elegant and very soft. We recommend adding edge lines with darker color landscape material to create visual path.

7. Gravel

This material is used in other construction mixes and underlayment systems. It’s literally fragments and small crushed stones that are put on top of soil. It is easily spread out by hands and anyone can do it. Pros of Gravel Driveway
  • Cheapest of them all
  • Easy DIY Job
  • Can install another material on top
Cons of Gravel Driveway
  • Needs to be graded very often
  • Will mix with dirt and leaves
  • Washes up with heavy rains
It is rough material and can be purchased in bulk (by metric tons or cubic meters). The cost of driveway with gravel should not exceed $3 per square foot, but you can save tons of money by purchasing materials and doings installation by yourself. You do not require specific tools or heavy equipment for the job and delivery of gravel can be arranged directly to your project.

Conclusion

To properly finish any and all of these driveways requires skills and experience. There is no way you can complete any of these projects without heavy equipment and tools that regular home owner’s just store in their garages. Most of those who will read this post will prefer to install asphalt driveway, because of its popularity and low costs. We want to encourage home owners to go for personal preference and what matches your house, rather than getting the most affordable and popular items. Driveway jobs have to be completed fast; otherwise you will need to park elsewhere while the project is running. To not overpay, ask us for quotation sample on material you prefer in specific region where the work need to be done and our team can provide some numbers.

Leave A Comment