How much does basement underpinning costs

How Much Does Basement Underpinning Cost?

Last Updated: 2022-09-29By

Average house with common basement of 800 sq ft and 6 feet height costs around $60 000 for underpinning and increase overall height to full 8 or even 9 feet. That work includes full excavation with underpinning, waterproofing and sump pump installation for flood protection.

Many houses built in throughout the country have basements with very low ceiling height. Throughout years we have adapted our services to needs of home owners who need to increase overall height to 8 or even 9 feet for comfortable living and enjoyment of the space. Average time to finish basement is 6-7 weeks after lowering is done. Local companies like Rock Basements can analyze project onsite and give more details on how much basement underpinning costs with waterproofing and other protective measures.

The process requires specific machinery, materials and heavy man labor. To understand involved costs in the process of lowering your basement we have divided job into small steps with approximate costs.

These prices will not be exact and may differ from one project to another. For more detailed quote please contact us directly.

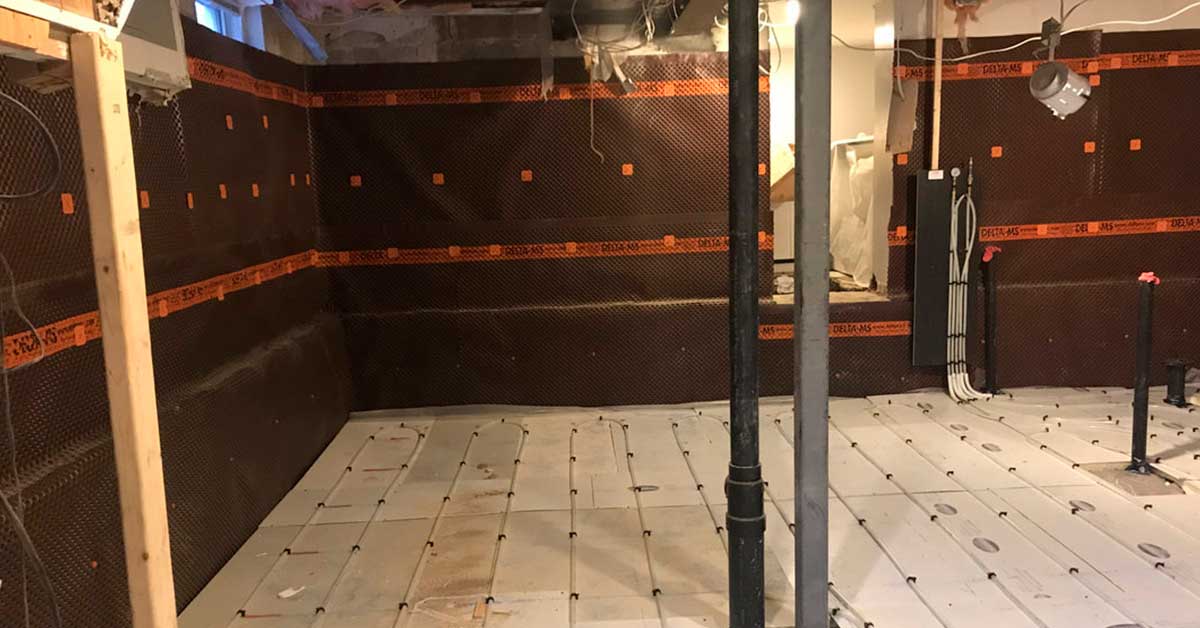
Underpinning of walls – $300 per linear foot

Each house has load bearing walls that hold entire structure. These walls go below concrete floor and have footings.  Basement underpinning process is literally excavating and extending support walls with new footings. The basement walls are divided in 3 or sometimes 4 stages of sections. Every section is between 2 and 4 feet.

Our job is to excavate all sections that are #1 with new concrete poured. It gets inspected by city official and similar process can be continued for next sections of the wall. Average wall is estimated to cost $300 per linear foot to extend and underpin.

Basement Slab – $20 per square foot

After all walls are extended down, middle of the basement has to be excavated to similar height. In most situations machinery cannot be brought down inside the house. It takes several weeks to manually dig all dirt with concrete. Dirt belt is directed throughout the basement window to easy the process of carrying outside what was dug out.

When excavated to the right depth, we need to put new gravel, insulation layer and pour new concrete slab. While digging process is calculated with labor of underpinning the walls, new slab with required materials will cost $20 per square foot of your new concrete basement floor.

New drains with sump pump – $6000 per job

New drains with sump pump in underpinning

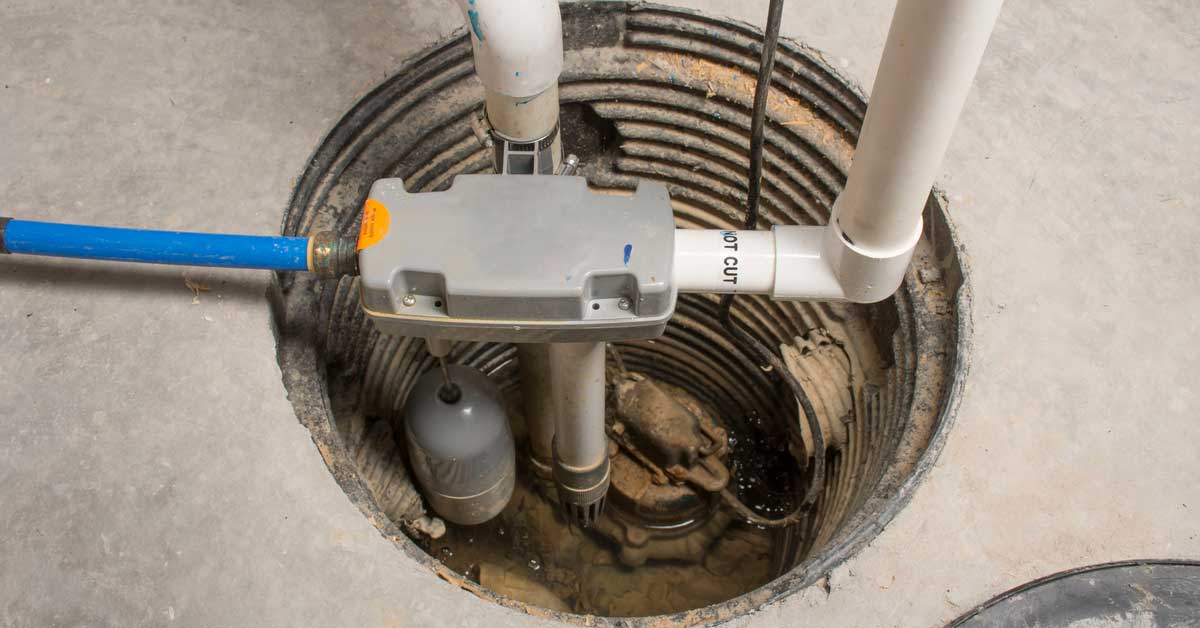
Installation of sump pump and back flow prevention.

Under floor in basement each house has drain pipes that connect to city lines. They take everything that gets flushed down from sinks, toilets and showers through stack pipes into the floor drains. While excavating and lowering basement floor these pipes are replaces and new drains are installed.

Sump pump is suggested for all basement work in risk of floods. Home owners will get rebate from the city for installation of sump pumps and backwater valves. All pipes are tested and inspected before covered with gravel and concrete to finish the job. Approximate costs for this stage of work are $6000.
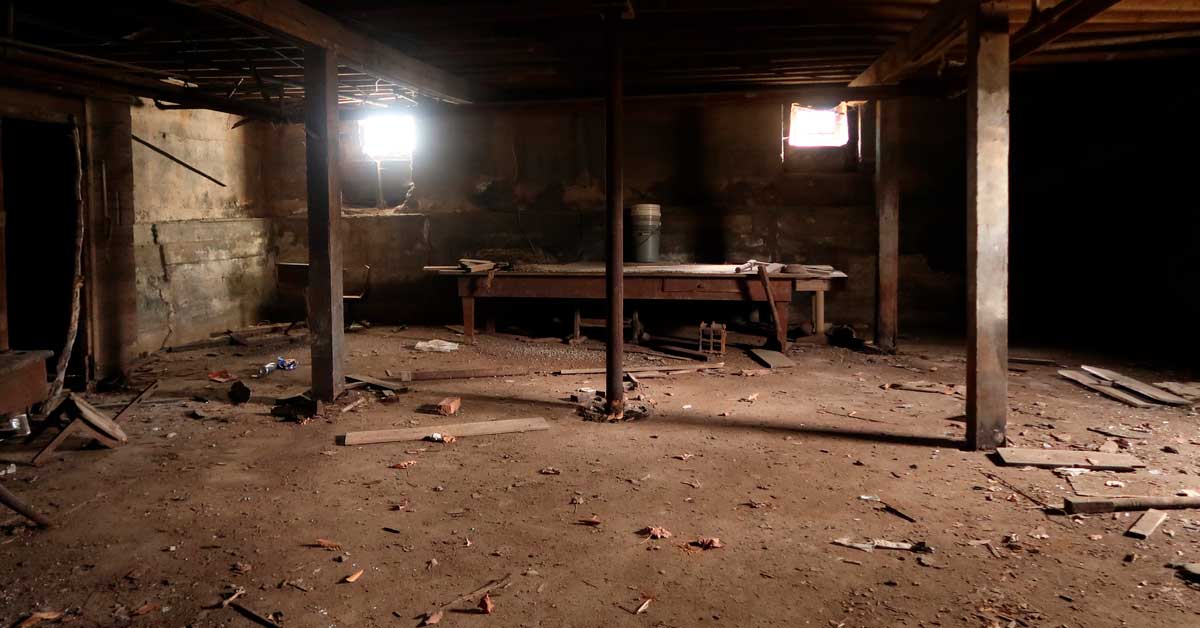
Demolition

Normally basements have some sort of finish before work. Basement underpinning companies may offer separate quotation for demolition and disposal of basement walls, floors and everything else to completely clear it.

Another option is to hire demo contractors ahead of time and save a little bit of money that way. It includes not only exterior walls and floor, but everything else within the basement. Drywall, framing, insulation, loose wires, drain stack and other things that were built previously now have to go.

Direct cost form demolition company can be within $4-$7 per square foot. The costs include disposal of material with construction bins.

Home owners that want to save a buck, we recommend doing the work by yourself. It will take several weekends of free time, but there is nothing complicated in demolition. Be careful with disconnecting electrical lines, shut off main water valve and gas line before you start swinging with hammer.

Additional costs

Additional costs when underpinning basement walls

Removing posts and adding beams during underpinning.

Other scope of work may increase overall costs for your basement underpinning. There are many factors and the best evaluation will be at the location of the job.

Beams – in wide basements middle concrete wall may act a support for main floor. To take it out and make open concept basement, metal beam is installed.

Basement Walk Out – to create separate entrance for new living space in basement some home owners decide to create basement walkout.

Depth of Basement – some existing basement have height less than 6 feet and to excavate more soil it costs more.

Limited Access – downtown housing is very condensed and some houses do have private driveways for disposal bins and concrete truck access.

Remediation – often enough there could be substances like asbestos, lead or mold behind the walls. All of these require lab testing and remediation by licensed company.

Temporary services – option to live inside of house during underpinning project is not only dangerous, but also very costly. Connections for washrooms, furnace and kitchen need to be temporary connected for time of work.

Conclusion for Basement Underpinning Costs

Lowering level of your house deeper into soil and extending foundational walls is not for everyone. The work itself is very hard and costly. Some homes cost more than companies would charge to underpin it.

Although $60 000 work can be justified by high living cost area such as New York or Seattle, where most of small houses cost north of a million dollars.

Another motivator for spending all these money for home underpinning is increasing living space and trying to avoid moving to another place.

On Point Remodeling listed average basic costs for underpinning of basic structure house. This changes from city to city and can go significantly higher and in some cases lower.

editor's pick

latest video

news via inbox

Nulla turp dis cursus. Integer liberos  euismod pretium faucibua

Each building has some sort of driveway or at least should have. The main reason is for vehicles to come closer without need to walk all the way. Some homes are residential with small driveway for their car to come in and park before garage or front entrance, and others can be large commercial buildings with loading docks, delivery entrances and casual parking entrances. On Point Remodeling was asked for suggestions on residential driveway for new home construction, and we decided to write detailed article for all our readers. Using this guide you can select the material for your driveway and see what works for your budget. Here are the materials for driveway we will be discussing in our guide:
  • Asphalt
  • Concrete
  • Paver Stone
  • Crushed stone
  • Brick
  • Seashell
  • Gravel
To find good contractor for your driveway, you can either ask our team by email or try to find someone local that worked with neighbors or nearby buildings.

Installation process of any material surface on your driveway

a) Demolition and Excavation – Before anything is done, your contractor will get heavy machinery and scratch off old layer of driveway. They need to go down at least 5-6 inches to insure proper layering before your final layer of material is installed. b) Material Purchase and Delivery – At this point your contract is signed and you already know how the surface will look. Contracting company purchases necessary materials and delivers them to site. Double check if material is correct and not damaged. c) Preparation of Sublevel – Whatever you place as final material, it cannot just be installed directly on top soil. Gravel is the first choice of material that goes down at this stage. Other preferred material is screen sand that can go on top of gravel and works better with stone and bricks. d) Compaction of Ground – To prevent your driveway from moving and changing shapes, all the layers from bottom up have to be properly compacted. Do not leave any spot untouched while doing this or you can get small holes and cracks in driveway after installation. E) Final Installation – This is when all the magic happens. After all preparations and dirty work the final installation is made literally within hours and you can enjoy new driveway. Stone and brick is set up by hand, while other materials require some sort of machinery with manual labor to even out surface.

1. Asphalt

Probably the most used material for road top surfaces as well as driveways is asphalt. This is a mix of gravel and sand that is mixed in and combined by asphalt cement with crude oil. Pros of Asphalt Driveway
  • Very popular and easy to find materials/contractor
  • Completed in 1 day and you can drive on it after
  • Patches and small holes can be fixed fast
Cons of Asphalt Driveway
  • Easy to damage and cracks appear in few years
  • Almost everyone else has same surface
  • Oily surface and chemicals used in mix
Prepared for asphalt driveway will cost you around $5 per square foot to finish. The contractors that take care of entire process from taking out old driveway surface, install subsurface and compact the ground with new asphalt on top, will charge on average $5500 per regular size driveway at single home property.

2. Concrete

What we call concrete is a mixture of Portland cement, aggregate as well as sand with gravel. Suggested thickness of concrete for driveway is 6 inches. The mixture needs to cure without being touched or driven on top for several days. Pros of Concrete Driveway
  • Durable material for large weights
  • Long lifespan if installed properly
  • Winter and summer friendly
Cons of Concrete Driveway
  • Has marks and stains over time
  • Hard to repair without replacement
  • Super hard to DIY
To hire contractors for concrete driveway it will cost around $7-$9 per square foot. This will include site preparation with gravel spread and new concrete installation. They will order full truck of concrete (or several for larger driveways) to pour inside forming. Smoothening and curing is required after installation.

3. Paver Stone

The most luxurious material that you can use to create driveway path with is paver stone. It is made out of natural stone with uneven rough shapes that have different line patterns. Paver stones are very heavy and are perfect for weights on top of them. Almost every city in Europe has roads and walks made out of stone that were installed centuries ago. Pros of Paver Stone Driveway
  • Creative designs can be done
  • Personal looks, can match the house
  • Can replace single stone in minutes
Cons of Paver Stone Driveway
  • Weeds growing through
  • Stone can move over time
  • Most expensive material
There is wide selection of stone that can be purchased for your driveway. On average we recommend settling with $17-$20 per square foot for stone with installation included. Working with this material is very intense labor and we recommend hiring professionals that do this type of work every day.

4. Crushed Stone

Our readers sometimes mistake crushed stone with gravel, but this is not the same material. Crushed stone material is achieved when machine is mechanically crushing larger pieces of unused stone for this specific purpose. It is larger than gravel and can have smooth finish. Crushed stone can also have a mix of colors, which is much pleasant to eyes than gravel. Pros of Crushed Stone Driveway
  • Low maintenance required
  • Fits rural area style
  • Can be reused for other purposes
Cons of Crushed Stone Driveway
  • Gets very hot during summer
  • Can be messy after many drives
  • Hard to remove snow and ice
Buying crushed stone and installing it on your driveway is as easy as it gets. Similar to other rough materials discussed in this post, only small tools like shovels, dolly and buckets are required to spread it on the road. The cost of crushed stone driveway is between $4 and $6 per square foot from professional local contractors that can finish the job in several days.

5. Brick

The same brick we see being used in wall construction can be installed as top driveway surface. Brick is manufactured by compressing clay with plastic mass. It is heated to extreme temperature and dried up to become as solid as you know it. Pros of Brick Driveway
  • Variety of selections in shapes and shades
  • Bricks are recyclable
  • Slip resistant with rough top part
Cons of Brick Driveway
  • Needs regular maintenance
  • Change color over time
  • Old fashion looking
Installing brick on driveway costs $10 per square foot, which is not too far from masonry brick laying as part of the wall. To save money you can use or purchase old brick, that was part of a wall before. Do not mix these two jobs and contact landscaping professionals instead of masonry contractors that work with bricks.

6. Seashell

This material is popular on the coast line where shells can be found near the water. Construction companies use seashells to add in other materials as well as spread them on driveway in rough condition, without adding anything else. It usually comes in white or pearl color and darkens within year because of mixing with sand and dirt. Pros of Seashell Driveway
  • Environmentally friendly
  • Has natural drainage
  • Creates worm vibe of beach house
Cons of Seashell Driveway
  • Break and crack under light weight
  • Sharp and very hard to walk on
  • Gets stuck in shoes and tires
To deliver and spread seashells on driveways costs below $4, which is only slightly more expensive than rough gravel. As you go further from coast line, cost of material increases due to delivery. This material is elegant and very soft. We recommend adding edge lines with darker color landscape material to create visual path.

7. Gravel

This material is used in other construction mixes and underlayment systems. It’s literally fragments and small crushed stones that are put on top of soil. It is easily spread out by hands and anyone can do it. Pros of Gravel Driveway
  • Cheapest of them all
  • Easy DIY Job
  • Can install another material on top
Cons of Gravel Driveway
  • Needs to be graded very often
  • Will mix with dirt and leaves
  • Washes up with heavy rains
It is rough material and can be purchased in bulk (by metric tons or cubic meters). The cost of driveway with gravel should not exceed $3 per square foot, but you can save tons of money by purchasing materials and doings installation by yourself. You do not require specific tools or heavy equipment for the job and delivery of gravel can be arranged directly to your project.

Conclusion

To properly finish any and all of these driveways requires skills and experience. There is no way you can complete any of these projects without heavy equipment and tools that regular home owner’s just store in their garages. Most of those who will read this post will prefer to install asphalt driveway, because of its popularity and low costs. We want to encourage home owners to go for personal preference and what matches your house, rather than getting the most affordable and popular items. Driveway jobs have to be completed fast; otherwise you will need to park elsewhere while the project is running. To not overpay, ask us for quotation sample on material you prefer in specific region where the work need to be done and our team can provide some numbers.

Leave A Comment