Get Rid of Drain Worms

How to Get Rid of Drain Worms in Your Kitchen

Last Updated: 2022-02-16By

The issue of drain worms is a nuisance for home owners and it’s very creepy. This problem does not occur in new house where kitchen has not been used that much. These worms doesn’t do harm to people or drain system but are extremely unpleasant and can cause harm to pets.

If you have drain worms it is very important to locate the infestation and get rid of them as soon as possible. Contact local specialist to take care of the problem and continue reading if interested in how Remodel On Point suggest it could be dealt with.

Solutions for getting rid or drain worms and flies:

  • Hot – Boiling Water
  • Spays and Chemicals
  • Power Washing or Commercial Drain Cleaning
  • Replace the Drain

The service to remove drain flies by professional is fast and not expensive. Trying to take care of it DYI method can damage pipes and cause additional problems.

[instagram-feed]

Pouring Boiling Water Solution

The simplest solution to get rid of drain worms is to flush out the drain with boiling water. The idea is to get water so hot that it kills worms and flies. With high pressure and large amounts of boiling water everything can be flushed out completely. But most situations are complicated and this trick will not work.

This method doesn’t cost anything and definitely worth trying before getting professionals involved. Boil pot of water (2-5 litters) and slowly pour down the drain where drain worms were seen. Repeat several times throughout the day and observe changes.

The problem always stops for at least a day or two, but can reoccur if worms have larger infestation and can hide away from boiling water.

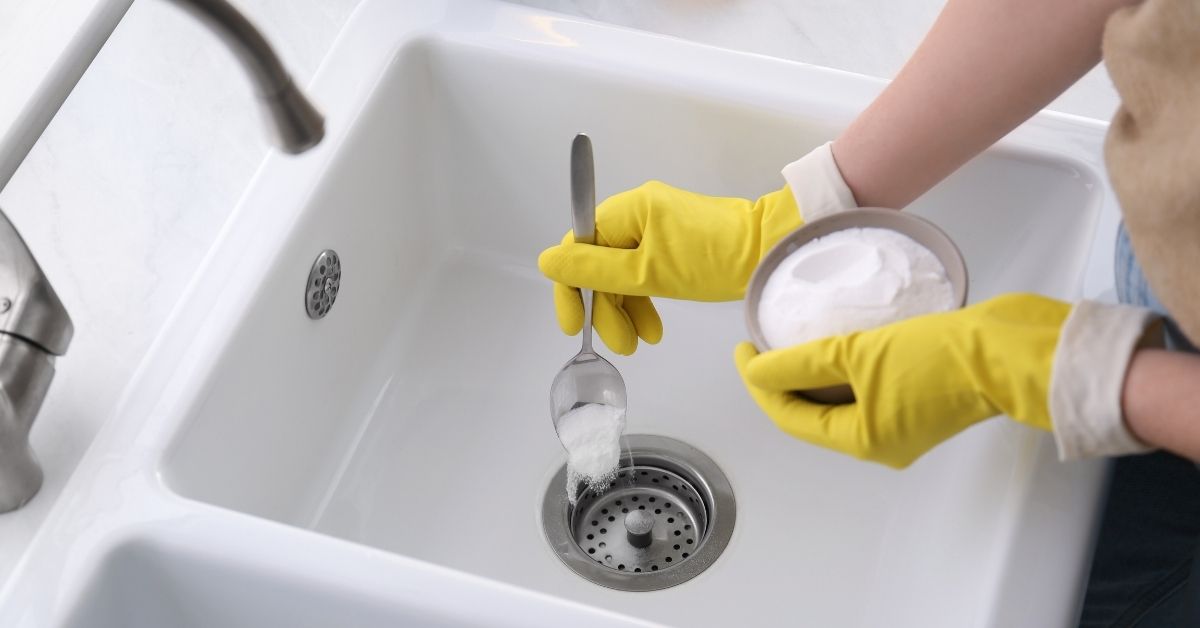
To Use Spays and Chemicals

Another solution is to apply different chemicals and pour them in drain system to kill worms. There are plenty of manufactures that claim to be best for worm and flies removal. They are available online and on shelves of local hardware stores.

Instructions are specific to each product, but to summarize it says to pour specific amount of chemicals down the drain without flushing it with water. The process may need to be repeated twice or three times to complete full treatment.

These chemicals are definitely not friendly to humans or pets. For the time of use it’s recommended to stay away from kitchen or even vacate the house. There have been incidents when suggested chemicals damaged the pipes causing more harm and full drain replacement.

Power Washing or Commercial Drain Cleaning

Just like a blockage in drain pipe, the nest of drain worms can be removed by power flushing the drain. In early stages it is very possible to make it go away, but when worms have large nest and have attachments to pipe from inside, it will be harder to power wash them completely.

Downside of this method is it can damage old pipes with pressurized water and drain would either crack or completely collapse. It helps more with blockage and not always cleans the pipe completely removing all the worms and flies.

In ideal world, light chemicals would be used first to kill worms and later power washed with less pressure to clean down the rest of infestation and wash out chemicals.

Replace the Drain

The last solution on recommendation list is to remove drain pipes completely. If nothing helps removing the worms from the drain, it’s time to get rid of pipes and replace it with new material.

The trick is to find where infestation is located and make sure it doesn’t go deeper down the drain. Camera inspection is good method to check inside of pipes. Hopefully they are located close to P-trap and not somewhere underground where excavation and full drain replacement required.

Plumbers deal with this issue and can suggest feasible solution with replacement. Unfortunately drain worms are more common than home owners realize.

Recommendation for DIY Removing Drain Worms

Remodel On Point specifically created list of how to get rid of drain worms in this sequence. For those who have to interest of calling professionals and want to take care of this problem on their own the steps should be:

  • Inspect and try to understand how large worm infestation is. Is it reoccurring issue or did it just start few days ago.
  • Boil water and pour it down the drain. This may be quickest way, but doesn’t always work.
  • If after few days to a week works or flies start coming from the drain, get suggested chemicals from local hardware store. Use it as told on package.
  • Wash it down several times with regular water in large amounts. Power wash is not recommended, but can be used under low pressure.
  • In case nothing works it’s time to completely remove drain pipe with worms and eggs inside.

What Causes Drain Worms and Flies?

Drain worms don’t appear from thin air. Pieces of vegetables or foods and organic materials that may originally have worms or eggs. It gets stuck and continues to decay. Technically it has come from worms originating from somewhere, blockage in pipe for them to develop and grow, source of food for worms to feed on.

Flies and worms can process fungus, hairs, plants organic material that are flushed down and stay inside the drain. If there is a blockage for drain worms to originate and grow, the food will definitely get stuck there as well.

It’s needless to say that these worms grow better in still water and high humidity. That is no surprise as it’s exactly what we expect inside drain pipes.

Are Drain Worms Dangerous or Harmful?

For many years people have experienced issues with worms inside drains and have thought that they are extremely dangerous living organisms. That is not true or at least not completely adequate statement.

They do not bite or carry infectious diseases that are transmittable to humans. Generally drain worms are more annoying and as some may say disgusting than harmful. If eaten accidently eat them, it can turn out pretty bad for them.

It is not clear if these flies can damage drain pipes, but blockage can contribute to cracks creating high pressure.

Worms and flies can become a source of food for larger and more dangerous insects like roaches and that may carry additional problems.

Fighting drain flies can be more harmful than having them. Chemicals used can poison people, plants and pets if treated without careful supervision. Always read the manual before use.

editor's pick

latest video

news via inbox

Nulla turp dis cursus. Integer liberos  euismod pretium faucibua

Each building has some sort of driveway or at least should have. The main reason is for vehicles to come closer without need to walk all the way. Some homes are residential with small driveway for their car to come in and park before garage or front entrance, and others can be large commercial buildings with loading docks, delivery entrances and casual parking entrances. On Point Remodeling was asked for suggestions on residential driveway for new home construction, and we decided to write detailed article for all our readers. Using this guide you can select the material for your driveway and see what works for your budget. Here are the materials for driveway we will be discussing in our guide:
  • Asphalt
  • Concrete
  • Paver Stone
  • Crushed stone
  • Brick
  • Seashell
  • Gravel
To find good contractor for your driveway, you can either ask our team by email or try to find someone local that worked with neighbors or nearby buildings.

Installation process of any material surface on your driveway

a) Demolition and Excavation – Before anything is done, your contractor will get heavy machinery and scratch off old layer of driveway. They need to go down at least 5-6 inches to insure proper layering before your final layer of material is installed. b) Material Purchase and Delivery – At this point your contract is signed and you already know how the surface will look. Contracting company purchases necessary materials and delivers them to site. Double check if material is correct and not damaged. c) Preparation of Sublevel – Whatever you place as final material, it cannot just be installed directly on top soil. Gravel is the first choice of material that goes down at this stage. Other preferred material is screen sand that can go on top of gravel and works better with stone and bricks. d) Compaction of Ground – To prevent your driveway from moving and changing shapes, all the layers from bottom up have to be properly compacted. Do not leave any spot untouched while doing this or you can get small holes and cracks in driveway after installation. E) Final Installation – This is when all the magic happens. After all preparations and dirty work the final installation is made literally within hours and you can enjoy new driveway. Stone and brick is set up by hand, while other materials require some sort of machinery with manual labor to even out surface.

1. Asphalt

Probably the most used material for road top surfaces as well as driveways is asphalt. This is a mix of gravel and sand that is mixed in and combined by asphalt cement with crude oil. Pros of Asphalt Driveway
  • Very popular and easy to find materials/contractor
  • Completed in 1 day and you can drive on it after
  • Patches and small holes can be fixed fast
Cons of Asphalt Driveway
  • Easy to damage and cracks appear in few years
  • Almost everyone else has same surface
  • Oily surface and chemicals used in mix
Prepared for asphalt driveway will cost you around $5 per square foot to finish. The contractors that take care of entire process from taking out old driveway surface, install subsurface and compact the ground with new asphalt on top, will charge on average $5500 per regular size driveway at single home property.

2. Concrete

What we call concrete is a mixture of Portland cement, aggregate as well as sand with gravel. Suggested thickness of concrete for driveway is 6 inches. The mixture needs to cure without being touched or driven on top for several days. Pros of Concrete Driveway
  • Durable material for large weights
  • Long lifespan if installed properly
  • Winter and summer friendly
Cons of Concrete Driveway
  • Has marks and stains over time
  • Hard to repair without replacement
  • Super hard to DIY
To hire contractors for concrete driveway it will cost around $7-$9 per square foot. This will include site preparation with gravel spread and new concrete installation. They will order full truck of concrete (or several for larger driveways) to pour inside forming. Smoothening and curing is required after installation.

3. Paver Stone

The most luxurious material that you can use to create driveway path with is paver stone. It is made out of natural stone with uneven rough shapes that have different line patterns. Paver stones are very heavy and are perfect for weights on top of them. Almost every city in Europe has roads and walks made out of stone that were installed centuries ago. Pros of Paver Stone Driveway
  • Creative designs can be done
  • Personal looks, can match the house
  • Can replace single stone in minutes
Cons of Paver Stone Driveway
  • Weeds growing through
  • Stone can move over time
  • Most expensive material
There is wide selection of stone that can be purchased for your driveway. On average we recommend settling with $17-$20 per square foot for stone with installation included. Working with this material is very intense labor and we recommend hiring professionals that do this type of work every day.

4. Crushed Stone

Our readers sometimes mistake crushed stone with gravel, but this is not the same material. Crushed stone material is achieved when machine is mechanically crushing larger pieces of unused stone for this specific purpose. It is larger than gravel and can have smooth finish. Crushed stone can also have a mix of colors, which is much pleasant to eyes than gravel. Pros of Crushed Stone Driveway
  • Low maintenance required
  • Fits rural area style
  • Can be reused for other purposes
Cons of Crushed Stone Driveway
  • Gets very hot during summer
  • Can be messy after many drives
  • Hard to remove snow and ice
Buying crushed stone and installing it on your driveway is as easy as it gets. Similar to other rough materials discussed in this post, only small tools like shovels, dolly and buckets are required to spread it on the road. The cost of crushed stone driveway is between $4 and $6 per square foot from professional local contractors that can finish the job in several days.

5. Brick

The same brick we see being used in wall construction can be installed as top driveway surface. Brick is manufactured by compressing clay with plastic mass. It is heated to extreme temperature and dried up to become as solid as you know it. Pros of Brick Driveway
  • Variety of selections in shapes and shades
  • Bricks are recyclable
  • Slip resistant with rough top part
Cons of Brick Driveway
  • Needs regular maintenance
  • Change color over time
  • Old fashion looking
Installing brick on driveway costs $10 per square foot, which is not too far from masonry brick laying as part of the wall. To save money you can use or purchase old brick, that was part of a wall before. Do not mix these two jobs and contact landscaping professionals instead of masonry contractors that work with bricks.

6. Seashell

This material is popular on the coast line where shells can be found near the water. Construction companies use seashells to add in other materials as well as spread them on driveway in rough condition, without adding anything else. It usually comes in white or pearl color and darkens within year because of mixing with sand and dirt. Pros of Seashell Driveway
  • Environmentally friendly
  • Has natural drainage
  • Creates worm vibe of beach house
Cons of Seashell Driveway
  • Break and crack under light weight
  • Sharp and very hard to walk on
  • Gets stuck in shoes and tires
To deliver and spread seashells on driveways costs below $4, which is only slightly more expensive than rough gravel. As you go further from coast line, cost of material increases due to delivery. This material is elegant and very soft. We recommend adding edge lines with darker color landscape material to create visual path.

7. Gravel

This material is used in other construction mixes and underlayment systems. It’s literally fragments and small crushed stones that are put on top of soil. It is easily spread out by hands and anyone can do it. Pros of Gravel Driveway
  • Cheapest of them all
  • Easy DIY Job
  • Can install another material on top
Cons of Gravel Driveway
  • Needs to be graded very often
  • Will mix with dirt and leaves
  • Washes up with heavy rains
It is rough material and can be purchased in bulk (by metric tons or cubic meters). The cost of driveway with gravel should not exceed $3 per square foot, but you can save tons of money by purchasing materials and doings installation by yourself. You do not require specific tools or heavy equipment for the job and delivery of gravel can be arranged directly to your project.

Conclusion

To properly finish any and all of these driveways requires skills and experience. There is no way you can complete any of these projects without heavy equipment and tools that regular home owner’s just store in their garages. Most of those who will read this post will prefer to install asphalt driveway, because of its popularity and low costs. We want to encourage home owners to go for personal preference and what matches your house, rather than getting the most affordable and popular items. Driveway jobs have to be completed fast; otherwise you will need to park elsewhere while the project is running. To not overpay, ask us for quotation sample on material you prefer in specific region where the work need to be done and our team can provide some numbers.

Leave A Comment