5 Best 4×5 Powder Room Layout Plans for Home
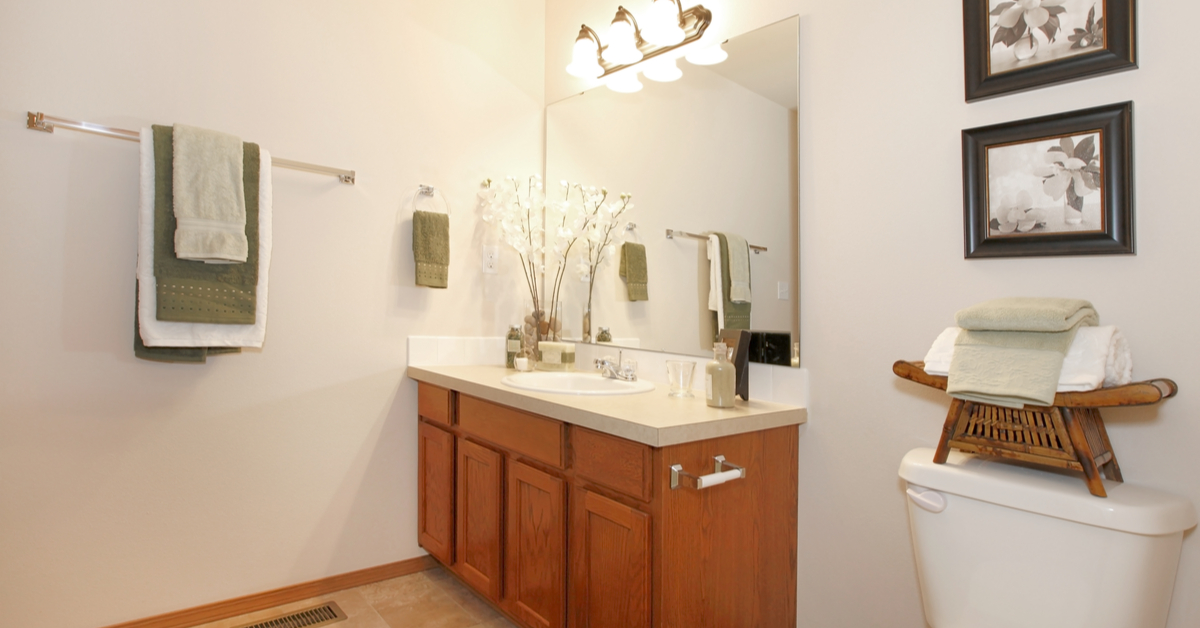
A comfortable powder room layout is essential for every home. The presence of such a room allows you to provide the convenience of your guests. In addition, few people like to have guests go around the house in search of a place to wash their hands or go to the toilet.
If your home is not very large, then every foot counts. If so, Remodel on point recommends that you consider the 5 most popular 4×5 powder room layout plans.
- Top Choice Powder Room Layout Plan
- Plan with a Door on the Long Side
- 4×5 Powder Room Layout with Small Vanity
- Same Wall Mounted Items Layout Plan
- Free Corner in Powder Room Plan
Due to their small size, these room layouts will fit perfectly even in small houses, and your guests will still feel comfortable. Layout in such narrow dimensions is of particular importance because you can’t place all the accessories in a mess. Let’s take a closer look at each of the options, compare their advantages and this will help you decide what you want to use in your home.
Top Choice Powder Room Layout Plan
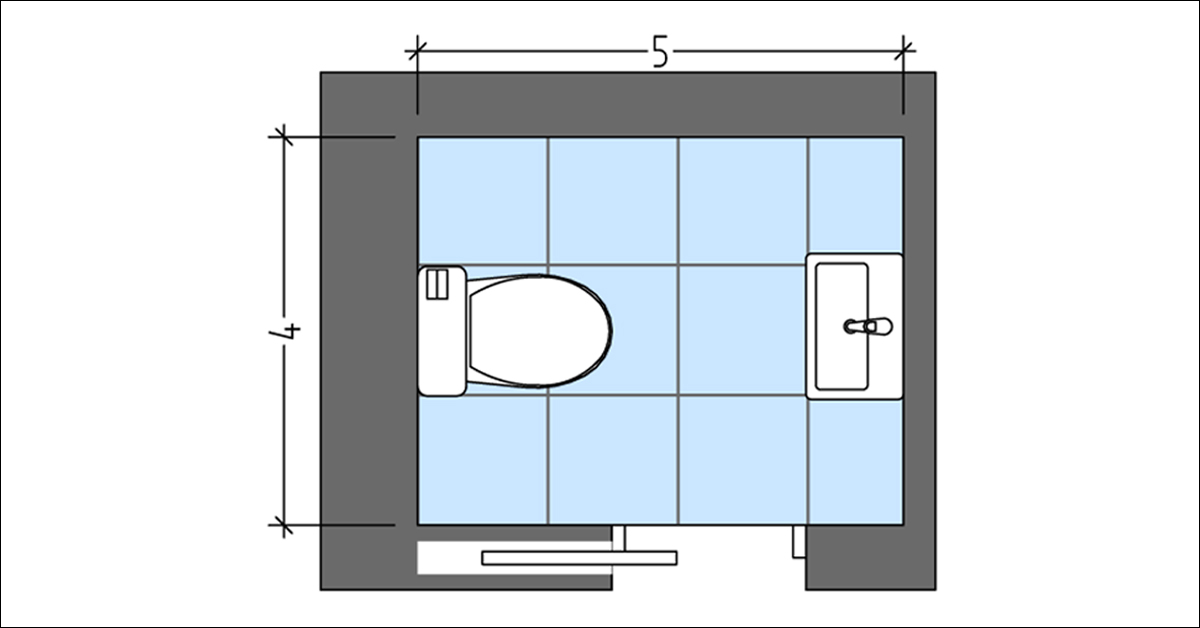
The above layout is one of the most popular in powder rooms. This is due to its simplicity and ample space even in such a small 4×5 foot room.
This room can be located in the corner of the house, usually next to the front door to the house, for the convenience of guests. It will be very convenient to immediately go to wash your hands, especially during a pandemic. Also, due to its shape, this 4×5 powder room can be placed anywhere on the ground floor of the house.
Due to its small size, the washroom lacks unnecessary furniture elements. Here you can see the toilet and sink facing each other. Since the door is shifted to the right, it will be more convenient to place the sink next to it. In this case, the toilet is located on the opposite side. Such layout can be beneficial to renovation project at home or Toronto laser hair removal business.
This layout allows you to use the entire space of the room and not leave dead corners. The sliding door built into the wall also contributes to this principle. Because it hides in the wall, you will not have any problems with space while opening it.
The use of this type of door is recommended but not necessary. If you prefer swing doors you can install them. In this case, it is worth making sure that they open outward of the powder room, otherwise, they can hook on the toilet or sink.
Plan with a Door on the Long Side

Let’s take a look at the following 4×5 powder room layout plan with a door on the long side. It is not very different from the previous version, and can also be used anywhere on the ground floor of your home.
The main difference is that this option provides for the presence of a swing door that opens into the interior of the room. Because of this feature, the sink is shifted from a central position to a corner of the room, allowing the door to fit against the wall. Moving the doorway as far as possible to the right allows you to avoid a dead corner behind an open door, thereby saving the already small washroom space.
This type of layout is notable for the fact that nothing bothers you when you enter a room. The toilet is located on the left, and the sink on the right, thereby freeing up significant space for you to move around. You can comfortably wash your hands, and if you need to use the toilet, you can easily close the door by going up to it.
Based on the listed features, the main positive features of this layout are the availability of free space and ease of use. Do not forget that the powder room is small and highly specialized, therefore you should not overload it with unnecessary furniture and decor elements. Exclusive bathroom renovation company such Easy Renovations can adjust any floor plan and layout
Features of the Layout with a Doorway in a Short Wall
Further, we will consider examples that are radically different from the previous types of powder room layouts. The main difference will be that the door will be positioned on a shorter wall, which is 4 feet.
At first glance, it may seem that this does not play a big role, but this arrangement changes a lot. Firstly, it should be understood that the location of the door greatly affects the overall layout of the room. Since with such an arrangement the room is more elongated, it is suitable for a completely different layout of the first floor.
Such a 4×5 powder room layout plan is more suitable for setting up a room in a wide corridor, between other rooms. That is, in fact, on the one hand, we will have various rooms outside the doors, and on the other, there may be a spacious living room.
Also, if you have an open concept of the first floor, you can install this room in the corner of the house and it will not take up much space. Its presence will not affect the visual picture and will preserve the general appearance of the open space.
Let’s take a closer look at each of the examples below.
4×5 Powder Room Layout with Small Vanity
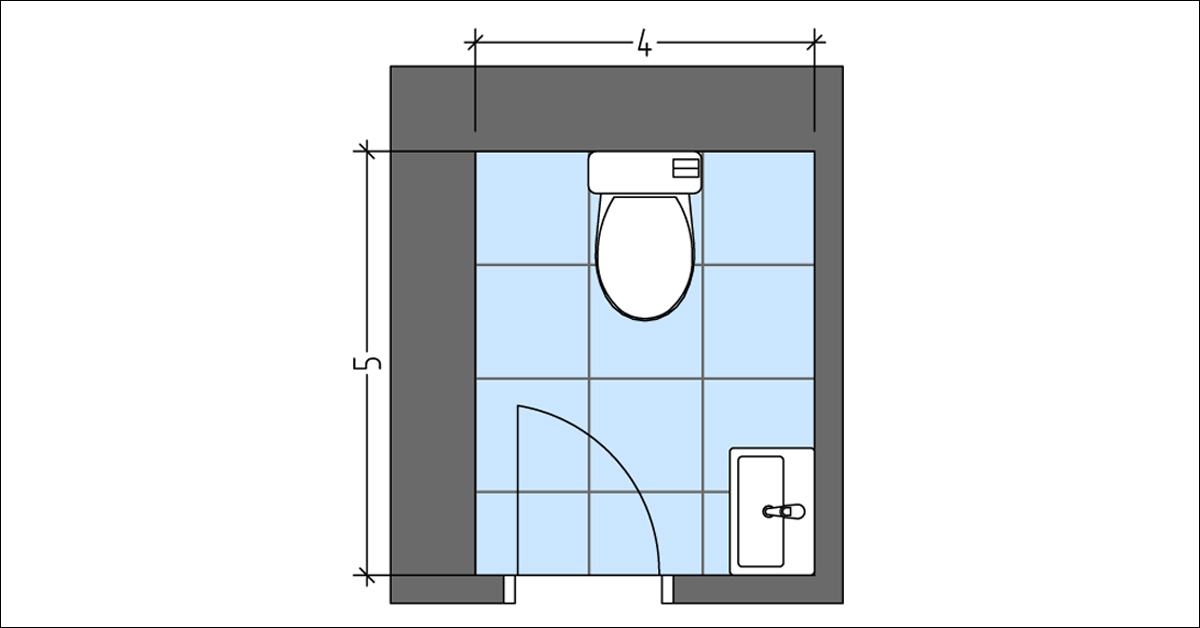
In the layout in the above drawing, we can observe the presence of a sink to the right of the door. Quite convenient if the guest just needs to wash his hands after the street or eating. In this case, you don’t even need to close the door, which will be quite convenient and will allow you not to make unnecessary movements.
A toilet is a similar layout is located in the middle of the wall, which is parallel to the one on which the door is located. This became possible because in this type of layout the room has a more elongated shape. Even a door open inward will not be a problem.
But it is still worth considering that, be that as it may, the powder room is still small. Do not use large toilets and sinks in them. Minimalistic dimensions will allow you to save more free space and the ability to use this room comfortably.
Same Wall Mounted Items Layout Plan
The example from this picture is also very common. It can even be found not only in the powder room of large houses but also in apartments. The main difference from the previous version is that the toilet is located along the same wall as the sink, and not opposite the door.
This change creates more free space in the room at the back of the room. And you can install a toilet in a larger size. Hanging toilets can often be found in washrooms like these.
The free space from the open door to the opposite wall gives the impression of a larger scale. Also, if you use light and mirror elements in the decoration of the room, you can visually enlarge the room.
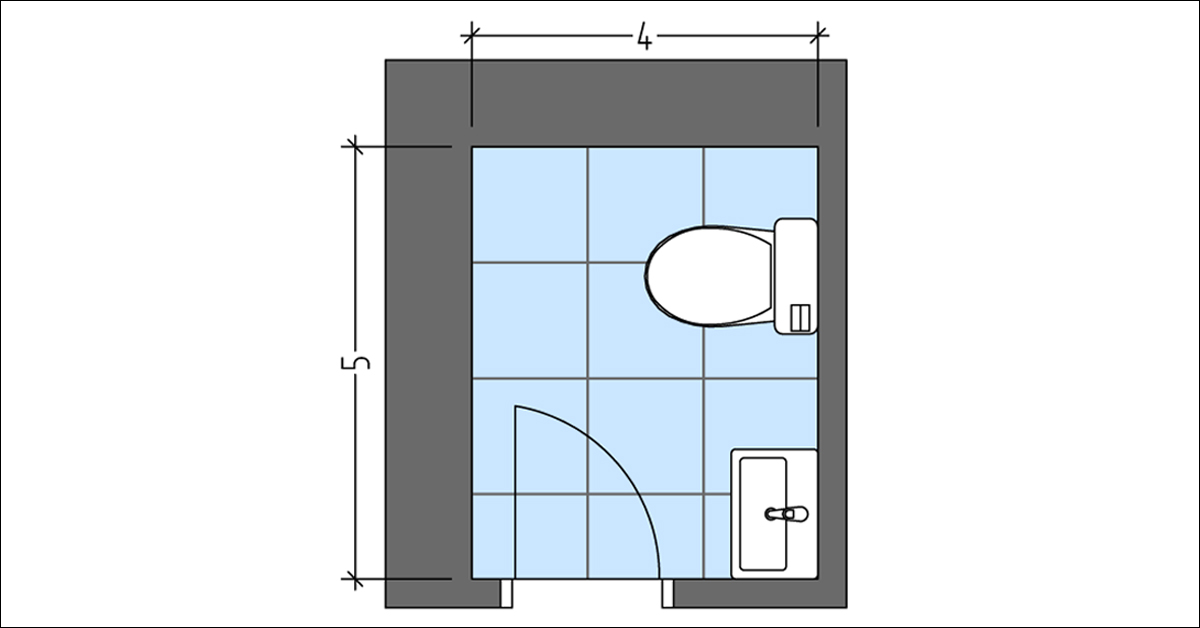
Free Corner in Powder Room Plan

The last 4×5 powder room layout that we will look at in this article has small features that can be used. First, we can notice that the door opens outward. This already at least creates more free space in the room itself.
It should be noted that in this drawing it is not possible to install the door in another way. Because the toilet is close enough to the door, it simply will not allow it to open inward. Also, because the doorway is in a wall that is only 4 feet long, the sliding door option is not suitable.
We can also see that the sink is along the same wall as the toilet. This immediately gives us the understanding that space next to the sink is quite free if we take into account the size of the room. This is the feature, you can use this angle for your needs or fantasies. You can install decorative elements in it, hang a mirror or pictures. We can say that this place is great for decorative items.
The presence of decorative elements in such a small room can surprise your guests. They will be interested in how this is possible, provided that it also does not interfere with the use of this room.
Conclusion for Powder Room Layout Plans
Proper planning is essential for every home and every room. This is especially true when it comes to very small spaces such as a 4×5 powder room. Everything here must be measured with great precision to ensure maximum functionality and comfort.
There are many different ways to arrange furniture, and each option has its advantages. We tried to maximize these qualities in the most popular types of layout plans. Once you have selected the option you want, be sure to discuss it with your contractor to see if it is compatible with your home.
Remember a high-quality and detailed approach to planning the entire house will help you create a place that will be as comfortable for you as possible for years to come.
latest video
news via inbox
Nulla turp dis cursus. Integer liberos euismod pretium faucibua