How to Remove Popcorn Ceiling

How to Remove Popcorn Ceiling With Asbestos Safely

Last Updated: 2021-08-11By

To remove popcorn ceiling with asbestos in safely manner you need to:

  • Seal the Area of Work
  • Depressurize Rooms
  • Wear Personal Protective Equipment
  • Break Material in Large Pieces
  • Dispose to Dedicated Facilities
  • Clean Up At the End

On top of above listed points, most of the states require specialized training and certificates for asbestos remediation. Simply following the safety protocol does not cut it and you would get large fines for working with designated or banned substances without license.

Assuming lab test were completed and asbestos is present in ceiling that needs to be removed. We are not coming back to this question again in our topic.

Finding asbestos remediation professionals in specific regions is not always as simple as it may seem. Ask our team for help and suggestions for companies that can take on your project and complete it with all necessary safety precautions.

Seal the Area Out Completely

Before works starts it is extremely important to seal it all out. The idea is to prevent dust particles or larger pieces get in other areas and contaminate air there.

[instagram-feed]

Plastic or similar material works best in room separation. It does not allow dust to travel through and can be removed easily to move work area elsewhere. It is taped around to the walls with zipper as an entry point.

This is the first step on how to remove popcorn ceiling with asbestos safely and you can purchase plastic with zipper already attached to it.

For even better dust control we suggest creating buffer zone as a second line of defense from asbestos flying in the air. In most states it is mandatory while dealing with asbestos. It’s almost like an entrance room before going into separated work area.

To do a buffer entry zone, separate an area with similar plastic and zipper before asbestos remediation area. This room does not need to be larger than 4×5 feet.

Depressurize Room – Create Negative Pressure

After years of studying how particles fly in the air, we can in a way control some of it. By creating negative pressure in the room or depressurizing it we make sure that everything stays inside the room and does not leak out.

Hospitals use the same strategy to control environment inside the rooms and prevent bacteria or viruses inside the rooms. It is the best known method to stop contamination and spread of airborne particles.

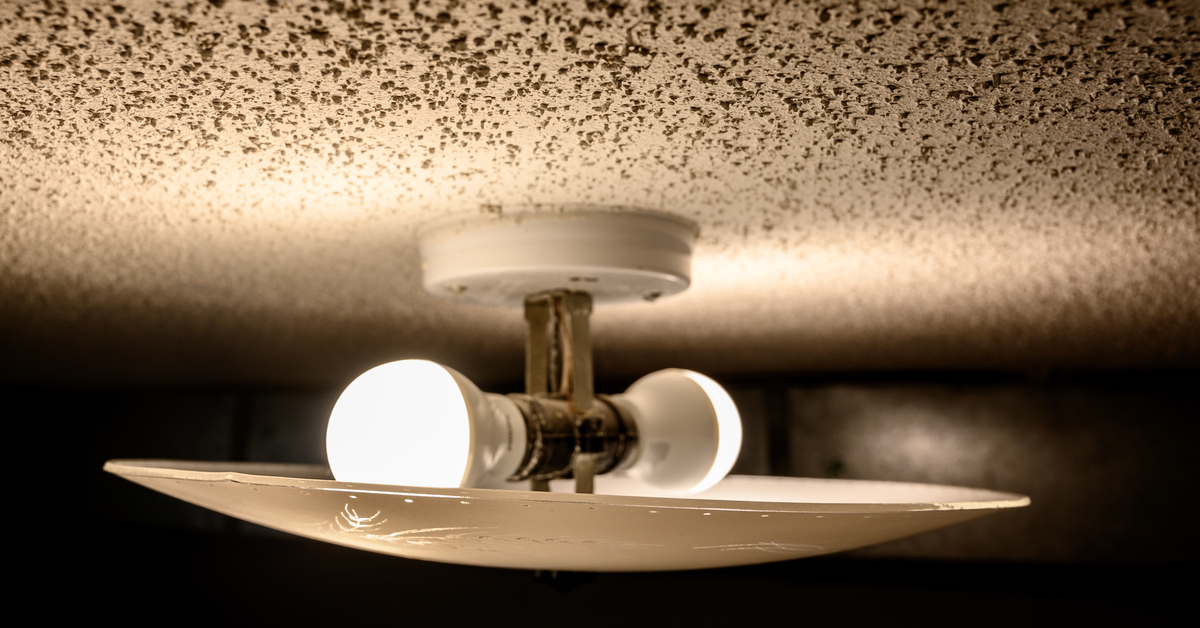
To start the room has to be completely sealed. Never miss a spot and know what should be covered. We are talking about little spots that can leak tiny bits of air. Instructions on how to remove popcorn ceiling with asbestos include sealing window cracks, electrical outlet holes, air vents and even tiny spots around lights. Cover all of them with tape completely.

The blower or negative pressure machine is attached to the room with exhaust to the outside. You plug it in and leave it working for exact time on instructions for this specific machine.

Break in Large Pieces

Removing popcorn ceiling layer

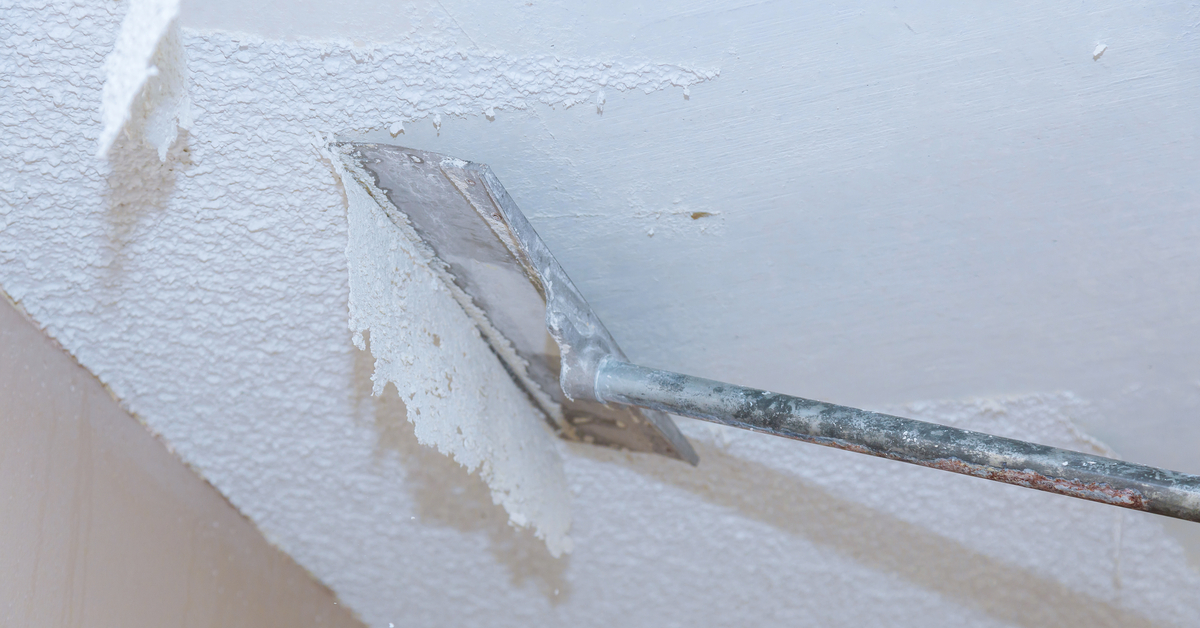
The correct way to remove the popcorn ceiling.

Another technique to minimize asbestos in the air is to break material in large pieces. We understand that each demolition is different and it never goes exactly as planned, but our recommendation is to take more time into planning than just swinging with hammer.

Asbestos inside material is not dangerous at all, it only hurts people when gets inside the lungs through airways. Technically speaking if you can break plaster that contains asbestos without creating any dust at all, it would be safe.

For this to happen contractors should use the least possible mechanical tools. Breaking by hands and using just enough force to remove materials is obviously the best way to go.

Cutting with saw or a grinder on other hand is the worst possible thing that you can do with asbestos contaminated material. It will create so much dust and send asbestos in the air.

Package Safely and Tag Bags

Once material was removed from its original places in sealed room that has negative pressure it’s time to package it and carry out.

Just like in previous steps, we want to make sure that material is controlled inside. Specialized bags are used for such purpose. They are harder to puncture through and more airtight. To be on a safe side you can use double bag method.

To avoid mix ups along the way, the bags with asbestos material have to be tagged. Tag should involve the name of material or designated substance, date/ time of removal and remediation company that performed work.

These tags can be purchased online and attached to bags with asbestos material. They do not cost lot of money and serve great purpose in work with asbestos.

Disposal Yards that Take Asbestos

Material that was demolished cannot be handled same way as other rough construction debris. Designator and banned substances are always separated from everything else as they can be harmful to people if mishandled.

After labeling bags with asbestos they are delivered to specific disposal yards. They are equipped with proper machines and safety equipment for such dangerous materials.

It costs money to dispose asbestos contaminated waste and don’t be surprised with overall remediation estimate from contractors.

Not every city has dedicated asbestos disposal sites and traveling can be expensive. It’s not always clear how to remove popcorn ceiling with asbestos and where to dump it by yourself. You can contact companies that specialize in disposal of dangerous substances for pick up from your home.

Clean Up Every Corner

Multiple level of ceiling edges with bumpy popcorn

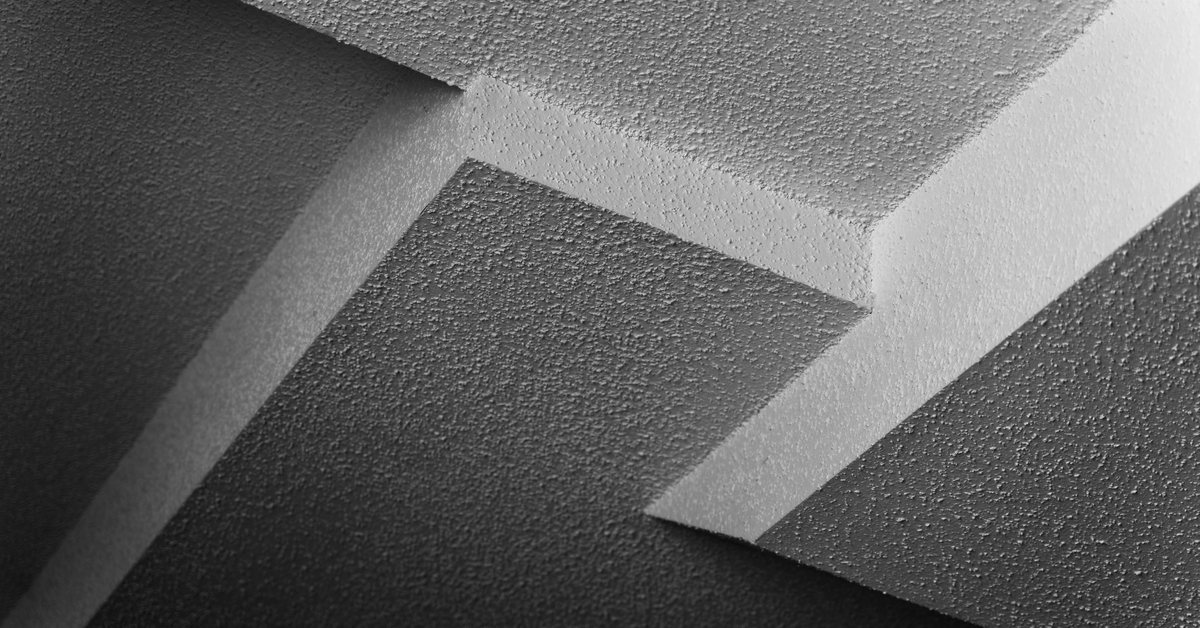
The importance of removing popcorn covering the ceiling from every corner.

After work is completed, contractor needs to do detailed cleaning of the rooms where asbestos material was removed. Every little piece has to be removed and carried out of the jobsite to avoid asbestos leftovers contaminating air.

Because the room was completely sealed prior to start of work, it should not be difficult to clean it up. Construction vacuum is mandatory to use for dust collection from corners and walls. Additional mop swaps can be necessary for insuring extra clean surfaces.

If you are hiring contractors for safe asbestos removal, make sure to agree on proper cleaning before they leave. It may cost a little extra, but it would guarantee removal of asbestos particles after demolition.

Safety is Always Priority when Dealing with Asbestos (PPE)

First defense from asbestos is proper Personal Protective Equipment (PPE). Always assume there is lots of asbestos in the area where work is performed.

Full body suits are mandatory for such work. They do not leak any air or dust through material. To work in those suits you would require respiratory devices that provide supply of air for a long time.

Cover suits can be only for one time use and disposable with rest of contaminated materials. Some professional equipment can be cleaned and reused again for next jobs.

Do not purchase personal protective equipment from unknown stores or sources. Manufacturer tag needs to be visible with approved credential from local authorities.

License and training on How to Remove Popcorn Ceiling with Asbestos

Working with asbestos is no fun at all. Dust particles that get inside lungs and slowly destroy it. There is just too many details to know while handling asbestos and staying safe at the same time.

Therefore for specific work with asbestos, safety associations developed education and licensing programs. Companies and contractors that work with asbestos materials need to obtain licenses and update it every several years.

Before hiring contractor for removal of popcorn ceiling with asbestos, make sure they have all required documents. Also go with them through list of stages for remediation and how they assure safety.

Do not attempt to do it on your own and get professionals that know how to remove popcorn ceiling with asbestos safely. This article is strictly for educational purposes and does not provide guide to do the work.

editor's pick

latest video

news via inbox

Nulla turp dis cursus. Integer liberos  euismod pretium faucibua

Each building has some sort of driveway or at least should have. The main reason is for vehicles to come closer without need to walk all the way. Some homes are residential with small driveway for their car to come in and park before garage or front entrance, and others can be large commercial buildings with loading docks, delivery entrances and casual parking entrances. On Point Remodeling was asked for suggestions on residential driveway for new home construction, and we decided to write detailed article for all our readers. Using this guide you can select the material for your driveway and see what works for your budget. Here are the materials for driveway we will be discussing in our guide:
  • Asphalt
  • Concrete
  • Paver Stone
  • Crushed stone
  • Brick
  • Seashell
  • Gravel
To find good contractor for your driveway, you can either ask our team by email or try to find someone local that worked with neighbors or nearby buildings.

Installation process of any material surface on your driveway

a) Demolition and Excavation – Before anything is done, your contractor will get heavy machinery and scratch off old layer of driveway. They need to go down at least 5-6 inches to insure proper layering before your final layer of material is installed. b) Material Purchase and Delivery – At this point your contract is signed and you already know how the surface will look. Contracting company purchases necessary materials and delivers them to site. Double check if material is correct and not damaged. c) Preparation of Sublevel – Whatever you place as final material, it cannot just be installed directly on top soil. Gravel is the first choice of material that goes down at this stage. Other preferred material is screen sand that can go on top of gravel and works better with stone and bricks. d) Compaction of Ground – To prevent your driveway from moving and changing shapes, all the layers from bottom up have to be properly compacted. Do not leave any spot untouched while doing this or you can get small holes and cracks in driveway after installation. E) Final Installation – This is when all the magic happens. After all preparations and dirty work the final installation is made literally within hours and you can enjoy new driveway. Stone and brick is set up by hand, while other materials require some sort of machinery with manual labor to even out surface.

1. Asphalt

Probably the most used material for road top surfaces as well as driveways is asphalt. This is a mix of gravel and sand that is mixed in and combined by asphalt cement with crude oil. Pros of Asphalt Driveway
  • Very popular and easy to find materials/contractor
  • Completed in 1 day and you can drive on it after
  • Patches and small holes can be fixed fast
Cons of Asphalt Driveway
  • Easy to damage and cracks appear in few years
  • Almost everyone else has same surface
  • Oily surface and chemicals used in mix
Prepared for asphalt driveway will cost you around $5 per square foot to finish. The contractors that take care of entire process from taking out old driveway surface, install subsurface and compact the ground with new asphalt on top, will charge on average $5500 per regular size driveway at single home property.

2. Concrete

What we call concrete is a mixture of Portland cement, aggregate as well as sand with gravel. Suggested thickness of concrete for driveway is 6 inches. The mixture needs to cure without being touched or driven on top for several days. Pros of Concrete Driveway
  • Durable material for large weights
  • Long lifespan if installed properly
  • Winter and summer friendly
Cons of Concrete Driveway
  • Has marks and stains over time
  • Hard to repair without replacement
  • Super hard to DIY
To hire contractors for concrete driveway it will cost around $7-$9 per square foot. This will include site preparation with gravel spread and new concrete installation. They will order full truck of concrete (or several for larger driveways) to pour inside forming. Smoothening and curing is required after installation.

3. Paver Stone

The most luxurious material that you can use to create driveway path with is paver stone. It is made out of natural stone with uneven rough shapes that have different line patterns. Paver stones are very heavy and are perfect for weights on top of them. Almost every city in Europe has roads and walks made out of stone that were installed centuries ago. Pros of Paver Stone Driveway
  • Creative designs can be done
  • Personal looks, can match the house
  • Can replace single stone in minutes
Cons of Paver Stone Driveway
  • Weeds growing through
  • Stone can move over time
  • Most expensive material
There is wide selection of stone that can be purchased for your driveway. On average we recommend settling with $17-$20 per square foot for stone with installation included. Working with this material is very intense labor and we recommend hiring professionals that do this type of work every day.

4. Crushed Stone

Our readers sometimes mistake crushed stone with gravel, but this is not the same material. Crushed stone material is achieved when machine is mechanically crushing larger pieces of unused stone for this specific purpose. It is larger than gravel and can have smooth finish. Crushed stone can also have a mix of colors, which is much pleasant to eyes than gravel. Pros of Crushed Stone Driveway
  • Low maintenance required
  • Fits rural area style
  • Can be reused for other purposes
Cons of Crushed Stone Driveway
  • Gets very hot during summer
  • Can be messy after many drives
  • Hard to remove snow and ice
Buying crushed stone and installing it on your driveway is as easy as it gets. Similar to other rough materials discussed in this post, only small tools like shovels, dolly and buckets are required to spread it on the road. The cost of crushed stone driveway is between $4 and $6 per square foot from professional local contractors that can finish the job in several days.

5. Brick

The same brick we see being used in wall construction can be installed as top driveway surface. Brick is manufactured by compressing clay with plastic mass. It is heated to extreme temperature and dried up to become as solid as you know it. Pros of Brick Driveway
  • Variety of selections in shapes and shades
  • Bricks are recyclable
  • Slip resistant with rough top part
Cons of Brick Driveway
  • Needs regular maintenance
  • Change color over time
  • Old fashion looking
Installing brick on driveway costs $10 per square foot, which is not too far from masonry brick laying as part of the wall. To save money you can use or purchase old brick, that was part of a wall before. Do not mix these two jobs and contact landscaping professionals instead of masonry contractors that work with bricks.

6. Seashell

This material is popular on the coast line where shells can be found near the water. Construction companies use seashells to add in other materials as well as spread them on driveway in rough condition, without adding anything else. It usually comes in white or pearl color and darkens within year because of mixing with sand and dirt. Pros of Seashell Driveway
  • Environmentally friendly
  • Has natural drainage
  • Creates worm vibe of beach house
Cons of Seashell Driveway
  • Break and crack under light weight
  • Sharp and very hard to walk on
  • Gets stuck in shoes and tires
To deliver and spread seashells on driveways costs below $4, which is only slightly more expensive than rough gravel. As you go further from coast line, cost of material increases due to delivery. This material is elegant and very soft. We recommend adding edge lines with darker color landscape material to create visual path.

7. Gravel

This material is used in other construction mixes and underlayment systems. It’s literally fragments and small crushed stones that are put on top of soil. It is easily spread out by hands and anyone can do it. Pros of Gravel Driveway
  • Cheapest of them all
  • Easy DIY Job
  • Can install another material on top
Cons of Gravel Driveway
  • Needs to be graded very often
  • Will mix with dirt and leaves
  • Washes up with heavy rains
It is rough material and can be purchased in bulk (by metric tons or cubic meters). The cost of driveway with gravel should not exceed $3 per square foot, but you can save tons of money by purchasing materials and doings installation by yourself. You do not require specific tools or heavy equipment for the job and delivery of gravel can be arranged directly to your project.

Conclusion

To properly finish any and all of these driveways requires skills and experience. There is no way you can complete any of these projects without heavy equipment and tools that regular home owner’s just store in their garages. Most of those who will read this post will prefer to install asphalt driveway, because of its popularity and low costs. We want to encourage home owners to go for personal preference and what matches your house, rather than getting the most affordable and popular items. Driveway jobs have to be completed fast; otherwise you will need to park elsewhere while the project is running. To not overpay, ask us for quotation sample on material you prefer in specific region where the work need to be done and our team can provide some numbers.

Leave A Comment