Heat Gun - Remove Paint

Can You Use Heat Gun to Remove Paint?

Last Updated: 2022-02-16By

Yes, heat gun is one of the options to remove old paint from many surfaces at home or other do it yourself projects.

Using heat gun to remove paint is very economical and fast procedure if used properly with caution. Many professionals pick this method due to simplicity and evolving tools.

Today we are going to teach you how one tool can save tons of money and time. You can do it on your own without hiring expensive contractors.

Heat guns slowly overthrow old methods like sanding by hand or using dangerous chemicals. This is simply the best solution when trying to remove old paint at home or use a solution for contracting business.

[instagram-feed]

How to Remove Paint with Heat Gun?

Each specific model of heat gun has direct manual for usage and safety. To summarize all of them together and provide basic instructions we list 5 steps on using heat gun to remove paint.

  1. Check All Features

Our example always starts with regular home owner who has never used a tool before. Rented or purchased heat gun should be checked for its condition and functions.

Working with faulty equipment or unknown features that can cause damage to surface you are trying to remove paint from is not the best idea to start with.

  1. Heat the Paint

Now it’s time to start using heat gun. Point it at surface with approximate distance of 3 to 4 inches away. Closer distance can damage material and start burning it.

We recommend starting with lower heat level just to try it out and moving to medium or high later on. Try it out before understanding full functionality and how well it works on your material and paint removal.
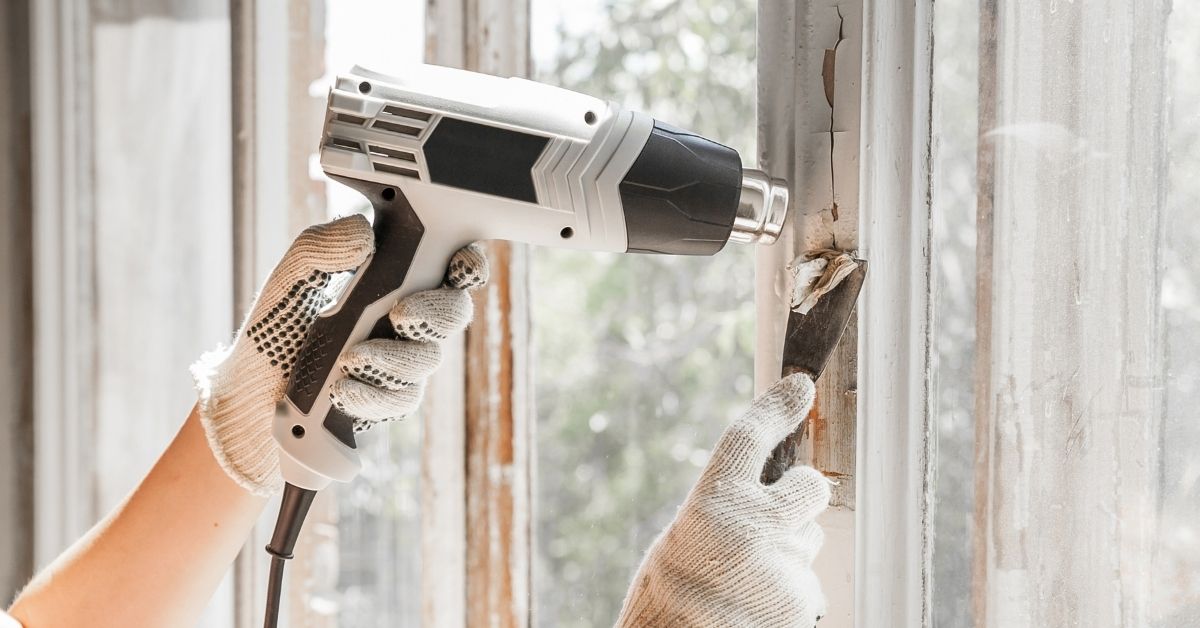
  1. Scrape Paint Off

The layer of paint should start bubbling and slowing coming off. It would not fall off ideally just because point enormous heat at it.

Using regular metal scraper you slide the surface and help remove the paint. Technically heat gun only helps pain get detached from original surface of material and scraper fully removes it.

  1. Repeat the Procedure

It almost never works perfectly from first time. Repeat heating old paint and scraping it off until fully removed from wood or brick materials.

Beginners need at least 3 or 4 times of tries removing paint with heat gun until it all goes away. Professionals like to work slower at each try but get it done after second round.

  1. Sand or Clean Surface

Fully removed paint is not a finished product that looks ideal. There are always small bits and pieces that have to be properly removed.

For wood we recommend typical sander. It sands down deficiencies and bumps that were created with paint. Harder surfaces like stone or concrete work better with hard brushes or sand paper bricks.

Pros and Cons of Heat Gun for Paint Removal

There are several methods of paint removal that can be compared to heat guns. Of course each method has their own benefits and negative sides. Here are pros and cons of heat guns:

Pros

Cost of Heat Gun

Unlike other methods, there is no need to buy large amount of chemicals or materials for paint removal. Simply need a paint gun, putty knife and lots of free time.

Starter quality tools wound cost under $50 and professional contractor heat gun is $100 – $150. It can be used for few years on multiple jobs.

Easy to Use

Heat guns are very easy to use. Simply point at surface and hold 3-4 inches away while paint heats up and starts to loosen up.

Follow procedures from manual or our simplified step by step program. Once learned you can never go wrong with actual process, just don’t forget safety measures.

Penetration of Paint Layers

As we know, older homes can have several layers of paint. Heat guns don’t care about all that, and everything is heated up at the same time.

Unlike chemicals, heat loosens up all layers of paint at the same time and you can save time getting it all off together.

Cons

Safety and Fire Hazard

Although it is less hazardous than paint removal chemicals, heat fun can still cause burns to hands. It is most common injury till this day, no matter how careful people claim to be.

Removing paint from flammable material like wood gives extra fire hazards. Ventilate the room and be very careful with not setting work station on fire.

Time Consumption

Small wooden shelves and cabinets can take forever to get paint of with heat gun. If you want it to look perfect it will take lots of time.

It may not be worth the time removing the paint and refurbishing the item. Why not just buy new one? Analyze if your time vs money spent on same new item.

Multiple Attempts

We previously said that working with heat gun requires multiple attempts to get paint off. This creates problems and downsides for choosing this specific method.

Chemicals or commercial sanders can potentially remove paint with one use if work is not complicated. It may be the reason to choose something else versus heat gun.

Proper Safety Measures for Heat Guns

When using any tools for remodeling or fix project first priority should be safety. Heat gun is no exception and we want all readers to be extra careful when removing paint.

Besides safety for yourself also consider environment around with potential hazards that can harm others or damage material you are removing paint from.

  • Keep room ventilated at all times
  • Plan exit route in case of fire
  • Inspect heat gun before use
  • Do not use heat gun on flammable material
  • Never touch the nozzle or put it face down
  • Clean heat gun and avoid blockage of nozzle
  • Do not play with it or point at people
  • Allow it to cool down before packaging

This simple tool can cause harm and many home owners do report injuries while using heat gun first time. It all happens due to underestimating danger and not following simple precautions.

Best Surfaces to Use Heat Gun On

Removing paint with heat gun recommended only for hand full of material types. They are hard and strong materials that do not ignite easily with provided heat.

Amongst them is wood as an exception. Wooden materials need extra careful work and usually take longer to remove paint.

Consider all possibilities of material change under heat such as breaking, cracking, igniting or melting.

Try other methods of paint removal for hardwood floor, glass, carpet, clothes and rubber materials.

Here is short list of materials we recommend to remove paint from with heat gun:

  • Natural & Veneer Stone
  • Wooden Materials
  • Metal
  • Concrete Surface
  • Most Types of Bricks

Drywall ceilings and walls can also be worked at with heat gun. It is not typical because it would require a lot of time for such project and it is not practical.

editor's pick

latest video

news via inbox

Nulla turp dis cursus. Integer liberos  euismod pretium faucibua

Each building has some sort of driveway or at least should have. The main reason is for vehicles to come closer without need to walk all the way. Some homes are residential with small driveway for their car to come in and park before garage or front entrance, and others can be large commercial buildings with loading docks, delivery entrances and casual parking entrances. On Point Remodeling was asked for suggestions on residential driveway for new home construction, and we decided to write detailed article for all our readers. Using this guide you can select the material for your driveway and see what works for your budget. Here are the materials for driveway we will be discussing in our guide:
  • Asphalt
  • Concrete
  • Paver Stone
  • Crushed stone
  • Brick
  • Seashell
  • Gravel
To find good contractor for your driveway, you can either ask our team by email or try to find someone local that worked with neighbors or nearby buildings.

Installation process of any material surface on your driveway

a) Demolition and Excavation – Before anything is done, your contractor will get heavy machinery and scratch off old layer of driveway. They need to go down at least 5-6 inches to insure proper layering before your final layer of material is installed. b) Material Purchase and Delivery – At this point your contract is signed and you already know how the surface will look. Contracting company purchases necessary materials and delivers them to site. Double check if material is correct and not damaged. c) Preparation of Sublevel – Whatever you place as final material, it cannot just be installed directly on top soil. Gravel is the first choice of material that goes down at this stage. Other preferred material is screen sand that can go on top of gravel and works better with stone and bricks. d) Compaction of Ground – To prevent your driveway from moving and changing shapes, all the layers from bottom up have to be properly compacted. Do not leave any spot untouched while doing this or you can get small holes and cracks in driveway after installation. E) Final Installation – This is when all the magic happens. After all preparations and dirty work the final installation is made literally within hours and you can enjoy new driveway. Stone and brick is set up by hand, while other materials require some sort of machinery with manual labor to even out surface.

1. Asphalt

Probably the most used material for road top surfaces as well as driveways is asphalt. This is a mix of gravel and sand that is mixed in and combined by asphalt cement with crude oil. Pros of Asphalt Driveway
  • Very popular and easy to find materials/contractor
  • Completed in 1 day and you can drive on it after
  • Patches and small holes can be fixed fast
Cons of Asphalt Driveway
  • Easy to damage and cracks appear in few years
  • Almost everyone else has same surface
  • Oily surface and chemicals used in mix
Prepared for asphalt driveway will cost you around $5 per square foot to finish. The contractors that take care of entire process from taking out old driveway surface, install subsurface and compact the ground with new asphalt on top, will charge on average $5500 per regular size driveway at single home property.

2. Concrete

What we call concrete is a mixture of Portland cement, aggregate as well as sand with gravel. Suggested thickness of concrete for driveway is 6 inches. The mixture needs to cure without being touched or driven on top for several days. Pros of Concrete Driveway
  • Durable material for large weights
  • Long lifespan if installed properly
  • Winter and summer friendly
Cons of Concrete Driveway
  • Has marks and stains over time
  • Hard to repair without replacement
  • Super hard to DIY
To hire contractors for concrete driveway it will cost around $7-$9 per square foot. This will include site preparation with gravel spread and new concrete installation. They will order full truck of concrete (or several for larger driveways) to pour inside forming. Smoothening and curing is required after installation.

3. Paver Stone

The most luxurious material that you can use to create driveway path with is paver stone. It is made out of natural stone with uneven rough shapes that have different line patterns. Paver stones are very heavy and are perfect for weights on top of them. Almost every city in Europe has roads and walks made out of stone that were installed centuries ago. Pros of Paver Stone Driveway
  • Creative designs can be done
  • Personal looks, can match the house
  • Can replace single stone in minutes
Cons of Paver Stone Driveway
  • Weeds growing through
  • Stone can move over time
  • Most expensive material
There is wide selection of stone that can be purchased for your driveway. On average we recommend settling with $17-$20 per square foot for stone with installation included. Working with this material is very intense labor and we recommend hiring professionals that do this type of work every day.

4. Crushed Stone

Our readers sometimes mistake crushed stone with gravel, but this is not the same material. Crushed stone material is achieved when machine is mechanically crushing larger pieces of unused stone for this specific purpose. It is larger than gravel and can have smooth finish. Crushed stone can also have a mix of colors, which is much pleasant to eyes than gravel. Pros of Crushed Stone Driveway
  • Low maintenance required
  • Fits rural area style
  • Can be reused for other purposes
Cons of Crushed Stone Driveway
  • Gets very hot during summer
  • Can be messy after many drives
  • Hard to remove snow and ice
Buying crushed stone and installing it on your driveway is as easy as it gets. Similar to other rough materials discussed in this post, only small tools like shovels, dolly and buckets are required to spread it on the road. The cost of crushed stone driveway is between $4 and $6 per square foot from professional local contractors that can finish the job in several days.

5. Brick

The same brick we see being used in wall construction can be installed as top driveway surface. Brick is manufactured by compressing clay with plastic mass. It is heated to extreme temperature and dried up to become as solid as you know it. Pros of Brick Driveway
  • Variety of selections in shapes and shades
  • Bricks are recyclable
  • Slip resistant with rough top part
Cons of Brick Driveway
  • Needs regular maintenance
  • Change color over time
  • Old fashion looking
Installing brick on driveway costs $10 per square foot, which is not too far from masonry brick laying as part of the wall. To save money you can use or purchase old brick, that was part of a wall before. Do not mix these two jobs and contact landscaping professionals instead of masonry contractors that work with bricks.

6. Seashell

This material is popular on the coast line where shells can be found near the water. Construction companies use seashells to add in other materials as well as spread them on driveway in rough condition, without adding anything else. It usually comes in white or pearl color and darkens within year because of mixing with sand and dirt. Pros of Seashell Driveway
  • Environmentally friendly
  • Has natural drainage
  • Creates worm vibe of beach house
Cons of Seashell Driveway
  • Break and crack under light weight
  • Sharp and very hard to walk on
  • Gets stuck in shoes and tires
To deliver and spread seashells on driveways costs below $4, which is only slightly more expensive than rough gravel. As you go further from coast line, cost of material increases due to delivery. This material is elegant and very soft. We recommend adding edge lines with darker color landscape material to create visual path.

7. Gravel

This material is used in other construction mixes and underlayment systems. It’s literally fragments and small crushed stones that are put on top of soil. It is easily spread out by hands and anyone can do it. Pros of Gravel Driveway
  • Cheapest of them all
  • Easy DIY Job
  • Can install another material on top
Cons of Gravel Driveway
  • Needs to be graded very often
  • Will mix with dirt and leaves
  • Washes up with heavy rains
It is rough material and can be purchased in bulk (by metric tons or cubic meters). The cost of driveway with gravel should not exceed $3 per square foot, but you can save tons of money by purchasing materials and doings installation by yourself. You do not require specific tools or heavy equipment for the job and delivery of gravel can be arranged directly to your project.

Conclusion

To properly finish any and all of these driveways requires skills and experience. There is no way you can complete any of these projects without heavy equipment and tools that regular home owner’s just store in their garages. Most of those who will read this post will prefer to install asphalt driveway, because of its popularity and low costs. We want to encourage home owners to go for personal preference and what matches your house, rather than getting the most affordable and popular items. Driveway jobs have to be completed fast; otherwise you will need to park elsewhere while the project is running. To not overpay, ask us for quotation sample on material you prefer in specific region where the work need to be done and our team can provide some numbers.

Leave A Comment