Complete guide how to build shed

Complete Guide – How to Build a Shed with Steps and Costs

Last Updated: 2021-08-12By

Some homes are already purchased with shed and if not, home owners may look for extra space to put their tools and materials for outdoor work.

If you are used to keep everything in garage and you have plenty of space there, you may not even need a shed. Homes with limited spaces and lots that are limited to smaller garages are looking to build something for storage.

Sheds are simply put small houses that do not need heating and water lines. They are not meant to be occupied, but rather to store your belongings.

If you are a very handy person and have proper tools, building a shed will not be super difficult to do. For those home owners that want to hire a contractor for the job, we wanted to explain the process of work.

Here are the steps for building new shed:

  • Demolition
  • Excavation
  • Footings
  • Walls
  • Roof
  • Doors/windows
  • Electrical
  • Insulation
  • Finishing Touches
  • Exterior Finishes

Find suggested suppliers and installation contractors for how to build a shed estimate and full details. This is very simple structure that can be built by small contractor company. Take several estimates and see who is more reasonable on timing and explanation how they will proceed with work.

1. Demolition Starts First

Demolition of old shed to build new

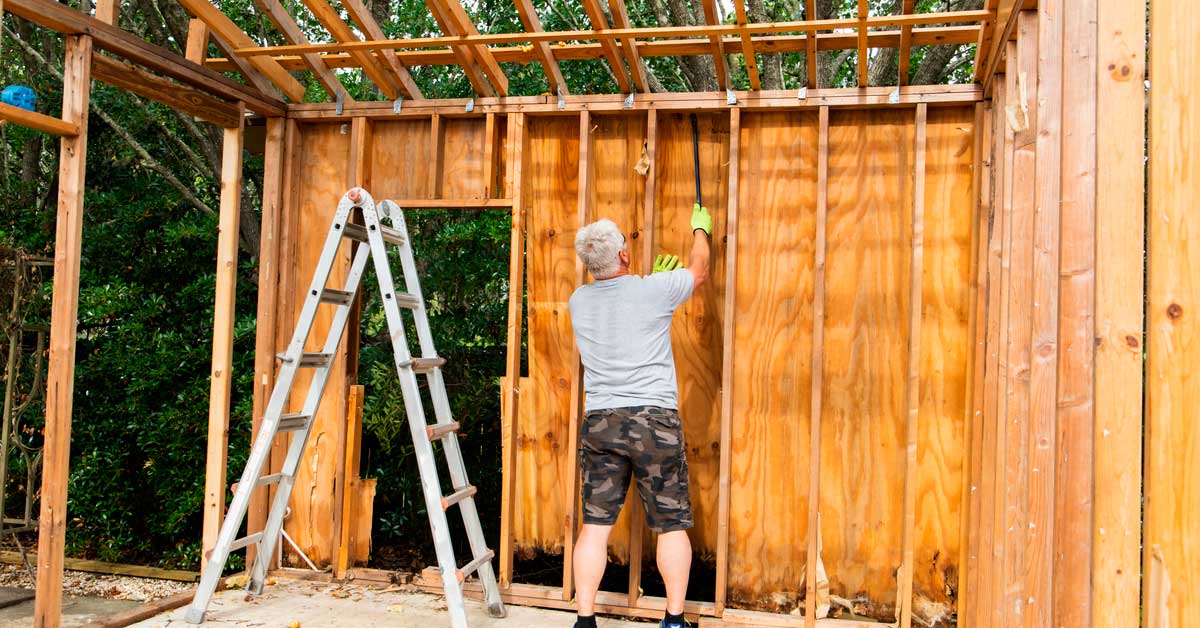
Man taking down old shed to replace with new.

Just like any other construction process, if there is anything on the way you need to demolish it. It’s a simple process to clear off the area where you are planning your new shed to be placed.

In 90% of situations there will be absolutely nothing on your way and you will not spend a dime on demolition. Or because the shed is not that big anyways, you can place it strategically so that no demolition is required.

Demolishing something on the way can be as easy as few hours’ work with hammer or can be complicated procedure with excavator and dozer. For more information on demolition process read an article that was posted by On Point Remodeling writers. Demolition is always the first step before discussing how to build shed at home with all costs.

2. Excavation For New Shed Positioning

You can never get absolutely flat and hard enough surfaces naturally to build something on top of it. The common practice in construction is to take top soil and dig down for foundation to be inside the ground. This way foundation will be held on all four sides by ground.

The good thing is that you do not need to dig deep at all. The width and length of excavation will depend on size of the shed you are planning to build. Depth should not be deeper than 6 to 10 inches.

This work can be easily done with a shovel within one day. To save some money on construction shed you can do it on weekend and substitute workout with digging.

3. Footings and foundation

The pad on which your entire shad will sit on is made of concrete footings and foundation. In some situations it’s poured together with rebar attached for strength. It is called slab on grade, which means your slab will be just above ground level.

Before pouring concrete into excavation you made, the ground has to be prepared. Usually we suggest tamping and evening the bottom of the whole. Lay down few inches of gravel and set up rebar.

This is the last mandatory step in how to build a shed. If you don’t want to build afterwards, there are plenty of options on prebuilt products. Be sure to make up your mind before concrete is poured, because the sizes have to match.

4. Walls Construction/Framing

On top of slab you can start framing or building exterior walls. Shed typically does not have any interior walls because of relatively small sizes.

The easiest and by far cheapest material for putting exterior walls is regular wood. You can buy it literally in any city at any hardware store. Some stores will even help you with exact material count.

Do not be afraid to ask for discounts, because there are ways you can save money and it does not cost to ask. If you have friends or family members in any construction or remodeling business they may already have account with suppliers that give contractor discounts.

You can build shed with blocks or poured concrete, but it does cost a lot more. It does not make sense to spend extra $5000 – $1000 just for exterior walls on small shed.

5. Roof Installation for Shed

All new structures need roof to protect interior from water coming inside with rains and snow during the winter.

You almost always want the roof of the shed to match with the roof of your house for the purpose of overall design.

Simple way to install roof on structure is with large siding panels or asphalt shingles. Make sure that whoever is working on roof is properly secured and trained to work at heights. Falling of the roof is the most common life threatening incident.

Do not forget the flushing, eaves and downspouts to divert the water from rains. Every drop that comes on roof should end up going through eaves and away from foundation of construction.

6. Doors/Windows/Skylight

At the time of framing you will be deciding where your doors and windows will be. Same goes for the windows and skylight if you plan to install any of those.

To save cost purchase very standard door and window from Home Depot or Lowes. They should always have windows and doors in stock with attached frame. Standard exterior door is 32 inches in width and 80 inches in height. Unless you want to spend tons of money, you should not look into custom doors and windows for new shed.

It is relatively easy to install new door and window for the shed. With screw driver and simple tools you should be able to install them in few hours. Skylight can be installed by roofers that will do your shingles.

7. Electrical Wiring

In new shed you will rarely need electricity in your shed. It will be very expensive to drag electrical line from house electrical panel towards how to build a shed overall costs.

First reason to have electricity line is for the lighting. It will be hard to see stored tools in all corners even during the day without proper lighting. To avoid these expenses we can suggest purchasing lighting that works on batteries.

Second reason to have electricity is to charge tools and equipment that you will be storing inside this shed. Once again you do not require electrical line if you can potentially get extension cord from your house.

8. Insulation of Walls and Roof

Beautiful built and decorated new shed

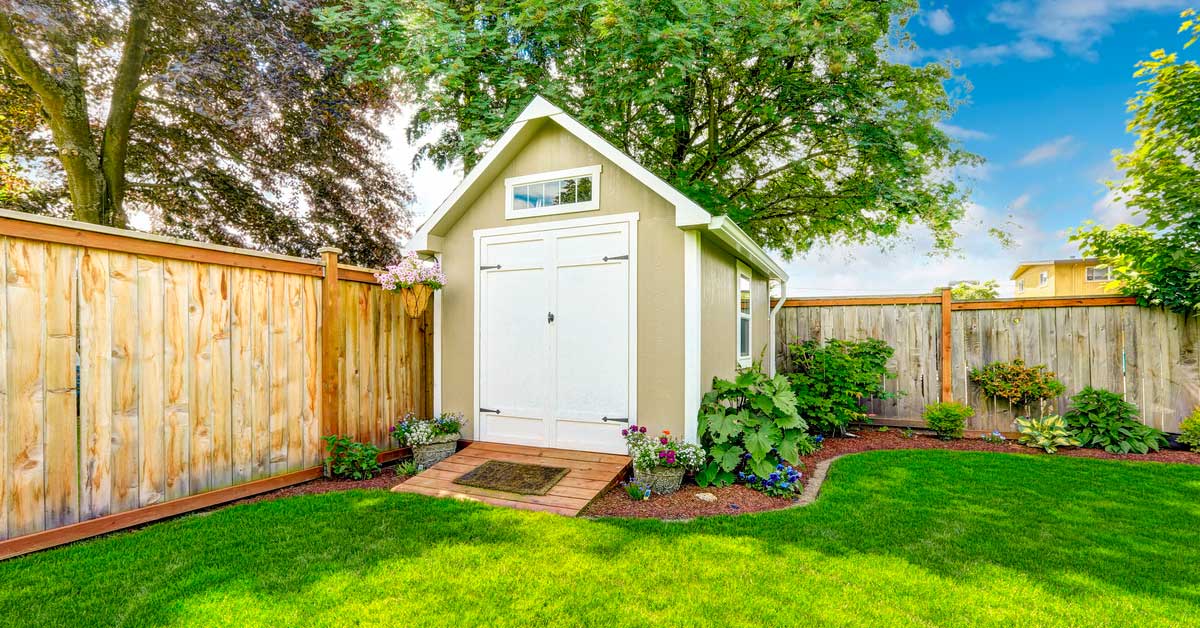
Completed construction of new shed and painted on exterior.

In colder regions there could be need to insulate the walls and ceiling of your shed. Normally home owners do not go through these expenses and extra work because there is no legal requirements and they plan to store inside the shed only things they barely use.

In reality insulation is very cheap and you can easily install insulation batts within few hours without even using any tools. It will make big difference if you are storing many liquids and materials that can easily freeze.

Otherwise you do not require insulation for shed. It’s only purpose is to keep interior slightly warmer then outside.

9. Finishing Inside the Shed

Inside of the shed is rarely finished, but some home owners go extra distance to make everything look pretty. Just like garage or similar storage space it interior could have tons of different finishes.

Installation of drywall, painting, polished concrete or even installation tiles can be considered as interior finishes of the shed.

Keep in mind that during the winter it will get cold and there is no internal heat source inside shed. Some finishing materials may get ruined with temperature change. In warmer states you can blow your mind and go crazy on decoration and finishes.

10. Exterior Finishes Details

On the outside of your new shed we recommend few types of finish options. If shed is built with concrete or block structure, there is not much you can do but to paint it on top.

In northern part of the country the main purpose of exterior finish is to protect everything from weather. Also installed materials on the walls will prevent from animals getting inside and making your shed their new home.

On Point Remodeling suggest installing cost effective siding or full metal sheets that are easily attached to walls. Beware that metal gets very hot and will create sauna effect inside the shed.

Costs for Building New Shed

Purchasing new shed is very easy and fast these days. Very small sheds can be bought in store for $600 and large is up to $2000.  Transportation and delivery will cost several hundred dollars. Building concrete pad to install new shed on top can cost up to $1000 In total.

Building new shed with contractor will cost double the money. Despite tested prefabricated materials and set on market, new constructed shed is more stable and can be definitely more attractive in design. Expect to spend $3000 – $6000 for building your shed.

Conclusion on How to Build a Shed

There are other options for storage without building a shed in your backyard. You can use spare rooms, basements storage area and car garage. Also instead of completely building new shed, there is an option to purchase prebuilt products from store.

The only problem is it will not be that steady and large enough. Also purchased shed may need to be put on concrete foundation, which means that first three steps have to be completed even if you buy it and deliver already finished shed.

editor's pick

latest video

news via inbox

Nulla turp dis cursus. Integer liberos  euismod pretium faucibua

Each building has some sort of driveway or at least should have. The main reason is for vehicles to come closer without need to walk all the way. Some homes are residential with small driveway for their car to come in and park before garage or front entrance, and others can be large commercial buildings with loading docks, delivery entrances and casual parking entrances. On Point Remodeling was asked for suggestions on residential driveway for new home construction, and we decided to write detailed article for all our readers. Using this guide you can select the material for your driveway and see what works for your budget. Here are the materials for driveway we will be discussing in our guide:
  • Asphalt
  • Concrete
  • Paver Stone
  • Crushed stone
  • Brick
  • Seashell
  • Gravel
To find good contractor for your driveway, you can either ask our team by email or try to find someone local that worked with neighbors or nearby buildings.

Installation process of any material surface on your driveway

a) Demolition and Excavation – Before anything is done, your contractor will get heavy machinery and scratch off old layer of driveway. They need to go down at least 5-6 inches to insure proper layering before your final layer of material is installed. b) Material Purchase and Delivery – At this point your contract is signed and you already know how the surface will look. Contracting company purchases necessary materials and delivers them to site. Double check if material is correct and not damaged. c) Preparation of Sublevel – Whatever you place as final material, it cannot just be installed directly on top soil. Gravel is the first choice of material that goes down at this stage. Other preferred material is screen sand that can go on top of gravel and works better with stone and bricks. d) Compaction of Ground – To prevent your driveway from moving and changing shapes, all the layers from bottom up have to be properly compacted. Do not leave any spot untouched while doing this or you can get small holes and cracks in driveway after installation. E) Final Installation – This is when all the magic happens. After all preparations and dirty work the final installation is made literally within hours and you can enjoy new driveway. Stone and brick is set up by hand, while other materials require some sort of machinery with manual labor to even out surface.

1. Asphalt

Probably the most used material for road top surfaces as well as driveways is asphalt. This is a mix of gravel and sand that is mixed in and combined by asphalt cement with crude oil. Pros of Asphalt Driveway
  • Very popular and easy to find materials/contractor
  • Completed in 1 day and you can drive on it after
  • Patches and small holes can be fixed fast
Cons of Asphalt Driveway
  • Easy to damage and cracks appear in few years
  • Almost everyone else has same surface
  • Oily surface and chemicals used in mix
Prepared for asphalt driveway will cost you around $5 per square foot to finish. The contractors that take care of entire process from taking out old driveway surface, install subsurface and compact the ground with new asphalt on top, will charge on average $5500 per regular size driveway at single home property.

2. Concrete

What we call concrete is a mixture of Portland cement, aggregate as well as sand with gravel. Suggested thickness of concrete for driveway is 6 inches. The mixture needs to cure without being touched or driven on top for several days. Pros of Concrete Driveway
  • Durable material for large weights
  • Long lifespan if installed properly
  • Winter and summer friendly
Cons of Concrete Driveway
  • Has marks and stains over time
  • Hard to repair without replacement
  • Super hard to DIY
To hire contractors for concrete driveway it will cost around $7-$9 per square foot. This will include site preparation with gravel spread and new concrete installation. They will order full truck of concrete (or several for larger driveways) to pour inside forming. Smoothening and curing is required after installation.

3. Paver Stone

The most luxurious material that you can use to create driveway path with is paver stone. It is made out of natural stone with uneven rough shapes that have different line patterns. Paver stones are very heavy and are perfect for weights on top of them. Almost every city in Europe has roads and walks made out of stone that were installed centuries ago. Pros of Paver Stone Driveway
  • Creative designs can be done
  • Personal looks, can match the house
  • Can replace single stone in minutes
Cons of Paver Stone Driveway
  • Weeds growing through
  • Stone can move over time
  • Most expensive material
There is wide selection of stone that can be purchased for your driveway. On average we recommend settling with $17-$20 per square foot for stone with installation included. Working with this material is very intense labor and we recommend hiring professionals that do this type of work every day.

4. Crushed Stone

Our readers sometimes mistake crushed stone with gravel, but this is not the same material. Crushed stone material is achieved when machine is mechanically crushing larger pieces of unused stone for this specific purpose. It is larger than gravel and can have smooth finish. Crushed stone can also have a mix of colors, which is much pleasant to eyes than gravel. Pros of Crushed Stone Driveway
  • Low maintenance required
  • Fits rural area style
  • Can be reused for other purposes
Cons of Crushed Stone Driveway
  • Gets very hot during summer
  • Can be messy after many drives
  • Hard to remove snow and ice
Buying crushed stone and installing it on your driveway is as easy as it gets. Similar to other rough materials discussed in this post, only small tools like shovels, dolly and buckets are required to spread it on the road. The cost of crushed stone driveway is between $4 and $6 per square foot from professional local contractors that can finish the job in several days.

5. Brick

The same brick we see being used in wall construction can be installed as top driveway surface. Brick is manufactured by compressing clay with plastic mass. It is heated to extreme temperature and dried up to become as solid as you know it. Pros of Brick Driveway
  • Variety of selections in shapes and shades
  • Bricks are recyclable
  • Slip resistant with rough top part
Cons of Brick Driveway
  • Needs regular maintenance
  • Change color over time
  • Old fashion looking
Installing brick on driveway costs $10 per square foot, which is not too far from masonry brick laying as part of the wall. To save money you can use or purchase old brick, that was part of a wall before. Do not mix these two jobs and contact landscaping professionals instead of masonry contractors that work with bricks.

6. Seashell

This material is popular on the coast line where shells can be found near the water. Construction companies use seashells to add in other materials as well as spread them on driveway in rough condition, without adding anything else. It usually comes in white or pearl color and darkens within year because of mixing with sand and dirt. Pros of Seashell Driveway
  • Environmentally friendly
  • Has natural drainage
  • Creates worm vibe of beach house
Cons of Seashell Driveway
  • Break and crack under light weight
  • Sharp and very hard to walk on
  • Gets stuck in shoes and tires
To deliver and spread seashells on driveways costs below $4, which is only slightly more expensive than rough gravel. As you go further from coast line, cost of material increases due to delivery. This material is elegant and very soft. We recommend adding edge lines with darker color landscape material to create visual path.

7. Gravel

This material is used in other construction mixes and underlayment systems. It’s literally fragments and small crushed stones that are put on top of soil. It is easily spread out by hands and anyone can do it. Pros of Gravel Driveway
  • Cheapest of them all
  • Easy DIY Job
  • Can install another material on top
Cons of Gravel Driveway
  • Needs to be graded very often
  • Will mix with dirt and leaves
  • Washes up with heavy rains
It is rough material and can be purchased in bulk (by metric tons or cubic meters). The cost of driveway with gravel should not exceed $3 per square foot, but you can save tons of money by purchasing materials and doings installation by yourself. You do not require specific tools or heavy equipment for the job and delivery of gravel can be arranged directly to your project.

Conclusion

To properly finish any and all of these driveways requires skills and experience. There is no way you can complete any of these projects without heavy equipment and tools that regular home owner’s just store in their garages. Most of those who will read this post will prefer to install asphalt driveway, because of its popularity and low costs. We want to encourage home owners to go for personal preference and what matches your house, rather than getting the most affordable and popular items. Driveway jobs have to be completed fast; otherwise you will need to park elsewhere while the project is running. To not overpay, ask us for quotation sample on material you prefer in specific region where the work need to be done and our team can provide some numbers.

Leave A Comment