Second Floor Addition

Partial Second Story Addition

Last Updated: 2022-02-16By

Home owners of bungalow at some point in time can start thinking of adding extra space to their house instead of moving elsewhere.

One of those options is full or partial second story addition. This can give desired extra space for home with bedroom or even few bedrooms on newly added second floor.

Partial second story addition is great option for homes with small lots that cannot expand towards either side or rear.

This is a great alternative for home owners that want to stick to original location due to work, kid’s school or other important attachment and extend home space.

[instagram-feed]

Cost of Partial Second Story Addition

Average cost to add partial second story addition to existing bungalow is between $200 and $300 per square foot.

This varies due to size, location and method of construction involved in process. For exact quotes contact local general contractor or ask Remodel On Point team for suggested builder.

It’s not a secret that larger size additions or builds end up costing less per square foot. Our situation is opposite and the small the addition, the more it will cost per square foot.

Custom construction is approximately 20% -30% more expensive than modular addition, but they end up with better finishes and custom attributes.

Why Commit to Partial Second Story Addition

If adding extra space on top, why not just do full second floor full blown out addition? It will cost less per square foot and give way more space.

There are three reasons we can think of to do partial second story addition:

  • Size limit on lot
  • Budget is set
  • Don’t need bigger

Upgrading home is an important commitment that not everyone is capable of. Keeping old house in place and adding extra space on top is risky. But let’s talk about why to add only partial second story.

Size limit on lot – each property has maximum potential home that is allowed by the city. Besides lot coverage, there is also a limit for combined square footage.

If your lot is small, doubling home square footage may not be even possible and you would be only allowed to add partial second story.

Budget is set – despite larger projects being cheaper per square foot, everyone has their maximum to spend.

It could be desirable for most home owners to add more space on top, but not everyone has ability to spend hundreds of thousands dollars.

We recommend against getting deeply in depth for overbuilding homes or adding more space that will be used.

Don’t need bigger – we always assume that bigger is better but in reality not everyone is eager to get more bedrooms upstairs.

Especially for older couples that have grown up kids, who have already nested elsewhere. If your bungalow is already 1000 sq ft or bigger, another 500-600 sq ft on top could be more than enough for a bedroom or two with unsuits.

Building Option for Partial Second Story Addition

There are two methods of adding extra space to existing structure. Both of them have pros and cons. Less populated and developed area may not have availability for modular home addition option.

Although it does gain more and more popularity in USA and other countries, manufacturers are not willing to deliver prebuilt homes far from their warehouse.

  • Custom Addition
  • Modular Addition

Take a look at each problem as well as benefit for home addition and decide which way you are going to take. Get few quotes from nearby companies and ask them why they are better solution.

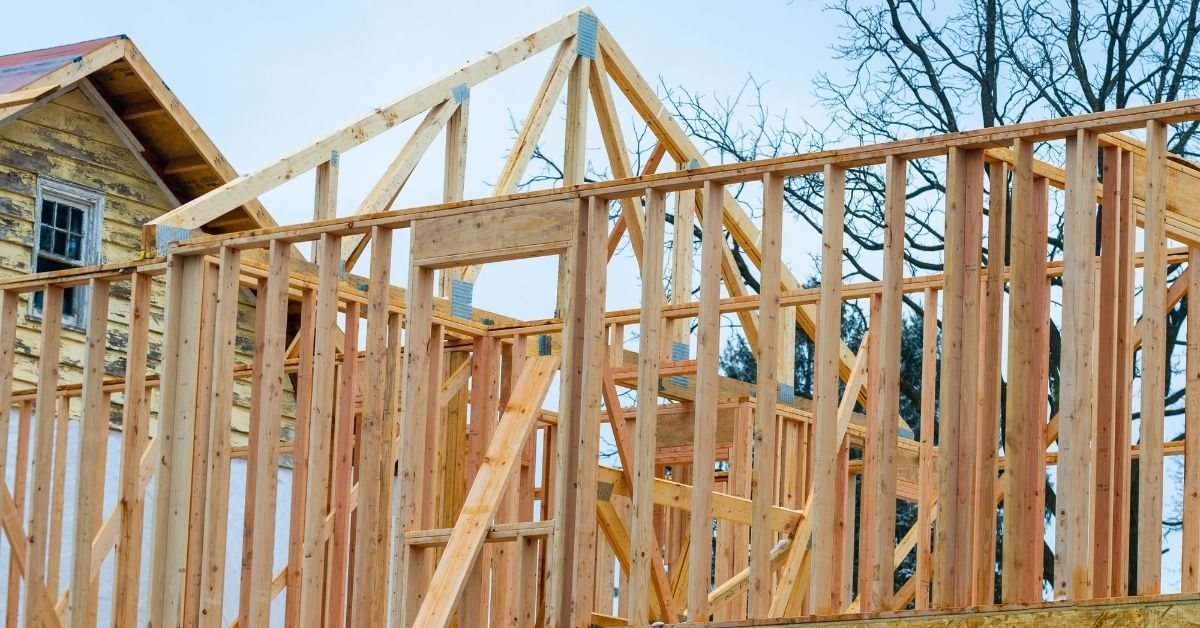
Custom Addition – pretty simple technique used since early days of construction. After design is completed, a team starts working on the project directly on jobsite.

At first, workers remove part of the roof, trusses and rest of existing parts that are in the way of addition. Partial second story is either framed or built with blocks/concrete on top of bungalow.

To build it and finish inside, it may take up to 2 – 4 month. Constant protection for rest of the home is required unless everything else is being renovated throughout.

Entire project (including interior and exterior) can be completely customized and built as you wish.

Don’t plan on living inside of the house while second story work is performed.

Modular Addition – alternative to regular addition projects that take too long and cost too much to complete.

Large manufacturing companies design and prebuilt entire addition structure in their warehouse. Then it is transported in once or several pieces to jobsite on large trucks and assembled there within few days.

Modular partial second story addition projects allow home owners to continue living inside the house until the day of installation. Take a long weekend off and come back to completely new house.

Modular constructions allow saving money. It’s built under warehouse roof by trained crew based on template home. Some parts can be modified but for the most you will be limited in selections.

Do You Need to Renovate Existing Home?

During second home addition project, it is always uncertain whether existing part of the house needs to be renovated or can it be kept as is.

It does make sense to upgrade house or parts of it, if original construction or last renovation was performed more than 30-50 years ago.

These are 4 main factors that dictate amount of openings and renovation extent of existing home:

  • Roof and Structural
  • HVAC or Heating
  • Electrical Wiring
  • Plumbing Pipes

To avoid large openings in the walls, closets or small portions of house next to the wall are dedicated to extending communications for new partial second story addition.

Roof and Structural – old house structure may need additional supports to withstand extra weight added on second floor.

Upgrades can involve adjustment or strength increase for foundation walls, interior load bearing posts and even new concrete footings.

Structural engineers determine maximum capacity load and necessary structural changes to existing home.

HVAC or Heating – Each added room needs to be heated as per building code or basic home functionality.

Unfortunately radiator and HVAC lines mostly run in central walls of the house with main heating source located at the bottom.

To avoid extension of current HVAC and radiator lines with large openings throughout the house there is always an option to install additional boiler or furnace separately for new second story space.

Electrical Wiring – this is the biggest problem of them all when adding extra space on top of house. Electrical wires run through house like veins through entire body system.

Simply cutting them and reconnecting is against logic and all building codes. Every light, switch and receptacle wire that is damaged needs to be replaced all the way from electrical panel.

Plumbing Pipes – if you are planning to add only living space without bathrooms or laundry rooms, all should be fine.

However whenever there is new bathroom added, water and drain pipes are to be added. We always recommend installation of plumbing inside interior walls instead of exterior.

To make things clear we are just going to say that even partial second story addition is better off with full gut remodeling of existing home to upgrade old wiring, plumbing lines and heating.

You are adding extra space for a reason to live here for a long time. Why risk having problems down the line if you can fix it now?

Issues with Partial Second Story Addition

Complicated project always have some type of issues to work around. Experienced contractors and companies know what they are dealing with and are prepared for a challenge.

For first time second story addition we decided to list few issues that are common in process:

  • Protecting existing property
  • Cost per square foot is high
  • Different exterior
  • Need to live somewhere
  • Check the footings for extra weight
  • Keeping Half of Existing Roof
  • Building new stairs up

Having great architect on your side is always helpful. They can solve most of problems on paper before work begins.

Don’t attempt doing it on your own unless years of experience have been obtained from previous projects.

editor's pick

latest video

news via inbox

Nulla turp dis cursus. Integer liberos  euismod pretium faucibua

Each building has some sort of driveway or at least should have. The main reason is for vehicles to come closer without need to walk all the way. Some homes are residential with small driveway for their car to come in and park before garage or front entrance, and others can be large commercial buildings with loading docks, delivery entrances and casual parking entrances. On Point Remodeling was asked for suggestions on residential driveway for new home construction, and we decided to write detailed article for all our readers. Using this guide you can select the material for your driveway and see what works for your budget. Here are the materials for driveway we will be discussing in our guide:
  • Asphalt
  • Concrete
  • Paver Stone
  • Crushed stone
  • Brick
  • Seashell
  • Gravel
To find good contractor for your driveway, you can either ask our team by email or try to find someone local that worked with neighbors or nearby buildings.

Installation process of any material surface on your driveway

a) Demolition and Excavation – Before anything is done, your contractor will get heavy machinery and scratch off old layer of driveway. They need to go down at least 5-6 inches to insure proper layering before your final layer of material is installed. b) Material Purchase and Delivery – At this point your contract is signed and you already know how the surface will look. Contracting company purchases necessary materials and delivers them to site. Double check if material is correct and not damaged. c) Preparation of Sublevel – Whatever you place as final material, it cannot just be installed directly on top soil. Gravel is the first choice of material that goes down at this stage. Other preferred material is screen sand that can go on top of gravel and works better with stone and bricks. d) Compaction of Ground – To prevent your driveway from moving and changing shapes, all the layers from bottom up have to be properly compacted. Do not leave any spot untouched while doing this or you can get small holes and cracks in driveway after installation. E) Final Installation – This is when all the magic happens. After all preparations and dirty work the final installation is made literally within hours and you can enjoy new driveway. Stone and brick is set up by hand, while other materials require some sort of machinery with manual labor to even out surface.

1. Asphalt

Probably the most used material for road top surfaces as well as driveways is asphalt. This is a mix of gravel and sand that is mixed in and combined by asphalt cement with crude oil. Pros of Asphalt Driveway
  • Very popular and easy to find materials/contractor
  • Completed in 1 day and you can drive on it after
  • Patches and small holes can be fixed fast
Cons of Asphalt Driveway
  • Easy to damage and cracks appear in few years
  • Almost everyone else has same surface
  • Oily surface and chemicals used in mix
Prepared for asphalt driveway will cost you around $5 per square foot to finish. The contractors that take care of entire process from taking out old driveway surface, install subsurface and compact the ground with new asphalt on top, will charge on average $5500 per regular size driveway at single home property.

2. Concrete

What we call concrete is a mixture of Portland cement, aggregate as well as sand with gravel. Suggested thickness of concrete for driveway is 6 inches. The mixture needs to cure without being touched or driven on top for several days. Pros of Concrete Driveway
  • Durable material for large weights
  • Long lifespan if installed properly
  • Winter and summer friendly
Cons of Concrete Driveway
  • Has marks and stains over time
  • Hard to repair without replacement
  • Super hard to DIY
To hire contractors for concrete driveway it will cost around $7-$9 per square foot. This will include site preparation with gravel spread and new concrete installation. They will order full truck of concrete (or several for larger driveways) to pour inside forming. Smoothening and curing is required after installation.

3. Paver Stone

The most luxurious material that you can use to create driveway path with is paver stone. It is made out of natural stone with uneven rough shapes that have different line patterns. Paver stones are very heavy and are perfect for weights on top of them. Almost every city in Europe has roads and walks made out of stone that were installed centuries ago. Pros of Paver Stone Driveway
  • Creative designs can be done
  • Personal looks, can match the house
  • Can replace single stone in minutes
Cons of Paver Stone Driveway
  • Weeds growing through
  • Stone can move over time
  • Most expensive material
There is wide selection of stone that can be purchased for your driveway. On average we recommend settling with $17-$20 per square foot for stone with installation included. Working with this material is very intense labor and we recommend hiring professionals that do this type of work every day.

4. Crushed Stone

Our readers sometimes mistake crushed stone with gravel, but this is not the same material. Crushed stone material is achieved when machine is mechanically crushing larger pieces of unused stone for this specific purpose. It is larger than gravel and can have smooth finish. Crushed stone can also have a mix of colors, which is much pleasant to eyes than gravel. Pros of Crushed Stone Driveway
  • Low maintenance required
  • Fits rural area style
  • Can be reused for other purposes
Cons of Crushed Stone Driveway
  • Gets very hot during summer
  • Can be messy after many drives
  • Hard to remove snow and ice
Buying crushed stone and installing it on your driveway is as easy as it gets. Similar to other rough materials discussed in this post, only small tools like shovels, dolly and buckets are required to spread it on the road. The cost of crushed stone driveway is between $4 and $6 per square foot from professional local contractors that can finish the job in several days.

5. Brick

The same brick we see being used in wall construction can be installed as top driveway surface. Brick is manufactured by compressing clay with plastic mass. It is heated to extreme temperature and dried up to become as solid as you know it. Pros of Brick Driveway
  • Variety of selections in shapes and shades
  • Bricks are recyclable
  • Slip resistant with rough top part
Cons of Brick Driveway
  • Needs regular maintenance
  • Change color over time
  • Old fashion looking
Installing brick on driveway costs $10 per square foot, which is not too far from masonry brick laying as part of the wall. To save money you can use or purchase old brick, that was part of a wall before. Do not mix these two jobs and contact landscaping professionals instead of masonry contractors that work with bricks.

6. Seashell

This material is popular on the coast line where shells can be found near the water. Construction companies use seashells to add in other materials as well as spread them on driveway in rough condition, without adding anything else. It usually comes in white or pearl color and darkens within year because of mixing with sand and dirt. Pros of Seashell Driveway
  • Environmentally friendly
  • Has natural drainage
  • Creates worm vibe of beach house
Cons of Seashell Driveway
  • Break and crack under light weight
  • Sharp and very hard to walk on
  • Gets stuck in shoes and tires
To deliver and spread seashells on driveways costs below $4, which is only slightly more expensive than rough gravel. As you go further from coast line, cost of material increases due to delivery. This material is elegant and very soft. We recommend adding edge lines with darker color landscape material to create visual path.

7. Gravel

This material is used in other construction mixes and underlayment systems. It’s literally fragments and small crushed stones that are put on top of soil. It is easily spread out by hands and anyone can do it. Pros of Gravel Driveway
  • Cheapest of them all
  • Easy DIY Job
  • Can install another material on top
Cons of Gravel Driveway
  • Needs to be graded very often
  • Will mix with dirt and leaves
  • Washes up with heavy rains
It is rough material and can be purchased in bulk (by metric tons or cubic meters). The cost of driveway with gravel should not exceed $3 per square foot, but you can save tons of money by purchasing materials and doings installation by yourself. You do not require specific tools or heavy equipment for the job and delivery of gravel can be arranged directly to your project.

Conclusion

To properly finish any and all of these driveways requires skills and experience. There is no way you can complete any of these projects without heavy equipment and tools that regular home owner’s just store in their garages. Most of those who will read this post will prefer to install asphalt driveway, because of its popularity and low costs. We want to encourage home owners to go for personal preference and what matches your house, rather than getting the most affordable and popular items. Driveway jobs have to be completed fast; otherwise you will need to park elsewhere while the project is running. To not overpay, ask us for quotation sample on material you prefer in specific region where the work need to be done and our team can provide some numbers.

Leave A Comment