Toilet Flange

Why is Toilet Flange Too High and How to Fix it?

Last Updated: 2022-02-16By

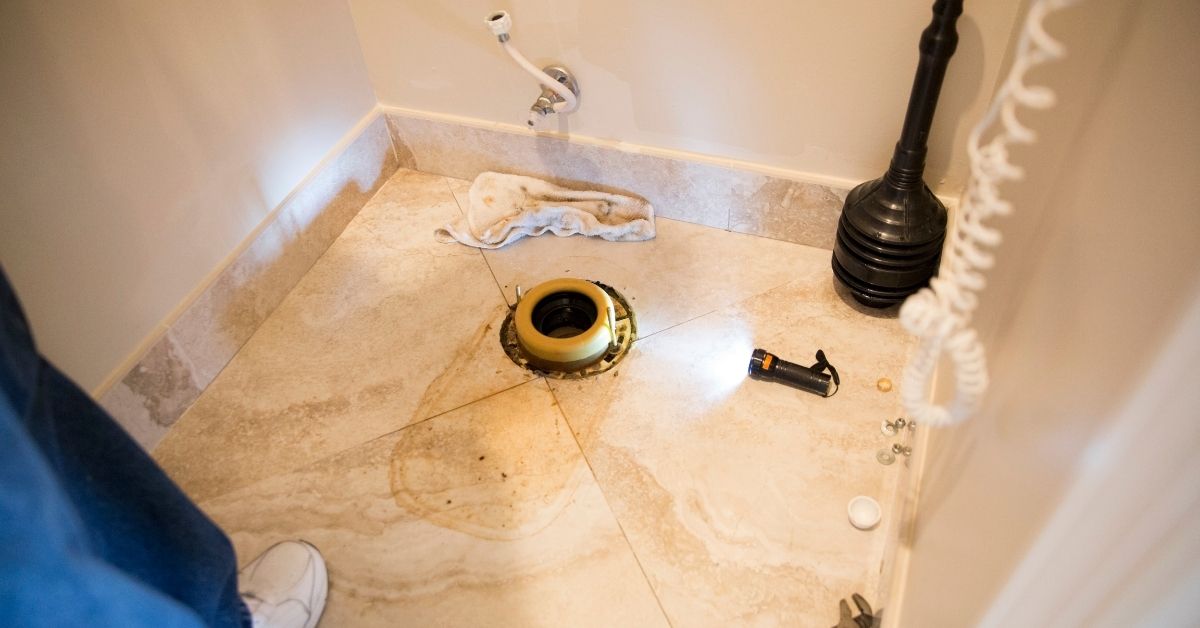
Imagine walking into bathroom after remodeling and seeing toilet drain flange sticking out of the floor and it seems to be too high.

This issue is common to see in old house bathroom remodeling jobs. Inexperienced project managers and general contractors don’t need to panic because there is always a solution with easy fix.

Immediately there will be questions such as:

  1. What Caused Toilet Flange to be Too High?
  2. Immediate and Cost Effective Fixes
  3. What Are Potential Problems with High Flange?

Remodel On Point team wants to tackle these questions and give detailed information to all home owners or general contractors that are in beginning of career path.

What Causes Toilet Flange to be Too High?

Smart remodeling companies always get to the root cause of an issue to prevent reoccurrence. We don’t want to blame anyone, but preventing an issue before it happens is the easiest way to save money.

3 Main Causes for Flange Being too High

  • Plumber Installed Drain Too High
  • Defected Flange or Connection
  • Multiple Layers of Floor Tiles

Understanding what to look for before starting remodeling project is going to save time and money. More so, knowledgeable salesman can use all information to sign the project.

[instagram-feed]

Plumber Installed Drain Too High – Replacing old drain with new has few stages. During rough ins, new drain pipe is installed usually higher than it will end up. It’s easier for everyone to work around it and cut pipe later in the process.

Don’t throw plumbers under the bus yet. Everyone works differently, and supervisor on jobsite should remind expectations and all details that workers need to comply with.

Just remind them to cut it down and let plumbers know exact thickness of tiles with cement mix.

Defected Flange or Connection – Every material has defects or issues at work. It may not be often, but once in a blue moon we see defected flanges that don’t go that easy on drain pipe no matter how we try.

If everything was done properly, replacement of flange piece would solve everything. Regular flange costs around $10 and can go as high as $50 for high end toilets.

Stay away from anything under that price or you will have issues with height and connection.

Multiple Layers of Floor Tiles – Older homes have layers over layers of flooring and tiles. This is because during previous project contractors wanted to save money, and installed layer of tiles on top without demolishing it first.

Now when we remove everything properly and put only one tile on the floor, flange would be about 1 inch higher than its supposed to be.

Simple Fix When Toilet Flange Too High

Those who are reading this article probably have their flange installed too high and now looking for a simple solution.

You can do it on your own or call handyman and have it fixed easily.

Here are fixes we propose for flange fix:

  • Replace Flange
  • Cut Down Pipe
  • Raise The Floor

Each above stated fix does not cost more than $50 even if you pay someone to do it. Although plumber or tile installed are able to include it in their scope of work without extras.

Replace Flange – the easiest and cheapest solution is obviously to replace defected flange. Any plumbing supplier or hardware store sells them and its super easy to replace.

New flange should fit perfectly 3 inch drain pipe and be on the same level or slightly lower than floor tiles.

Cut Down Pipe – realizing issue down the line makes everything harder to adjust. If pipe is too big and you already put flange on it with tiles around, you my friend have an issue.

Now you need to take everything apart and cut down drain pipe for it to have flange connection below floor level.

Few tiles may need to be taken out for plumber to cut the drain and readjust toilet connection.

Raise The Floor – If you cannot move the flange down, move the floor up. Not the easiest solution after the tiles are installed. That would mean installing extra level of tile or taking of those you just laid.

If you found out that flange is too high before tiling, guys can fix it by increasing amount of cement to raise the floor up.

It would cost just one more hour of labor and several bags of concrete mix.

What Happens if You Don’t Fix It?

What is the worst that can happen? Actually small details like this can lead to thousands of dollars in fixes later on if not addressed immediately.

  • Toilet is Unstable
  • Looks Horrible with Gap
  • Water Leaking

Every small issue during construction transforms into something bigger every day. Trades are not happy when they are called for fixes and can charge hundreds of dollars per visit.

Toilet is Unstable – When flange is too high, installation of toilet won’t be as tight. Bottom will not reach floor level and connection is not going to be secure.

Imagine that your toilet will be on tiny piper pedestal and can pivot from side to side.

In worst case scenario toilet will fall on side and break into pieces. Hopefully no one would be using it at the time.

Looks Horrible with Gap – This is not the way proper bathroom remodeling would should flow. You are paying money and expecting work to be ideal.

A whole inch of extra space between toilet and tiled floor is way too much and it must be fixed immediately. Silicon or grout in the gap are not the solutions we recommend.

Water Leaking – Every unsecured plumbing connection has potential of water sipping through. Drain pipe for toilet is 3 inches wide with lots of water flushed under pressure.

Water on bathroom floor can damage vanity, door, frame and baseboards. If not stopped water would go even further through subfloor, damaging ceiling of below levels.

editor's pick

latest video

news via inbox

Nulla turp dis cursus. Integer liberos  euismod pretium faucibua

Each building has some sort of driveway or at least should have. The main reason is for vehicles to come closer without need to walk all the way. Some homes are residential with small driveway for their car to come in and park before garage or front entrance, and others can be large commercial buildings with loading docks, delivery entrances and casual parking entrances. On Point Remodeling was asked for suggestions on residential driveway for new home construction, and we decided to write detailed article for all our readers. Using this guide you can select the material for your driveway and see what works for your budget. Here are the materials for driveway we will be discussing in our guide:
  • Asphalt
  • Concrete
  • Paver Stone
  • Crushed stone
  • Brick
  • Seashell
  • Gravel
To find good contractor for your driveway, you can either ask our team by email or try to find someone local that worked with neighbors or nearby buildings.

Installation process of any material surface on your driveway

a) Demolition and Excavation – Before anything is done, your contractor will get heavy machinery and scratch off old layer of driveway. They need to go down at least 5-6 inches to insure proper layering before your final layer of material is installed. b) Material Purchase and Delivery – At this point your contract is signed and you already know how the surface will look. Contracting company purchases necessary materials and delivers them to site. Double check if material is correct and not damaged. c) Preparation of Sublevel – Whatever you place as final material, it cannot just be installed directly on top soil. Gravel is the first choice of material that goes down at this stage. Other preferred material is screen sand that can go on top of gravel and works better with stone and bricks. d) Compaction of Ground – To prevent your driveway from moving and changing shapes, all the layers from bottom up have to be properly compacted. Do not leave any spot untouched while doing this or you can get small holes and cracks in driveway after installation. E) Final Installation – This is when all the magic happens. After all preparations and dirty work the final installation is made literally within hours and you can enjoy new driveway. Stone and brick is set up by hand, while other materials require some sort of machinery with manual labor to even out surface.

1. Asphalt

Probably the most used material for road top surfaces as well as driveways is asphalt. This is a mix of gravel and sand that is mixed in and combined by asphalt cement with crude oil. Pros of Asphalt Driveway
  • Very popular and easy to find materials/contractor
  • Completed in 1 day and you can drive on it after
  • Patches and small holes can be fixed fast
Cons of Asphalt Driveway
  • Easy to damage and cracks appear in few years
  • Almost everyone else has same surface
  • Oily surface and chemicals used in mix
Prepared for asphalt driveway will cost you around $5 per square foot to finish. The contractors that take care of entire process from taking out old driveway surface, install subsurface and compact the ground with new asphalt on top, will charge on average $5500 per regular size driveway at single home property.

2. Concrete

What we call concrete is a mixture of Portland cement, aggregate as well as sand with gravel. Suggested thickness of concrete for driveway is 6 inches. The mixture needs to cure without being touched or driven on top for several days. Pros of Concrete Driveway
  • Durable material for large weights
  • Long lifespan if installed properly
  • Winter and summer friendly
Cons of Concrete Driveway
  • Has marks and stains over time
  • Hard to repair without replacement
  • Super hard to DIY
To hire contractors for concrete driveway it will cost around $7-$9 per square foot. This will include site preparation with gravel spread and new concrete installation. They will order full truck of concrete (or several for larger driveways) to pour inside forming. Smoothening and curing is required after installation.

3. Paver Stone

The most luxurious material that you can use to create driveway path with is paver stone. It is made out of natural stone with uneven rough shapes that have different line patterns. Paver stones are very heavy and are perfect for weights on top of them. Almost every city in Europe has roads and walks made out of stone that were installed centuries ago. Pros of Paver Stone Driveway
  • Creative designs can be done
  • Personal looks, can match the house
  • Can replace single stone in minutes
Cons of Paver Stone Driveway
  • Weeds growing through
  • Stone can move over time
  • Most expensive material
There is wide selection of stone that can be purchased for your driveway. On average we recommend settling with $17-$20 per square foot for stone with installation included. Working with this material is very intense labor and we recommend hiring professionals that do this type of work every day.

4. Crushed Stone

Our readers sometimes mistake crushed stone with gravel, but this is not the same material. Crushed stone material is achieved when machine is mechanically crushing larger pieces of unused stone for this specific purpose. It is larger than gravel and can have smooth finish. Crushed stone can also have a mix of colors, which is much pleasant to eyes than gravel. Pros of Crushed Stone Driveway
  • Low maintenance required
  • Fits rural area style
  • Can be reused for other purposes
Cons of Crushed Stone Driveway
  • Gets very hot during summer
  • Can be messy after many drives
  • Hard to remove snow and ice
Buying crushed stone and installing it on your driveway is as easy as it gets. Similar to other rough materials discussed in this post, only small tools like shovels, dolly and buckets are required to spread it on the road. The cost of crushed stone driveway is between $4 and $6 per square foot from professional local contractors that can finish the job in several days.

5. Brick

The same brick we see being used in wall construction can be installed as top driveway surface. Brick is manufactured by compressing clay with plastic mass. It is heated to extreme temperature and dried up to become as solid as you know it. Pros of Brick Driveway
  • Variety of selections in shapes and shades
  • Bricks are recyclable
  • Slip resistant with rough top part
Cons of Brick Driveway
  • Needs regular maintenance
  • Change color over time
  • Old fashion looking
Installing brick on driveway costs $10 per square foot, which is not too far from masonry brick laying as part of the wall. To save money you can use or purchase old brick, that was part of a wall before. Do not mix these two jobs and contact landscaping professionals instead of masonry contractors that work with bricks.

6. Seashell

This material is popular on the coast line where shells can be found near the water. Construction companies use seashells to add in other materials as well as spread them on driveway in rough condition, without adding anything else. It usually comes in white or pearl color and darkens within year because of mixing with sand and dirt. Pros of Seashell Driveway
  • Environmentally friendly
  • Has natural drainage
  • Creates worm vibe of beach house
Cons of Seashell Driveway
  • Break and crack under light weight
  • Sharp and very hard to walk on
  • Gets stuck in shoes and tires
To deliver and spread seashells on driveways costs below $4, which is only slightly more expensive than rough gravel. As you go further from coast line, cost of material increases due to delivery. This material is elegant and very soft. We recommend adding edge lines with darker color landscape material to create visual path.

7. Gravel

This material is used in other construction mixes and underlayment systems. It’s literally fragments and small crushed stones that are put on top of soil. It is easily spread out by hands and anyone can do it. Pros of Gravel Driveway
  • Cheapest of them all
  • Easy DIY Job
  • Can install another material on top
Cons of Gravel Driveway
  • Needs to be graded very often
  • Will mix with dirt and leaves
  • Washes up with heavy rains
It is rough material and can be purchased in bulk (by metric tons or cubic meters). The cost of driveway with gravel should not exceed $3 per square foot, but you can save tons of money by purchasing materials and doings installation by yourself. You do not require specific tools or heavy equipment for the job and delivery of gravel can be arranged directly to your project.

Conclusion

To properly finish any and all of these driveways requires skills and experience. There is no way you can complete any of these projects without heavy equipment and tools that regular home owner’s just store in their garages. Most of those who will read this post will prefer to install asphalt driveway, because of its popularity and low costs. We want to encourage home owners to go for personal preference and what matches your house, rather than getting the most affordable and popular items. Driveway jobs have to be completed fast; otherwise you will need to park elsewhere while the project is running. To not overpay, ask us for quotation sample on material you prefer in specific region where the work need to be done and our team can provide some numbers.

Leave A Comment