How long does it take to frame a house

How Long Does it Take to Frame a House For Average Project

Last Updated: 2021-08-12By

It takes on average 23 working days to frame 3000 sq ft house by crew of five carpenters. It includes entire carpenter’s work for new build with completion of roof and back framing for ducts and bulkheads. Schedule can be extended due to weather condition, complexity of project and late delivery of materials.

This information can be used by home owners or contractors that are planning new build project. You can clearly understand how professional carpenters spend proceed and time in requires for each step. This table although is very accurate can be off if crew has more workers or less experienced framers are completing new house

Here is a chart of how long does it take to frame a house by experienced crew:

2000 sq ft House3000 sq ft House4000 sq ft House
Preparation2 Days2 Days2 Days
Subfloor2 Days3 Days4 Days
Main Floor Walls2 Days2 Days3 Days
2nd Floor Base2 Days2 Days3 Days
2nd Floor Walls3 Days4 Days5 Days
Roof3 Days4 Days5 Days
Adjustments2 Days2 Days4 Days
Back Framing2 Days3 Days4 Days
Total Time18 Working Days22 Working Days30 Working Days
See below explanation and details on operating sequence
[instagram-feed]

Remodel on Point often gets inquires for helping with framing subcontractors. Email our team with exact details of job and we will be glad to help with quality performance guys.

Explained Steps with Time to Frame House

Instead of providing basing short answer, we contacted several builders and asked them to explain how it works. With their help our team was able to create a list of steps with approximate time lines. This extended example is based on 3000 sq ft house.

Preparation for work – Framers come on jobsite for the first day where concrete or block footings have been completed with foundation in place. It will always be slightly off the mark and we expect that. Framers shoot lasers and measure with thread line future home box. Sill plates are installed with connection to concrete. Very often they are shimmed to start off with leveled walls. We give this step 1-2 days.

Subfloor – Once everything is leveled and clear plan established, carpenters begin to swing with hammers. To finish first base with plywood we give framers 3 days at max. It takes longer than 2nd floor base because measurements have to be exact as they create floor plan for entire house.

Main Floor Walls – Wall studs are nailed together to create a full length exterior or interior wall. Windows are framed out as per given sizes and plywood/OSB fastened on exterior side. Than walls are lifted by all workers and nailed in place. Most of main floors In new homes have open concept, therefore our average time here is 2 days.

2nd Floor Base – Similar to subfloor, joists are installed on top of wall to create a floor base. They are covered thick plywood (3/4 inch) during the framing stage. Estimation is 2 days to complete it.

2nd Floor Walls – Unlike main floor, upper level normally has all the bedrooms with closets and bathroom for family to use. Although exterior walls take same time to complete, interior framing needs additional two days. Remodel on Point suggests 4 days for 2nd floor walls step during framing of house.

Time to install roof trusses on house

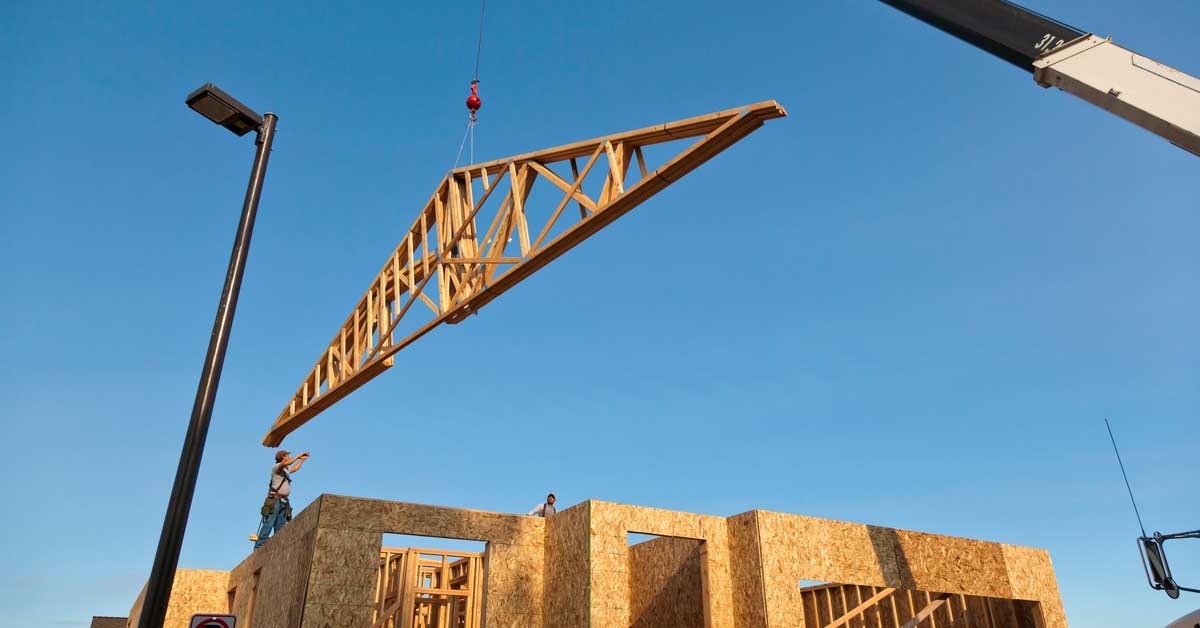
Engineered trussed lifted by crane and installed on top of house.

Roof – There are several types of roof and they all take different time to complete. Flat and sloped roof made on site take the longest. Builders prefer to order premade trusses and attach them in one day. Ceilings and other details take 2 more days, to make it 3 in total for this step.

Interior Adjustments – Every day we hear stories of adjustments being made after work is completed. How long does it take to frame a house when adding or changing layout as you go? It depends on changes. Let’s assume 2 more days are needed for adjusting frames.

Back framing – This is not always done with all other work. Often enough we see builders completing ducts and other rough ins before getting carpenters again on site. It should take 3 full days.

Extra Space for Similar Size Homes

What exactly is square footage of home and how do you measure it? Everyone is giving different numbers when describing the same house. Realtor calculates every inch of space inside and wants to make it seem bigger than it is when putting it for sale. Home builders see it in different way.

For example 3000 sq ft home to a builder is living area on main and 2nd floor. Even if it has 3 car garage on the side and 1500 sq ft basement underneath it is still 3000 sq ft home, but realtors sell it as above 4500 sq ft.

In our schedule we have a line for back framing, which includes framing of exterior and interior walls in the basement. Different designs have extra additional spaces that may not be considered as living space but require extra time to frame and finish.

Framing Time Extended if Lumber is Not There

Nothing is more annoying during home construction project than entire crew waiting for delivery of material. It causes extra money and wasted time that could be used with meaning.

Imagine situation when five carpenters come on site at 7 am to find out there is no lumber for them to work with. And supplier is saying delivery will be close to noon. Will they stay and wait?

Another common issue is ordering or delivering wrong material. It does not take much to mix up thickness of plywood or length of TGI.

To avoid delays of deliveries that affects how long does it take to frame a house, Remodel o Point team wants to encourage using trusted and well known suppliers. They would value reputation and try to keep orders tight.

Have Materials Delivered 3 or 4 Times in Batches

Delivery of all materials for house framing

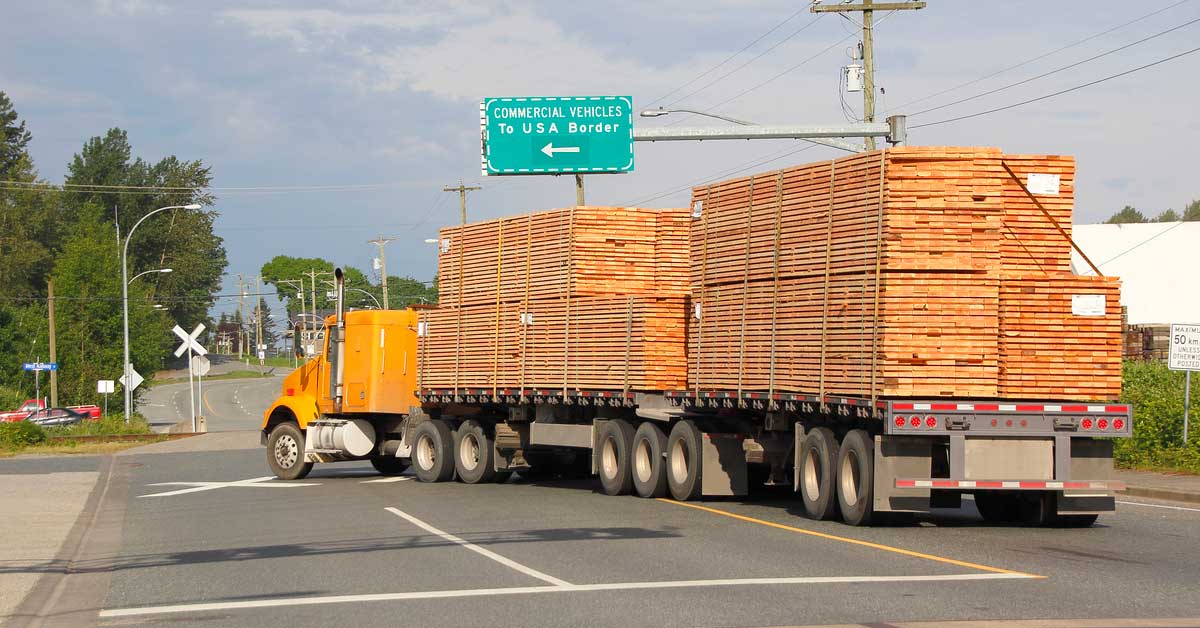
Truck full of lumber goes to jobsite

Schedules can be followed by workers only if you provide them with appropriate working conditions. This means providing exact materials as they are needed throughout the job. If construction lot is large and has lots of unused extra space It is ideal. Very often new build is within limited space and lumbers with other needed material.

To make jobsite somewhere clean and easy to maneuver around, we suggest shipment in several loads (3-4 deliveries during the project). This way carpenters would not move material around to get to exact studs or joist they need right at this moment. Lumber suppliers are happy to work with multiple deliveries and cane schedule it to specific days when ordered ahead of time.

Additional Time for Welding Beams and Steel Posts

Large structures with open concept need some sort of support system. For smaller openings that have carry less structural load framers can use wood material or LVLs (laminated veneer lumber). For larger spans that need to support entire floor space, exterior wall or other heavy load, engineers spec out metal beams.

Carpenters can install these metal beams and even bolt together, but they do not perform welding. To connect two beams together or steel beam to a steel post, welder is required. This adds additional day or two to overall schedule to frame a house.

How Long Does it Take to Frame a House with Bad Weather Conditions

Builders can make schedule as accurately as they want, but it all goes to trash if weather does not let carpenters work. The assumption of bad weather for some reason goes only for rainy and snow days. For carpenter crew it is important to have ideal working conditions to finish the project within given time. This means temperature cannot be too hot or too cold, no high winds and no snow.

It does not matter where your project is located; always expect nature to slow down the job one way or another. Some cities have extreme hot and humid seasons while other are known for longer winter seasons.

Depending on severity of region, we suggest adding 5-15% of overall working days to the schedule for weather condition delays.

Summary for Scheduling Framing During New Construction

In conclusion we want to underline and point out that each project is unique and framing conditions will never be the same. Our mission is to educate readers that are interested in scheduling new home build projects. We provide educational content with average timelines for steps involved, but how long does it take to frame a house depends on many factors.

There is nothing easy about building or framing houses, and even to plan it you need a lot of experience and knowledge in construction.  Reach out to qualified builders in your area or ask us for suggestions on companies to hire.

editor's pick

latest video

news via inbox

Nulla turp dis cursus. Integer liberos  euismod pretium faucibua

Each building has some sort of driveway or at least should have. The main reason is for vehicles to come closer without need to walk all the way. Some homes are residential with small driveway for their car to come in and park before garage or front entrance, and others can be large commercial buildings with loading docks, delivery entrances and casual parking entrances. On Point Remodeling was asked for suggestions on residential driveway for new home construction, and we decided to write detailed article for all our readers. Using this guide you can select the material for your driveway and see what works for your budget. Here are the materials for driveway we will be discussing in our guide:
  • Asphalt
  • Concrete
  • Paver Stone
  • Crushed stone
  • Brick
  • Seashell
  • Gravel
To find good contractor for your driveway, you can either ask our team by email or try to find someone local that worked with neighbors or nearby buildings.

Installation process of any material surface on your driveway

a) Demolition and Excavation – Before anything is done, your contractor will get heavy machinery and scratch off old layer of driveway. They need to go down at least 5-6 inches to insure proper layering before your final layer of material is installed. b) Material Purchase and Delivery – At this point your contract is signed and you already know how the surface will look. Contracting company purchases necessary materials and delivers them to site. Double check if material is correct and not damaged. c) Preparation of Sublevel – Whatever you place as final material, it cannot just be installed directly on top soil. Gravel is the first choice of material that goes down at this stage. Other preferred material is screen sand that can go on top of gravel and works better with stone and bricks. d) Compaction of Ground – To prevent your driveway from moving and changing shapes, all the layers from bottom up have to be properly compacted. Do not leave any spot untouched while doing this or you can get small holes and cracks in driveway after installation. E) Final Installation – This is when all the magic happens. After all preparations and dirty work the final installation is made literally within hours and you can enjoy new driveway. Stone and brick is set up by hand, while other materials require some sort of machinery with manual labor to even out surface.

1. Asphalt

Probably the most used material for road top surfaces as well as driveways is asphalt. This is a mix of gravel and sand that is mixed in and combined by asphalt cement with crude oil. Pros of Asphalt Driveway
  • Very popular and easy to find materials/contractor
  • Completed in 1 day and you can drive on it after
  • Patches and small holes can be fixed fast
Cons of Asphalt Driveway
  • Easy to damage and cracks appear in few years
  • Almost everyone else has same surface
  • Oily surface and chemicals used in mix
Prepared for asphalt driveway will cost you around $5 per square foot to finish. The contractors that take care of entire process from taking out old driveway surface, install subsurface and compact the ground with new asphalt on top, will charge on average $5500 per regular size driveway at single home property.

2. Concrete

What we call concrete is a mixture of Portland cement, aggregate as well as sand with gravel. Suggested thickness of concrete for driveway is 6 inches. The mixture needs to cure without being touched or driven on top for several days. Pros of Concrete Driveway
  • Durable material for large weights
  • Long lifespan if installed properly
  • Winter and summer friendly
Cons of Concrete Driveway
  • Has marks and stains over time
  • Hard to repair without replacement
  • Super hard to DIY
To hire contractors for concrete driveway it will cost around $7-$9 per square foot. This will include site preparation with gravel spread and new concrete installation. They will order full truck of concrete (or several for larger driveways) to pour inside forming. Smoothening and curing is required after installation.

3. Paver Stone

The most luxurious material that you can use to create driveway path with is paver stone. It is made out of natural stone with uneven rough shapes that have different line patterns. Paver stones are very heavy and are perfect for weights on top of them. Almost every city in Europe has roads and walks made out of stone that were installed centuries ago. Pros of Paver Stone Driveway
  • Creative designs can be done
  • Personal looks, can match the house
  • Can replace single stone in minutes
Cons of Paver Stone Driveway
  • Weeds growing through
  • Stone can move over time
  • Most expensive material
There is wide selection of stone that can be purchased for your driveway. On average we recommend settling with $17-$20 per square foot for stone with installation included. Working with this material is very intense labor and we recommend hiring professionals that do this type of work every day.

4. Crushed Stone

Our readers sometimes mistake crushed stone with gravel, but this is not the same material. Crushed stone material is achieved when machine is mechanically crushing larger pieces of unused stone for this specific purpose. It is larger than gravel and can have smooth finish. Crushed stone can also have a mix of colors, which is much pleasant to eyes than gravel. Pros of Crushed Stone Driveway
  • Low maintenance required
  • Fits rural area style
  • Can be reused for other purposes
Cons of Crushed Stone Driveway
  • Gets very hot during summer
  • Can be messy after many drives
  • Hard to remove snow and ice
Buying crushed stone and installing it on your driveway is as easy as it gets. Similar to other rough materials discussed in this post, only small tools like shovels, dolly and buckets are required to spread it on the road. The cost of crushed stone driveway is between $4 and $6 per square foot from professional local contractors that can finish the job in several days.

5. Brick

The same brick we see being used in wall construction can be installed as top driveway surface. Brick is manufactured by compressing clay with plastic mass. It is heated to extreme temperature and dried up to become as solid as you know it. Pros of Brick Driveway
  • Variety of selections in shapes and shades
  • Bricks are recyclable
  • Slip resistant with rough top part
Cons of Brick Driveway
  • Needs regular maintenance
  • Change color over time
  • Old fashion looking
Installing brick on driveway costs $10 per square foot, which is not too far from masonry brick laying as part of the wall. To save money you can use or purchase old brick, that was part of a wall before. Do not mix these two jobs and contact landscaping professionals instead of masonry contractors that work with bricks.

6. Seashell

This material is popular on the coast line where shells can be found near the water. Construction companies use seashells to add in other materials as well as spread them on driveway in rough condition, without adding anything else. It usually comes in white or pearl color and darkens within year because of mixing with sand and dirt. Pros of Seashell Driveway
  • Environmentally friendly
  • Has natural drainage
  • Creates worm vibe of beach house
Cons of Seashell Driveway
  • Break and crack under light weight
  • Sharp and very hard to walk on
  • Gets stuck in shoes and tires
To deliver and spread seashells on driveways costs below $4, which is only slightly more expensive than rough gravel. As you go further from coast line, cost of material increases due to delivery. This material is elegant and very soft. We recommend adding edge lines with darker color landscape material to create visual path.

7. Gravel

This material is used in other construction mixes and underlayment systems. It’s literally fragments and small crushed stones that are put on top of soil. It is easily spread out by hands and anyone can do it. Pros of Gravel Driveway
  • Cheapest of them all
  • Easy DIY Job
  • Can install another material on top
Cons of Gravel Driveway
  • Needs to be graded very often
  • Will mix with dirt and leaves
  • Washes up with heavy rains
It is rough material and can be purchased in bulk (by metric tons or cubic meters). The cost of driveway with gravel should not exceed $3 per square foot, but you can save tons of money by purchasing materials and doings installation by yourself. You do not require specific tools or heavy equipment for the job and delivery of gravel can be arranged directly to your project.

Conclusion

To properly finish any and all of these driveways requires skills and experience. There is no way you can complete any of these projects without heavy equipment and tools that regular home owner’s just store in their garages. Most of those who will read this post will prefer to install asphalt driveway, because of its popularity and low costs. We want to encourage home owners to go for personal preference and what matches your house, rather than getting the most affordable and popular items. Driveway jobs have to be completed fast; otherwise you will need to park elsewhere while the project is running. To not overpay, ask us for quotation sample on material you prefer in specific region where the work need to be done and our team can provide some numbers.

Leave A Comment