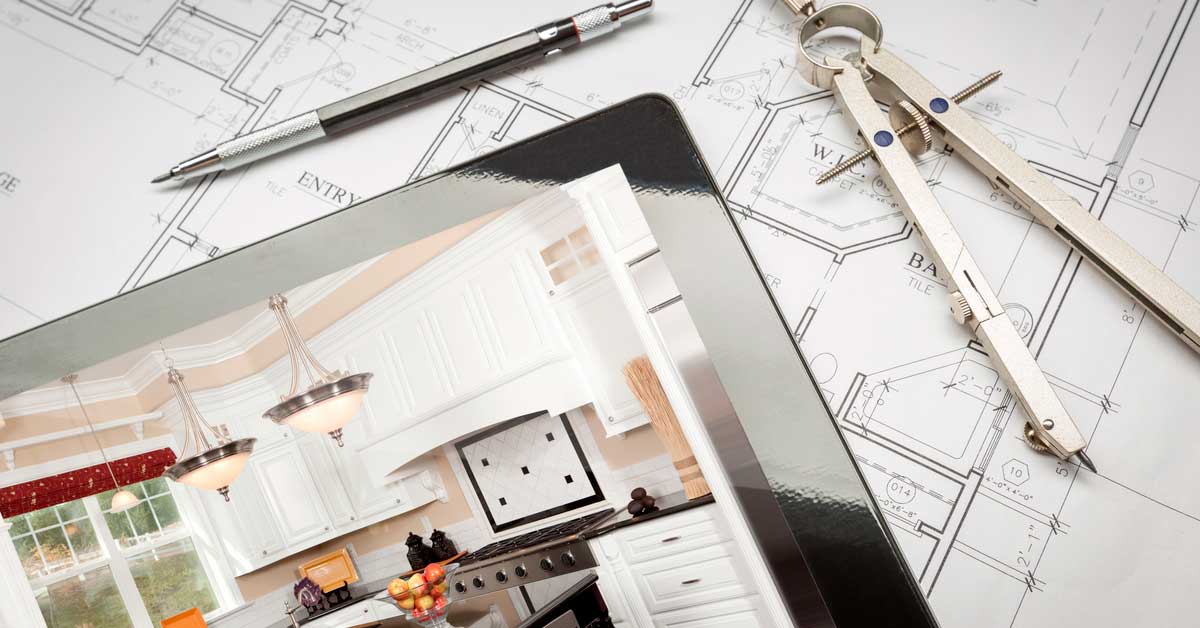
How to Calculate Square Feet of a House and Measure It
To measure the living space of your home, you need to follow a few simple rules. For a start, you should have on hand all the items you need for this. First of all, you will need any kind of device that measures distance or length. It can be a measuring tape or a laser.
You will also need a piece of paper and a pen to write down the measurements that appear. For simpler calculations, you should have a calculator at hand, because you will have to multiply and add complex numbers.
When you already have all the necessary tools, let’s move on to how to measure square footage of a house. For a simpler example, consider a house with an even rectangle shape. To find out the area of any surface, you need to know its width and length. After that, the resulting numbers must be multiplied and you will get your surface area in square feet.
Let’s Divide the Measurement Process into Stages
Unfortunately, it will be a little more difficult to measure our houses or apartments because they have many different rooms. To simplify the task, on a piece of paper, draw a rough drawing of your house with all the rooms and corridors. After that, measure each room separately and count their areas. To find out the total area of the house, you only need to add up the areas of all rooms.
Sometimes there are more complex cases, for example, how to calculate square feet of a house if one or more rooms have a rounded shape? In such rare cases, more complex mathematical measurements are needed but don’t worry. There is a good chance that the city government has blueprints for your house or apartment. These drawings usually show all the dimensions you need. If you built a house by hiring a construction company, then perhaps these drawings are stored at your home and you can use them.
[instagram-feed]How to Calculate Square Feet of a House with Few Floors
Sometimes people make a simple mistake when measuring the area of a house with several floors. Do not think that if the exchanges of the first and second floors look the same, then the area will also be the same.
This is a common mistake because due to the different layouts of rooms on the floors, their total area may differ. This may be due to the presence of additional walls or, for example, part of the first floor will be occupied by a garage.
So how to measure square footage of a house with two or more floors. It’s quite simple, you need to draw each floor on a separate sheet of paper. After carrying out all the measurements that we described above, you will receive the area of each floor separately.
After that, to find out the total area of the house, you will need to sum up the areas of each floor. Remember that each floor must be counted separately, whether you have two, three, or more floors in your house.
What Devices to Use for Measurements?
Nowadays, there are several types of measuring instruments for determining the length of the room, which are easy to use. They are used by all builders and you cannot do without them if you are going to calculate the square footage of a house.
Measure Tape
Measure tape is considered the most common device. Its popularity is due to its ease of use and low price. This is an indispensable tool that may be needed in any home, regardless of whether you are measuring the length of a room or any other object. Also, the price plays an important role, it is much lower than that of other measuring devices and is $ 10 – 15.
Laser Measure
The laser distance measure is a more modern version of a measuring device. If you are wondering how to calculate square feet of a house with this fixture, then the answer is, very simple. With a laser, you get the most accurate measurements effortlessly.
The additional functions of the device will allow you to immediately calculate the area of a room of any shape. But since this is an electronic device, its price will differ significantly. Depending on the company and the set of functions, it can be $ 50-200, which is much higher than that of the measuring tape.
Measuring Wheel
The measuring wheel is also often used to calculate the distance. This is an excellent device, but it should be understood that it will not be quite convenient inside the house due to its size. If you need to measure the outer dimensions of the house, then this device can help you. Its price is $ 50 – $ 100, depending on the size and manufacturer.
Which Rooms are not Living Spaces in the House?
Living space is a very important factor when buying a home. But as with any measurements, it is worthwhile to correctly understand what exactly to relate to living space in the house. Firstly, it is worth excluding the balcony and deck, the size of these parts of the house should not be taken into account, the same applies to the garage.
For example, the house is built in such a way that the garage occupies part of the first floor and has a separate entrance from inside the house. In this case, the garage is located in the aisles of the house, but it should be understood that this is a separate room.
What about Basement and Attic?
As for premises such as attic and basement, everything will depend on the laws adopted in your state. For example, your house is built on a slope and part of it will be visible as an additional floor. In this case, the house can be considered an exception and the basement square can be added to the total area of the house.
Even the height of rooms can affect the increase in the size of the living space. If the layout of your house includes a living room of two floors, then in some cases its area can be considered double.
If your home has these features and you are in doubt about how to measure square footage of a house, Remodel on point recommends that you contact your local real estate appraiser. These specialists know in detail all the subtleties in your state and city to provide you with a detailed answer.
An Example of how to Measure Square Footage of a House
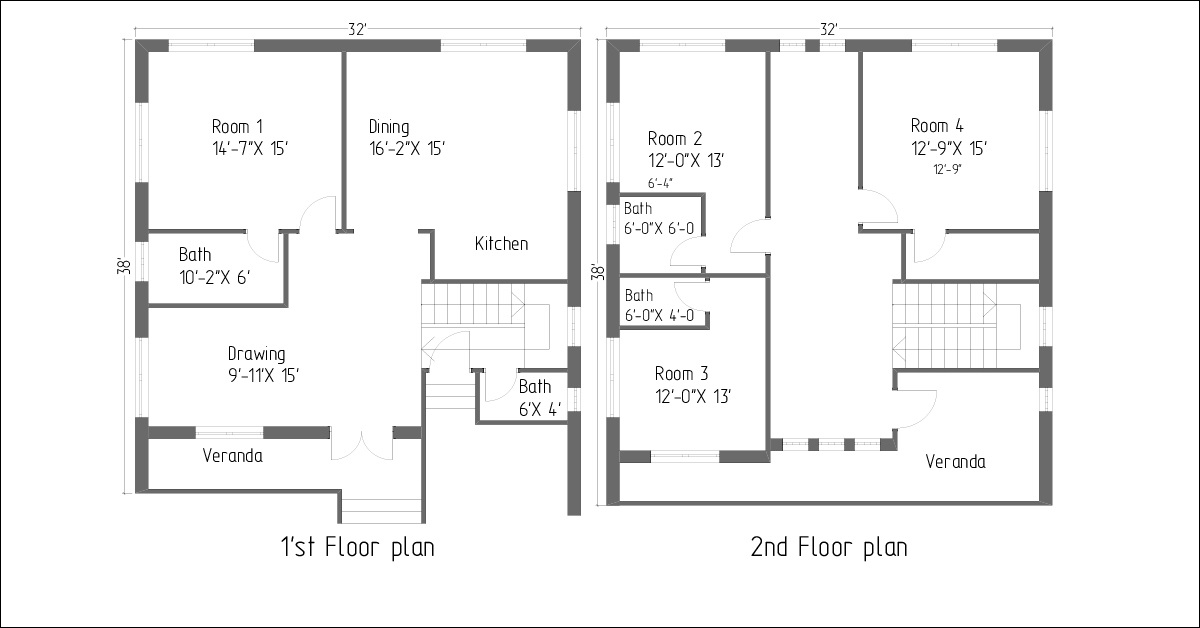
At first glance, all these calculations can be confusing. For a more illustrative example, Remodel on point invites you to consider how to calculate square feet of a house using a drawing example. We have chosen an accurate drawing made in electronic form for a clearer understanding of the written. You will have a blank sheet of paper where you draw by hand the outer walls of your house, as well as the interior walls.
For a simpler understanding of what is shown in your drawing, you can sign each room as it is done in the picture. After that, you will need to measure the length and width of each room. The results of these measurements can be recorded under the name of the room so that there is no confusion and nothing to miss. You can also immediately multiply these numbers and enter the values immediately in square feet into the drawing.
After you measure all the rooms, you just have to add up the areas of each room and you will get the total living space in your home. It is also worth noting that in the figure we did not count the dimensions of the veranda. This is because although it is part of the house, it is not a living space. We would like to remind you that the attic, garage, basement, and some other parts of the house may also not be considered living space, except in rare cases.
What if Measure Square Footage of a House from Outside?
Based on this, we see that if you calculate square feet of a house outside, then you will only get the total area of the building and not a living space. It should also be understood that in addition to additional rooms, which should not be taken into account, the thickness of the outer walls will also play a role in the dimensions.
For example, consider a house measuring 25 x 40 feet. If we count from the outside, that’s 1000 square feet per floor. Exterior walls are on average 8 to 9 inches thick. Based on this, the actual dimensions of the house will be approximately 23.5 x 38.5 feet, and multiplying these values we get 904.75 square feet, which is already a difference of 5% of the total area of the house.
Such seemingly small details can play an important role in the correctness of the calculations. We have tried to give you all the details on how to measure square footage of a house. If you stick to the tips above, calculating the square footage of a house will be pretty straightforward.
latest video
news via inbox
Nulla turp dis cursus. Integer liberos euismod pretium faucibua