Building a Million Dollar Custom Home By ALBO Homes
Another company that has been on our radar decided to share information on one of their recent projects. We are going to share the journey of home builder for close to two years during design stage and construction of the house.
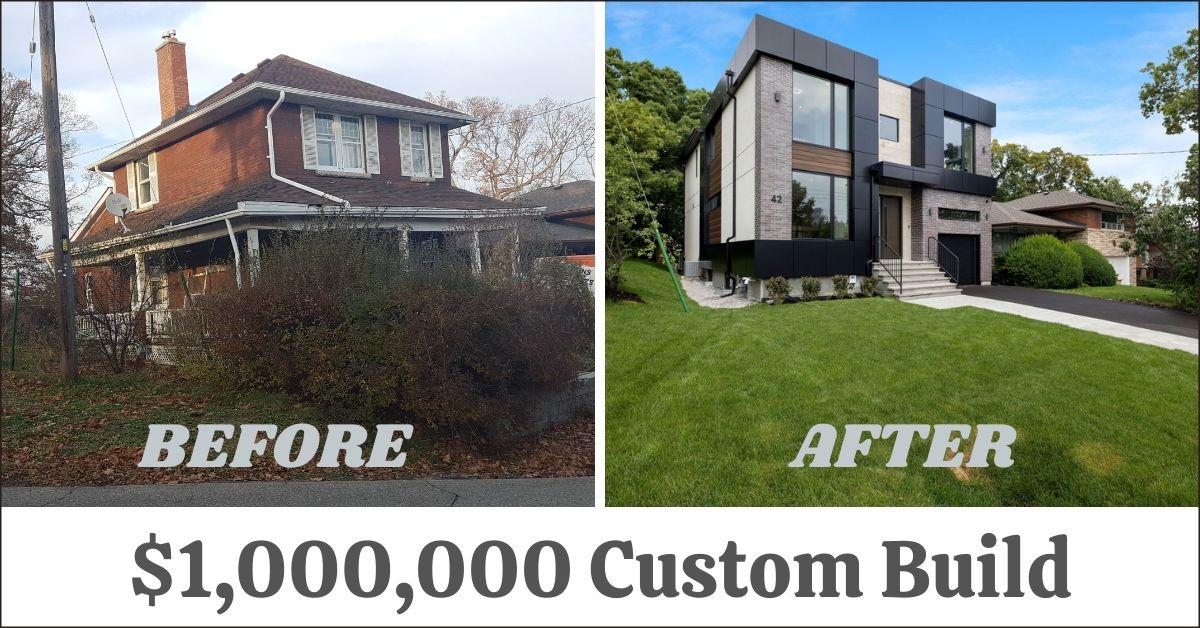
New modern house was built on 40 x 150 lot with older home that had to be completely demolished and excavated. After everything was completed we are looking at 3280 sq ft piece of art home that required investments of $1,100,000 and extremely professional crews to complete the project.
Budgeting and Building a Million Dollar Home
One of the most important aspects in new home construction is setting up the budget. Miscalculating costs and end up traumatic for the project and it goes both ways.
Under estimating expenses can cause running out of money midway and entire construction would be stopped until additional funds are obtained. Overestimating can definitely scare off client and hire someone else for the same work.
The whole idea was to sit down with client for several hours and understand his exact vision of the house with specific finishes that they wanted to achieve based on images they saw in other homes as well as magazines. Our reputation as best Custom Home Builders in Toronto makes our project managers spend extra time and dedication to understand all priorities.
After breaking down each line with details and setting up smaller budgets for kitchen, floors, windows and literally everything else, our project manager calculated expected cost for the entire construction and presented it.
Our team always explains that during the course of work, some materials and labor costs can go up in price, and we should budget a little extra on top.
The budget was established and client agreed on $1,000,000.
Design Stage and Committee of Adjustments
From the beginning it was known and understood that this house construction will take much longer than regular build project. The idea was to make it tall and larger than bylaw currently allowed to construct.
Plans were made by top notch architects and engineering specs attached to the package. Design process went smooth and clients loved the concept. Everything was approved (including interior and exterior) within 3-4 month and two revisions from home owners.
In order to build more than allowed the application is sent to committee for review and hearing is scheduled. This took a long time to do. 6 month and $12000 later the file was approved and ruled in favor of builder.
The last stage was to send entire package of documents to the city and get actual permits. 5 Weeks passed by and email was received with stamped permits for demolition, new build, HVAC and plumbing.
Demolition and Preparation for Construction Begins
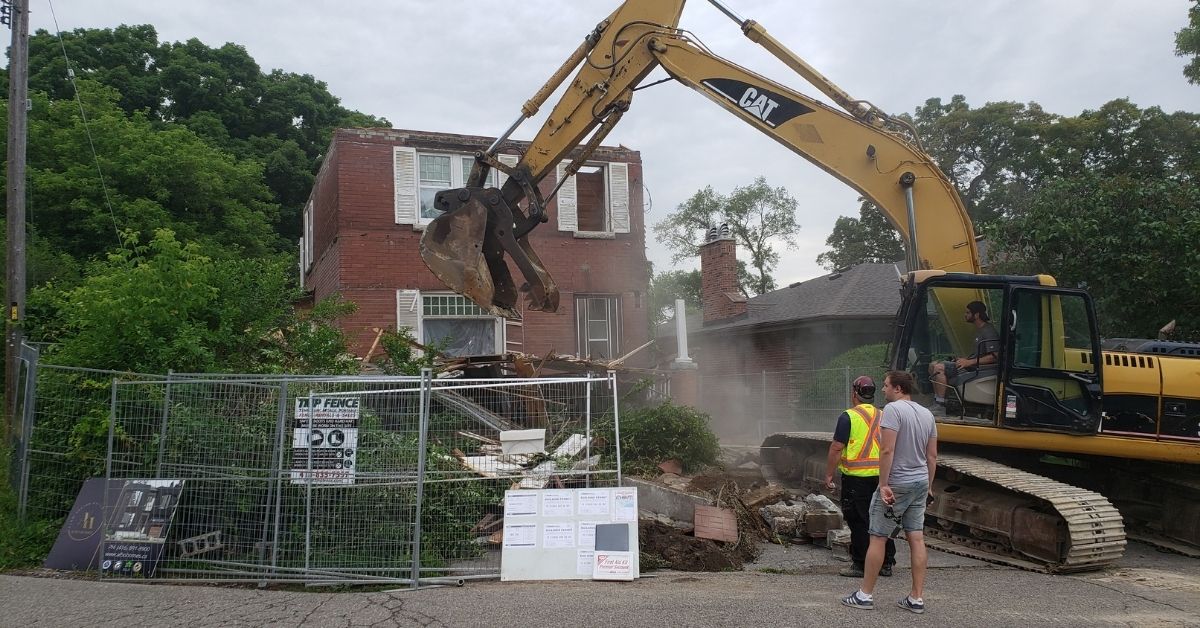
Demolition of the old house, before the start of construction.
Everyone gets excited on first day of demolition. In all honesty demolition is only one day and excavator levels the house pretty fast. After that its only cleanup of debris and further excavation for new foundation.
Our excavator operator was super awesome. Even though neighbor house was very close, he managed to get the job done without us worrying of damaging neighbor.
There were two main issues to deal with. First one was depth of excavation next to city property. It was almost 14 feet deep at basement walkout foundation and we had to be extremely cautions setting up forms for footings and foundation.
The other issue was again the neighbor. City inspectors made us install handmade shoring system to protect cave-ins and water flows towards his house. So far we are on track for building a million dollar home.
All other things went very smooth and ALBO team was ready to go with construction only after 3 weeks of work. At this point construction hard costs are $42.000.
Exterior Finishes Of the House – Modern Style
The idea was to frame and finish the box before the first snow. As we thought it would be a piece of cake, but due to COVID lumber suppliers just stopped. Everything was delayed, and getting ruff trusses engineered with full shipment of lumber for the house took so much longer than we expected.
Our framers were on standby all the time and as soon as materials came in, the house was completed in 3 weeks. Lumber delay played big role in timing at the beginning, but because of it we preordered windows, doors and everything else for exterior finish work.
Scaffolds were up immediately and window installation followed by exterior stucco and brick work. Extra protection and waterproofing substance was applied on plywood that stayed exposed through the winter. This were the parts that client wanted to cover with Aluminum Panels.
Windows were extra-large with single frame made from fiberglass. These are expensive but so durable.
To summarize exterior work that was done before first snow is concrete foundation, framing, windows and doors, roof, insulation, stucco and brick. These allowed us to close up the house and heat it inside for work during the winter.
It took just over two and a half month and costs were close to $225.000.
Interior Work and Finishes That Take Most of Work
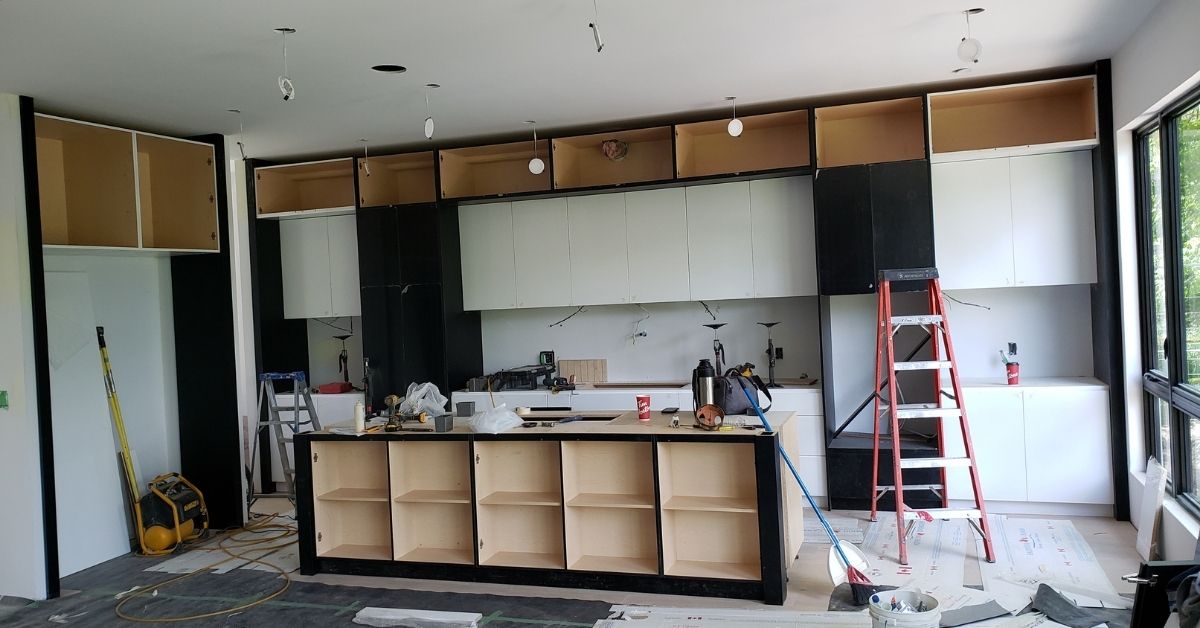
Installation of finishes and furniture in the kitchen.
First few weeks it seems like no work is happening at the house, but in reality most important aspect of planning for rough ins is being discussed between project manager and all the trades.
The idea is to make sure that all wires, plumbing pipes, ducts, smart home system and even gas lines have ideal location and never take out each other’s space.
Modern houses are done without bulkheads, therefore entire planning of rough ins is one of the major aspects of it. It is easy to make mistakes that can ruing building a million dollar home and going over budget.
After that the plan was very clear. Everything was insulated and closed by drywall, tiles, flooring, doors and trims quickly made house look pretty. Our speed was good and after 3 more moth ALBO Homes was installing kitchen cabinets with vanities and fireplace shelves.
We already knew there will be issues with high end appliances. Not every installer knows what to do with fridge that costs over $20.000. It had to be connected to water and fit precisely into already built cabinet frame. Fridge and freezer needed to be leveled and attached together with cabinet panels secured on opening doors.
It took a while to find someone who specialized in Dacor appliances, but once they came everything was completed in one day. Expect a fridge like that to cost over $1000 just for installation. In our case we paid $1400.
Clients absolutely loved the finishes for curbless modern showers, railings and literally everything that was installed at the house. Take a look at our video and tell us what do you not like about the finishes and workmanship inside the house.
This huge milestone took 5 month and our budget stretched for $520,000 more.
Landscape and Work Around The House
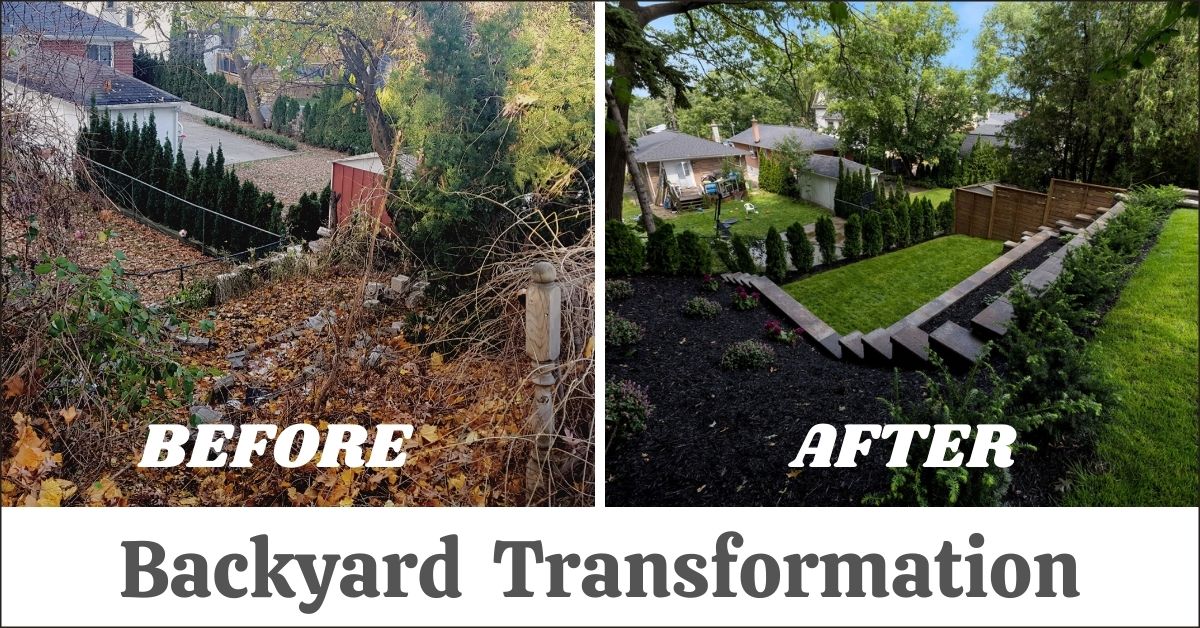
Changing the backyard after building a house.
Whatever time you see required for landscape, it is almost never added to overall schedule. This is because landscape work is usually completed parallel to interior finishes and touchups around the house.
In our situation however this was not the case. Landscape ideas were added to scope of work and client requested several stone retaining walls with steps up. Although we started building one million dollar home on budget, this request made it $100,000 more.
The excavation and getting rid of waste materials from the back of the house at the completion is more complicated than we can even describe. If it was planned preconstruction, the amount of work and cost would be at least cut in half if not more.
Nevertheless the project was delayed by one month and now ran 10% more than originally budgeted, but it was a request from a client and not a calculation mistake. Few minor things were also added to the scope like fence, cedar trees and extra stone, but it did not push our timelines.
Take a look at final landscape product and give your thoughts in comments. Some critique us about the neighbor, but we were working within the given lot.
The sum costs for landscape work were $162.000 and that included driveway, sod, all stonework, fence and trees. Like previously mentioned the timelines were mostly parallel to interior finishes, but due to extra work it increased by 1 month.
Cost and Budgets Used in Toronto Custom Home
Although during pandemic everyone expects the costs for construction to increase exponentially, but ALBO Homes was able to secure prices with suppliers and keep them as is. Scheduling trades was absolute disaster for project manager but he was able to organize everything and it seemed like magic given that during COVID there is shortage of labor.
- Soft costs that included design package, permits, all fees to city for disconnects and road damage deposit totaled $78,000 plus $12,000 for committee with representation.
- Builder fee with management and onsite supervision was agreed for flat $100.000.
- Exterior finishes for this house had us for $225,000 and surprisingly we did not exceed original budget.
- Everything that involved interior work for the project has price tag of $520,000. ALBO Homes was able to even save money on few stages, but client decided to spend it anyways on upgrades such as smart home system and extra cabinetry.
- Original amount for landscape work was set up as $65,000, but we ended up spending $162.000
There you go, our one million dollar home build ended up going 10% above with extra work. This happens a lot when during construction, clients think of additions and more expensive items. Builders should be fine with that as long as initial schedule is not interrupted.
Timing for One Million Dollar Home Construction
Staying within time and completing one million dollar new build custom home is more important that most people think.
ALBO Homes always gets the question about time it takes to finish such project. Our response is simple – Home builders are more interested than clients in finishing the project faster. The more we drag it the more money is spent by building company for supervision, management and other overheads.
Preparation for construction and approvals took actually more time than building itself. From agreeing on project with client till breaking ground it took over 9 month while actual building one million dollar house took eight month with extra 30 days for additional landscape.
Hopefully ALBO Homes was detailed enough about time and expenses for this project. Reach out to us if you are interested in more detailed breakdown or want to build new custom home.
latest video
news via inbox
Nulla turp dis cursus. Integer liberos euismod pretium faucibua