Cost To Remove Popcorn Ceiling

How Much Does It Cost To Remove Popcorn Ceiling On Average

Last Updated: 2022-02-16By

It costs $9 per square foot to remove popcorn ceiling in average residential house. Popcorn ceilings with asbestos cost as much as $15 per square foot to remediate by professional and licensed contractor.

During large or small remodeling projects, home owners tend to prefer modern look with smooth ceiling. Most common question clients ask is how much does it cost to remove popcorn ceiling in their home

To answer that, first you need to establish if asbestos will be an issue or can it be simply removed by tapers. Our recommendation is to be on a safe side and always test for designated substances before doing work.

Here is table with average costs to remove popcorn ceiling:

Do It YourselfHire ContractorsWith Asbestos
Lab Testing$300$500$500
Preparation$100$200$600
Removal$100$3000$7000
Patchwork$200$400$400
Cleaning0$200$300
Total Costs$700$4300$8800
Calculations based on 1000 square feet of popcorn ceiling removal

Commercial popcorn asbestos remediation is more expensive. For specific quotes discuss full scope of work with licensed local contractors or ask our team for assistance.

Test for Asbestos Particles

Popcorn ceiling test for asbestos costs on average $100 – $150 per spot and $500 per 2000 square foot house. This size home needs 5 sample tests to be analyzed.

Regardless of which method or company you chose for popcorn removal, the first and mandatory thing to do is testing for asbestos. There is no other way no matter how convincing contractor sounds. Cutting corners can lead to fines and health issues.

To save money we suggest purchasing sample kits on Amazon and sending it directly to the lab. After laboratory results it will be more clear how much does it cost to remove popcorn ceiling in your home.

[instagram-feed]

Working with sample kits on your own instead of hiring company saves 40%-50% of testing costs, but will not affect other expenses for popcorn ceiling removal.

DIY Project Cost – Materials and Tools

If you are reading this article, you either have doubts on overall costs for work or thinking of saving money and doing the work by yourself.

This type of work is very dirty but not technical at all and there is definitely money to be saved. Tools and materials determine how much does it cost to remove popcorn ceiling in your home without hiring contractor.

To break down materials and tools we first want to describe process of work. Here we assume that lab test is completed for asbestos and none was found. Before work starts we are down $500 already.

Water is required to soften settled popcorn that was installed years or decades ago. Of course we assume there are no costs for water and everyone would have it in their house.

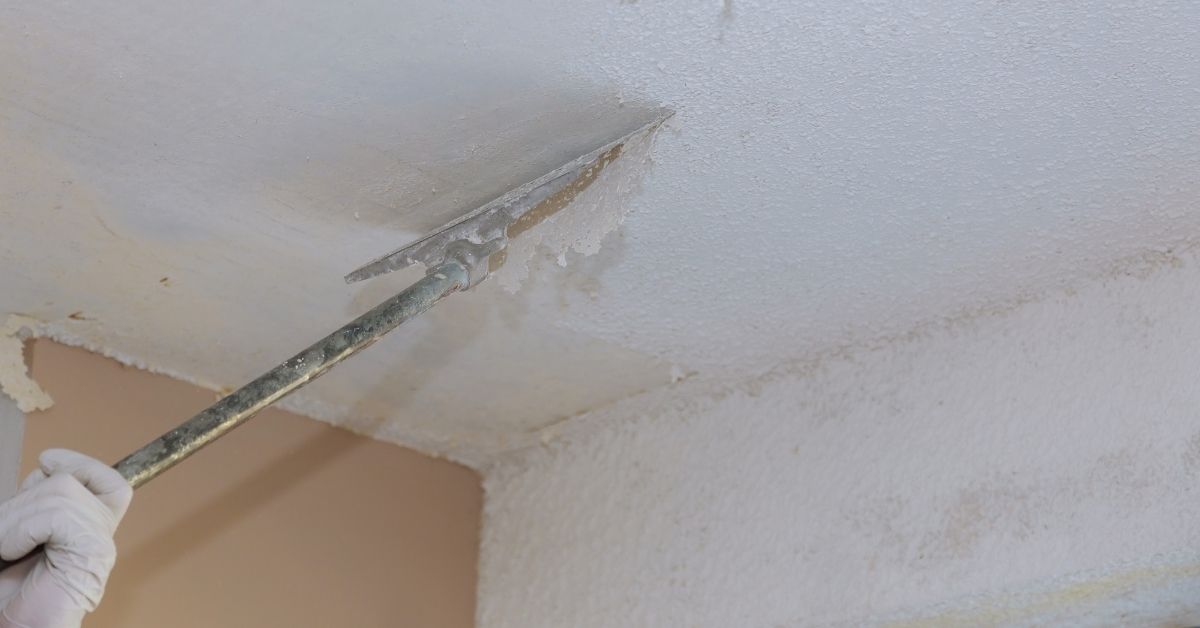
Joint Knife – to scrape already soft cement. Buy it for $20 and use it for taping the ceiling later. There is literally nothing else needed. There are expensive machines that contractors use. They go beyond several hundred dollars and not recommended for DIY one time use.

Mud/Tape – After scrubbing everything off its time to smooth out joints and make perfectly looking ceiling. Pros need only 2 boxes for 1000 sq ft, but average home owner makes many mistakes and requires 3 of them. The math tells us $0.05 per square foot of ceiling to be spent on mud and tape.

Paint and Brush – Do not forget to prime ceiling before painting. 2 gallons of paint and 1 of primer is used for 1000 square feet. Two relatively cheap brushes are better than one. Combined costs are close to $0.15 $0.20 per square foot.

Protection – Scrubbing ceiling and mudding is messy work. We suggest protecting area with plastic and masking tape. $100 would be more than enough for small house.

Time – Doing work on your own means trading money for time spent. There is no way to estimate cost of your time and most of home owners would do it on weekends anyways.

For example we calculate 1000 square feet of ceiling and give approximate cost of materials required. For under $400 you can remove popcorn ceiling on your own and make necessary touch ups with finishes.

Hire Contractors Cost for Popcorn Ceiling Removal

Of course most of us do not want to deal with any of this work and hire contractors. They know what to do and can get job done much faster than non-professional home owners would.

Although we can say that average cost to remove popcorn ceiling is $4-$5 per square foot, every contractor can increase or decrease their estimate based on how busy they are.

In high peaks we can see prices go up to $8 per square foot. When companies have less work and want to grab anything they see it can drop down to $3 per square foot and even lower in some cases.

On top of that always expect asbestos testing costs to be added on. This is of course if you did not have lab tests completed already.

Remediation of Asbestos

Completely different story when there is asbestos in popcorn ceiling. Remediation is quite expensive and hiring licensed company is necessary.

Small 10 x 15 rooms with asbestos popcorn ceiling can cost $1000-$2000 to remediate and dispose material. Larger projects that involve full house or office popcorn removal with asbestos average $7-$8 per square foot.

Do not attempt to perform popcorn with asbestos removal on your own. It requires experience and specific equipment.

Entire area of work is completely sealed and depressurized to create less dust particles in the air. Personal protective equipment looks like space suits and actually prevents workers from breathing in asbestos particles.

If you or contractors are caught by inspectors removing asbestos without proper procedures in place they can lay fines on both of you. There have been cases when fines were as high as tens of thousands dollars.

How Much to Remove Popcorn Ceiling vs New Drywall?

The other popular question we always get is if it would be cheaper to completely remove drywall instead of just scraping popcorn.

In a way it is easier to take down old pieces from ceiling and install new ones but in this topic we discuss the costs.

If we compare time and efforts spent for removing popcorn ceiling versus installing new drywall it could seem that new is easy but there are few things that can come across and ruin the budget.

First of all the biggest driving cost factor would be purchasing and delivering drywall. Cost of material would be more than entire job of removing popcorn.

Another big problem that can cost thousands of dollars can be hidden under old drywall or plaster. While performing demolition nails have been removed and framing is very easy to damage. Therefore relaying drywall is much higher than how much to remove popcorn ceiling at home.

Residential and Commercial costs

As we like to say, it all depends how much does it cost to remove popcorn ceiling in residential and commercial spaces. We can’t simply say one is more expensive than the other. Overall factors make commercial jobs on average 1.4 times more expensive.

What really matters is access to property, size of the project and complexity level.

Access – Residential jobs are easy to understand and estimate. Time is arranged for regular working hours. Commercial projects are not like that. Although it can be even cheaper to do same job in unused office building, most of them more complicated.

Some offices require traveling through other spaces, elevators and retail stores. Time of work can be requested for nights and even weekends not to disturb work.

Size of the project – using basic logic we may think that more work should be estimated at lower cost per square foot, but its actually the opposite. Large commercial projects need professional crew with more equipment and overheads for company. Therefore big jobs can cost more per square foot of removing popcorn ceiling.

Complexity – Ever project is different and requires more or less effort to complete. There is no comparison between 20 year old residential house project with 8-9 foot ceiling and 60 year old warehouse/office with 20+ foot ceiling that requires scaffold system for work at heights.

How much does it cost to remove popcorn ceiling when it takes several hours to move scaffold from one spot to another not even counting actual work? Most of commercial projects are harder to take on than residential jobs.

editor's pick

latest video

news via inbox

Nulla turp dis cursus. Integer liberos  euismod pretium faucibua

Each building has some sort of driveway or at least should have. The main reason is for vehicles to come closer without need to walk all the way. Some homes are residential with small driveway for their car to come in and park before garage or front entrance, and others can be large commercial buildings with loading docks, delivery entrances and casual parking entrances. On Point Remodeling was asked for suggestions on residential driveway for new home construction, and we decided to write detailed article for all our readers. Using this guide you can select the material for your driveway and see what works for your budget. Here are the materials for driveway we will be discussing in our guide:
  • Asphalt
  • Concrete
  • Paver Stone
  • Crushed stone
  • Brick
  • Seashell
  • Gravel
To find good contractor for your driveway, you can either ask our team by email or try to find someone local that worked with neighbors or nearby buildings.

Installation process of any material surface on your driveway

a) Demolition and Excavation – Before anything is done, your contractor will get heavy machinery and scratch off old layer of driveway. They need to go down at least 5-6 inches to insure proper layering before your final layer of material is installed. b) Material Purchase and Delivery – At this point your contract is signed and you already know how the surface will look. Contracting company purchases necessary materials and delivers them to site. Double check if material is correct and not damaged. c) Preparation of Sublevel – Whatever you place as final material, it cannot just be installed directly on top soil. Gravel is the first choice of material that goes down at this stage. Other preferred material is screen sand that can go on top of gravel and works better with stone and bricks. d) Compaction of Ground – To prevent your driveway from moving and changing shapes, all the layers from bottom up have to be properly compacted. Do not leave any spot untouched while doing this or you can get small holes and cracks in driveway after installation. E) Final Installation – This is when all the magic happens. After all preparations and dirty work the final installation is made literally within hours and you can enjoy new driveway. Stone and brick is set up by hand, while other materials require some sort of machinery with manual labor to even out surface.

1. Asphalt

Probably the most used material for road top surfaces as well as driveways is asphalt. This is a mix of gravel and sand that is mixed in and combined by asphalt cement with crude oil. Pros of Asphalt Driveway
  • Very popular and easy to find materials/contractor
  • Completed in 1 day and you can drive on it after
  • Patches and small holes can be fixed fast
Cons of Asphalt Driveway
  • Easy to damage and cracks appear in few years
  • Almost everyone else has same surface
  • Oily surface and chemicals used in mix
Prepared for asphalt driveway will cost you around $5 per square foot to finish. The contractors that take care of entire process from taking out old driveway surface, install subsurface and compact the ground with new asphalt on top, will charge on average $5500 per regular size driveway at single home property.

2. Concrete

What we call concrete is a mixture of Portland cement, aggregate as well as sand with gravel. Suggested thickness of concrete for driveway is 6 inches. The mixture needs to cure without being touched or driven on top for several days. Pros of Concrete Driveway
  • Durable material for large weights
  • Long lifespan if installed properly
  • Winter and summer friendly
Cons of Concrete Driveway
  • Has marks and stains over time
  • Hard to repair without replacement
  • Super hard to DIY
To hire contractors for concrete driveway it will cost around $7-$9 per square foot. This will include site preparation with gravel spread and new concrete installation. They will order full truck of concrete (or several for larger driveways) to pour inside forming. Smoothening and curing is required after installation.

3. Paver Stone

The most luxurious material that you can use to create driveway path with is paver stone. It is made out of natural stone with uneven rough shapes that have different line patterns. Paver stones are very heavy and are perfect for weights on top of them. Almost every city in Europe has roads and walks made out of stone that were installed centuries ago. Pros of Paver Stone Driveway
  • Creative designs can be done
  • Personal looks, can match the house
  • Can replace single stone in minutes
Cons of Paver Stone Driveway
  • Weeds growing through
  • Stone can move over time
  • Most expensive material
There is wide selection of stone that can be purchased for your driveway. On average we recommend settling with $17-$20 per square foot for stone with installation included. Working with this material is very intense labor and we recommend hiring professionals that do this type of work every day.

4. Crushed Stone

Our readers sometimes mistake crushed stone with gravel, but this is not the same material. Crushed stone material is achieved when machine is mechanically crushing larger pieces of unused stone for this specific purpose. It is larger than gravel and can have smooth finish. Crushed stone can also have a mix of colors, which is much pleasant to eyes than gravel. Pros of Crushed Stone Driveway
  • Low maintenance required
  • Fits rural area style
  • Can be reused for other purposes
Cons of Crushed Stone Driveway
  • Gets very hot during summer
  • Can be messy after many drives
  • Hard to remove snow and ice
Buying crushed stone and installing it on your driveway is as easy as it gets. Similar to other rough materials discussed in this post, only small tools like shovels, dolly and buckets are required to spread it on the road. The cost of crushed stone driveway is between $4 and $6 per square foot from professional local contractors that can finish the job in several days.

5. Brick

The same brick we see being used in wall construction can be installed as top driveway surface. Brick is manufactured by compressing clay with plastic mass. It is heated to extreme temperature and dried up to become as solid as you know it. Pros of Brick Driveway
  • Variety of selections in shapes and shades
  • Bricks are recyclable
  • Slip resistant with rough top part
Cons of Brick Driveway
  • Needs regular maintenance
  • Change color over time
  • Old fashion looking
Installing brick on driveway costs $10 per square foot, which is not too far from masonry brick laying as part of the wall. To save money you can use or purchase old brick, that was part of a wall before. Do not mix these two jobs and contact landscaping professionals instead of masonry contractors that work with bricks.

6. Seashell

This material is popular on the coast line where shells can be found near the water. Construction companies use seashells to add in other materials as well as spread them on driveway in rough condition, without adding anything else. It usually comes in white or pearl color and darkens within year because of mixing with sand and dirt. Pros of Seashell Driveway
  • Environmentally friendly
  • Has natural drainage
  • Creates worm vibe of beach house
Cons of Seashell Driveway
  • Break and crack under light weight
  • Sharp and very hard to walk on
  • Gets stuck in shoes and tires
To deliver and spread seashells on driveways costs below $4, which is only slightly more expensive than rough gravel. As you go further from coast line, cost of material increases due to delivery. This material is elegant and very soft. We recommend adding edge lines with darker color landscape material to create visual path.

7. Gravel

This material is used in other construction mixes and underlayment systems. It’s literally fragments and small crushed stones that are put on top of soil. It is easily spread out by hands and anyone can do it. Pros of Gravel Driveway
  • Cheapest of them all
  • Easy DIY Job
  • Can install another material on top
Cons of Gravel Driveway
  • Needs to be graded very often
  • Will mix with dirt and leaves
  • Washes up with heavy rains
It is rough material and can be purchased in bulk (by metric tons or cubic meters). The cost of driveway with gravel should not exceed $3 per square foot, but you can save tons of money by purchasing materials and doings installation by yourself. You do not require specific tools or heavy equipment for the job and delivery of gravel can be arranged directly to your project.

Conclusion

To properly finish any and all of these driveways requires skills and experience. There is no way you can complete any of these projects without heavy equipment and tools that regular home owner’s just store in their garages. Most of those who will read this post will prefer to install asphalt driveway, because of its popularity and low costs. We want to encourage home owners to go for personal preference and what matches your house, rather than getting the most affordable and popular items. Driveway jobs have to be completed fast; otherwise you will need to park elsewhere while the project is running. To not overpay, ask us for quotation sample on material you prefer in specific region where the work need to be done and our team can provide some numbers.

Leave A Comment