Build a Shed

Build a Shed for Under $500

Last Updated: 2022-02-16By

Can someone build a shed only spending $500 or less? Yes it is possible, but circumstances and construction abilities have to align with project requirements.

What we mean is all the money are spent on materials and you will be building the shed on your own.

Can You Build a Shed for Under $500?

  • 33 Pieces of 2 x 4 Studs = $124
  • 6 Pieces of Plywood = $156
  • 2 PVC Roofing Sheets = $35
  • Exterior Wood Siding Panels = $182

Total $497

[instagram-feed]

Even cheaper materials can be purchased through local hardware stores during discount seasons. Even reused construction lumber is sometimes good for such project.

Size of Shed Built for Under $500

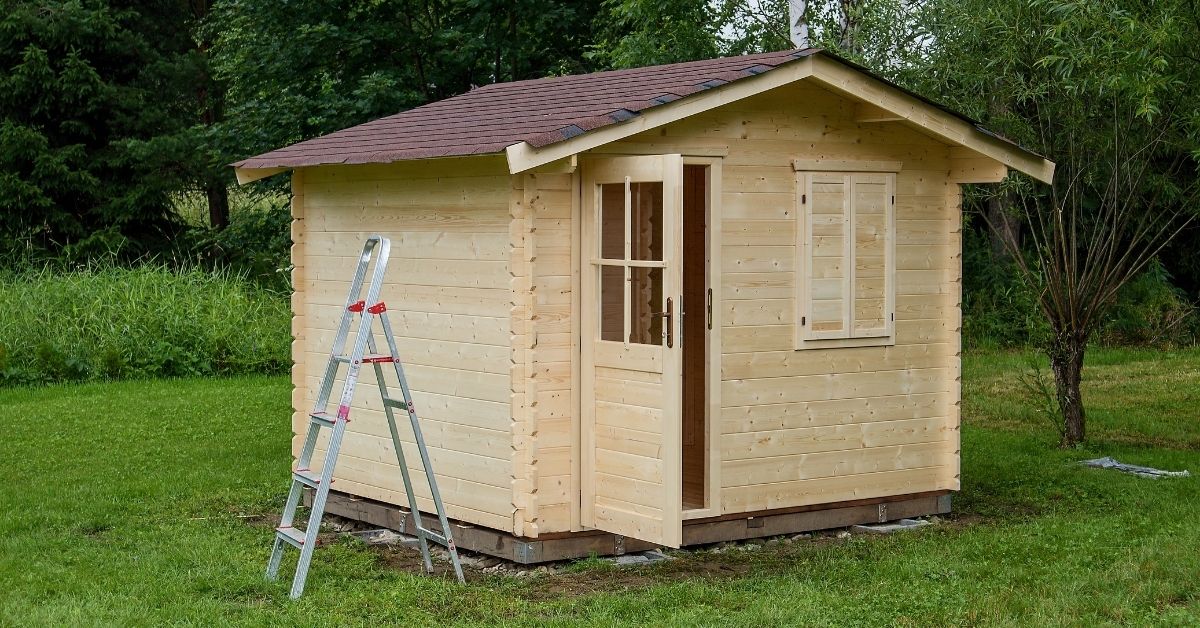
Our optimal calculated size that has enough storage space and isn’t too big to blow out $500 budget is 5 by 8 feet and height of 7 feet.

It actually matches dimensions of average condo or apartment bathroom size. If you can fit full bathroom in 5×8 room, storage shed dimensions are big enough.

We tried to make it 8 feet tall, but exterior square footage would be too big for our budget and we had to cut it down. Plywood and exterior siding eat up most of our money during shed construction.

Exterior box of shed being built is 26 linear feet. Simply add all the sides together. For calculating square footage we multiply 26 by height of 7 feet and get total 182 square feet.

To figure out roof surface we need to multiply 8 by 5 and we get 40 square feet. This is how much material is required to cover our shed roof.

Ideal Conditions to Build Cheap Shed

In order for this shed to work and have it complete with only $500 in your pocket, the stars have to align perfectly.

Following our recommendations is not enough and here is what needs to happen:

  • No Slab or Use Existing Slab
  • Know How to Frame
  • Owning Necessary Tools
  • All Materials Are Available
  • Using Own Screws and Nails
  • Build Door With Same Materials

To build a shed for under $500 is definitely a challenge even for experienced trades. Entire budget is dedicated towards materials and everything else is to be owned and completed by person who is doing the job.

No Slab or Use Existing Slab – Larger sheds and standalone garages definitely need some sort of slab, but our example shed for under $500 does not have one.

In case your backyard has existing concrete or stone pad – it can be used for shed as a base.

Know How to Frame – Although it is not even close to be complicated structural framing, you still need to understand how it works.

Any previous carpentry experience is a benefit to building this shed. It’s easy to find build guide or example video to follow.

Owning Necessary Tools – In our calculations there are no purchased or even rented tools. All of them have to be owned by whoever is building it.

Honestly, there isn’t much needed. We are talking about saws to cut wood, hammer and drill to fasten screws.

All Materials Are Available – Full list of materials needed to build shed for under $500 is easy to find in local hardware store or small construction supplier.

Small towns could have lack of stock or inflated prices due to no competition around.

Using Own Screws and Nails – Our $500 budget has run out and we have to use our own nails and screws. It isn’t much, but without having a box of screws it is impossible to build 5×8 shed.

Neighbors or friend can always help out with box of nails or screws if you don’t have any.

Build Door with Same Materials –As you can see the door for our shed has to be custom built from lumber that is covered in our lumber and exterior material.

We are talking about 2×4 lumber swing doors that are installed on a hinge and lock with hook.

Buying Similar Size Prebuilt Shed

Why would someone try and build a shed if you can buy it and have delivered on your property. Plenty of stores like home depot sell it for reasonable price, and their sheds aren’t the worse.

So why would you prefer to build a shed rather than purchase it?

  • It Costs More to Buy
  • The Quality is Not the Same
  • Need to Accommodate Delivery

Comparing apples to apples, our base size is 5×8 feet. Similar 40 square foot sheds in hardware stores cost slightly more than $500.

There is no reason to pay more for similar size storage unit that is also fun to build on your own. It can actually turn out to be bonding activity for father and son.

Structure built with 2×4 lumber and proper roof connection is extremely strong. It surpasses quality of purchased shed by far.

Lifespan is at least tripled when it is built on site with recommended materials. Unless critical mistakes in installation are made, the water would not come true and integrity of our shed is pretty good.

On top of higher build for purchasing large shed, never forget about transportation. It has to be delivered on large vehicle and stores charge premium for it.

Having large truck does help and you can technically move it on your own without additional expenses.

Breakdown of Materials for Shed Under $500

So what exactly goes in construction and how did we calculate it? Let’s look at each type of material separately to understand full breakdown.

2×4 Lumber – 33 Pieces

Walls have combined length of 26 linear feet. With distance of just over 1 and 4 inches foot between each stud we need exactly 20 pieces of lumber. Additional 6 pieces are needed for single bottom and top plates.

Roof is spaced exactly with same dimensions and we need 7 pieces of 2×4 to cover roof and add plates to both sides. Our roof is flat with slight tilt towards one side.

4×8 Plywood – 6 Pieces

Next calculation is even simpler. First let’s find exterior walls surface area. As we explained above, linear footage is multiplied by height of walls and we get 182 square feet.

Each piece of plywood covers 32 square feet (4×8). Dividing 182 by 32 equals to 5.687 pieces required or 6 pieces of plywood when we round up.

2 Sheets of PVC Roof

Roof surface of shed under $500 is 40 square feet. Home depot or similar hardware stores sell PVC sheeting for $14 – $18 each and they cover around 24 square feet.

With overlap connection we need exactly 2 sheets of PVC for the roof. Smaller and bigger sizes can be purchased for installation.

Wood Siding Panels – 182 sq ft

One of the cheapest materials for exterior siding that still works good is wood siding premade panels. They cost around $1 per square foot.

Remember that our door is made out of same materials, so cuts can be made here. Look for sale discounts and possibility to buy this material for even cheaper.

editor's pick

latest video

news via inbox

Nulla turp dis cursus. Integer liberos  euismod pretium faucibua

Each building has some sort of driveway or at least should have. The main reason is for vehicles to come closer without need to walk all the way. Some homes are residential with small driveway for their car to come in and park before garage or front entrance, and others can be large commercial buildings with loading docks, delivery entrances and casual parking entrances. On Point Remodeling was asked for suggestions on residential driveway for new home construction, and we decided to write detailed article for all our readers. Using this guide you can select the material for your driveway and see what works for your budget. Here are the materials for driveway we will be discussing in our guide:
  • Asphalt
  • Concrete
  • Paver Stone
  • Crushed stone
  • Brick
  • Seashell
  • Gravel
To find good contractor for your driveway, you can either ask our team by email or try to find someone local that worked with neighbors or nearby buildings.

Installation process of any material surface on your driveway

a) Demolition and Excavation – Before anything is done, your contractor will get heavy machinery and scratch off old layer of driveway. They need to go down at least 5-6 inches to insure proper layering before your final layer of material is installed. b) Material Purchase and Delivery – At this point your contract is signed and you already know how the surface will look. Contracting company purchases necessary materials and delivers them to site. Double check if material is correct and not damaged. c) Preparation of Sublevel – Whatever you place as final material, it cannot just be installed directly on top soil. Gravel is the first choice of material that goes down at this stage. Other preferred material is screen sand that can go on top of gravel and works better with stone and bricks. d) Compaction of Ground – To prevent your driveway from moving and changing shapes, all the layers from bottom up have to be properly compacted. Do not leave any spot untouched while doing this or you can get small holes and cracks in driveway after installation. E) Final Installation – This is when all the magic happens. After all preparations and dirty work the final installation is made literally within hours and you can enjoy new driveway. Stone and brick is set up by hand, while other materials require some sort of machinery with manual labor to even out surface.

1. Asphalt

Probably the most used material for road top surfaces as well as driveways is asphalt. This is a mix of gravel and sand that is mixed in and combined by asphalt cement with crude oil. Pros of Asphalt Driveway
  • Very popular and easy to find materials/contractor
  • Completed in 1 day and you can drive on it after
  • Patches and small holes can be fixed fast
Cons of Asphalt Driveway
  • Easy to damage and cracks appear in few years
  • Almost everyone else has same surface
  • Oily surface and chemicals used in mix
Prepared for asphalt driveway will cost you around $5 per square foot to finish. The contractors that take care of entire process from taking out old driveway surface, install subsurface and compact the ground with new asphalt on top, will charge on average $5500 per regular size driveway at single home property.

2. Concrete

What we call concrete is a mixture of Portland cement, aggregate as well as sand with gravel. Suggested thickness of concrete for driveway is 6 inches. The mixture needs to cure without being touched or driven on top for several days. Pros of Concrete Driveway
  • Durable material for large weights
  • Long lifespan if installed properly
  • Winter and summer friendly
Cons of Concrete Driveway
  • Has marks and stains over time
  • Hard to repair without replacement
  • Super hard to DIY
To hire contractors for concrete driveway it will cost around $7-$9 per square foot. This will include site preparation with gravel spread and new concrete installation. They will order full truck of concrete (or several for larger driveways) to pour inside forming. Smoothening and curing is required after installation.

3. Paver Stone

The most luxurious material that you can use to create driveway path with is paver stone. It is made out of natural stone with uneven rough shapes that have different line patterns. Paver stones are very heavy and are perfect for weights on top of them. Almost every city in Europe has roads and walks made out of stone that were installed centuries ago. Pros of Paver Stone Driveway
  • Creative designs can be done
  • Personal looks, can match the house
  • Can replace single stone in minutes
Cons of Paver Stone Driveway
  • Weeds growing through
  • Stone can move over time
  • Most expensive material
There is wide selection of stone that can be purchased for your driveway. On average we recommend settling with $17-$20 per square foot for stone with installation included. Working with this material is very intense labor and we recommend hiring professionals that do this type of work every day.

4. Crushed Stone

Our readers sometimes mistake crushed stone with gravel, but this is not the same material. Crushed stone material is achieved when machine is mechanically crushing larger pieces of unused stone for this specific purpose. It is larger than gravel and can have smooth finish. Crushed stone can also have a mix of colors, which is much pleasant to eyes than gravel. Pros of Crushed Stone Driveway
  • Low maintenance required
  • Fits rural area style
  • Can be reused for other purposes
Cons of Crushed Stone Driveway
  • Gets very hot during summer
  • Can be messy after many drives
  • Hard to remove snow and ice
Buying crushed stone and installing it on your driveway is as easy as it gets. Similar to other rough materials discussed in this post, only small tools like shovels, dolly and buckets are required to spread it on the road. The cost of crushed stone driveway is between $4 and $6 per square foot from professional local contractors that can finish the job in several days.

5. Brick

The same brick we see being used in wall construction can be installed as top driveway surface. Brick is manufactured by compressing clay with plastic mass. It is heated to extreme temperature and dried up to become as solid as you know it. Pros of Brick Driveway
  • Variety of selections in shapes and shades
  • Bricks are recyclable
  • Slip resistant with rough top part
Cons of Brick Driveway
  • Needs regular maintenance
  • Change color over time
  • Old fashion looking
Installing brick on driveway costs $10 per square foot, which is not too far from masonry brick laying as part of the wall. To save money you can use or purchase old brick, that was part of a wall before. Do not mix these two jobs and contact landscaping professionals instead of masonry contractors that work with bricks.

6. Seashell

This material is popular on the coast line where shells can be found near the water. Construction companies use seashells to add in other materials as well as spread them on driveway in rough condition, without adding anything else. It usually comes in white or pearl color and darkens within year because of mixing with sand and dirt. Pros of Seashell Driveway
  • Environmentally friendly
  • Has natural drainage
  • Creates worm vibe of beach house
Cons of Seashell Driveway
  • Break and crack under light weight
  • Sharp and very hard to walk on
  • Gets stuck in shoes and tires
To deliver and spread seashells on driveways costs below $4, which is only slightly more expensive than rough gravel. As you go further from coast line, cost of material increases due to delivery. This material is elegant and very soft. We recommend adding edge lines with darker color landscape material to create visual path.

7. Gravel

This material is used in other construction mixes and underlayment systems. It’s literally fragments and small crushed stones that are put on top of soil. It is easily spread out by hands and anyone can do it. Pros of Gravel Driveway
  • Cheapest of them all
  • Easy DIY Job
  • Can install another material on top
Cons of Gravel Driveway
  • Needs to be graded very often
  • Will mix with dirt and leaves
  • Washes up with heavy rains
It is rough material and can be purchased in bulk (by metric tons or cubic meters). The cost of driveway with gravel should not exceed $3 per square foot, but you can save tons of money by purchasing materials and doings installation by yourself. You do not require specific tools or heavy equipment for the job and delivery of gravel can be arranged directly to your project.

Conclusion

To properly finish any and all of these driveways requires skills and experience. There is no way you can complete any of these projects without heavy equipment and tools that regular home owner’s just store in their garages. Most of those who will read this post will prefer to install asphalt driveway, because of its popularity and low costs. We want to encourage home owners to go for personal preference and what matches your house, rather than getting the most affordable and popular items. Driveway jobs have to be completed fast; otherwise you will need to park elsewhere while the project is running. To not overpay, ask us for quotation sample on material you prefer in specific region where the work need to be done and our team can provide some numbers.

Leave A Comment