11 Steps in Adding a Garage to a House with Costs
Many older homes were built without garage. While some areas in parts of cities become more expensive and attractive for living, home owners of older houses may be interested in upgrades and addition of new garage for their cars.
It may be any size and style of garage, but the process is relatively similar. On Point Remodeling will share past experience on how to add garage for your home with relative costs associated. We base everything on national average and some regions may not match the costs or even materials used in process.
Here are the steps in adding a garage to a house:
- Demolition of Anything on the Way
- Excavation of the Area
- Footings and Concrete Slab
- Foundation/Structural Walls
- Roof and Gutters
- Doors/windows with Hardware
- Electrical Connections and Wiring
- Plumbing Lines
- Insulation for Walls and Ceiling
- Finishing details
- Outside finishes
On Point Remodeling can suggest contractors in your area for building new garage and share where you can purchase all materials with discounts.
[instagram-feed]1. Demo Before Adding a Garage to a House
To start you need to clear off the area. If there is a shed or any structure on the way, you will need to demolish it. Most likely you can get away with demolishing it by yourself, unless it is a heave structure that requires machinery.
Bin disposal is absolutely necessary for waste and garbage from demolition. Expect to spend several hundred dollars for demo bin and disposal charges.
If you decided to do it by yourself, we recommend using right tools and all safety precautions. Demolition is one of the most dangerous types of work in construction and if you get injured at this stage you garage will not be build any time soon.
2. Excavation of the area
You will definitely need to do some digging for new garage to be added. The idea is to have the base of garage sit under ground for more stability. Footing or sometimes foundation is needed for garage structure to be built on.
Depending on size of garage adding to a house you may choose to excavate it by hand with shower or by an excavator. If the addition is not huge and you have tons of time on weekend and evenings you may do it slowly but surely by yourself and saving some money.
To rent an excavator it will cost you up to $500 for day and you do not need more than several hours if you know what you are doing. Now the dirt has to go somewhere, so the bin with dirt disposal cost $300-$500.
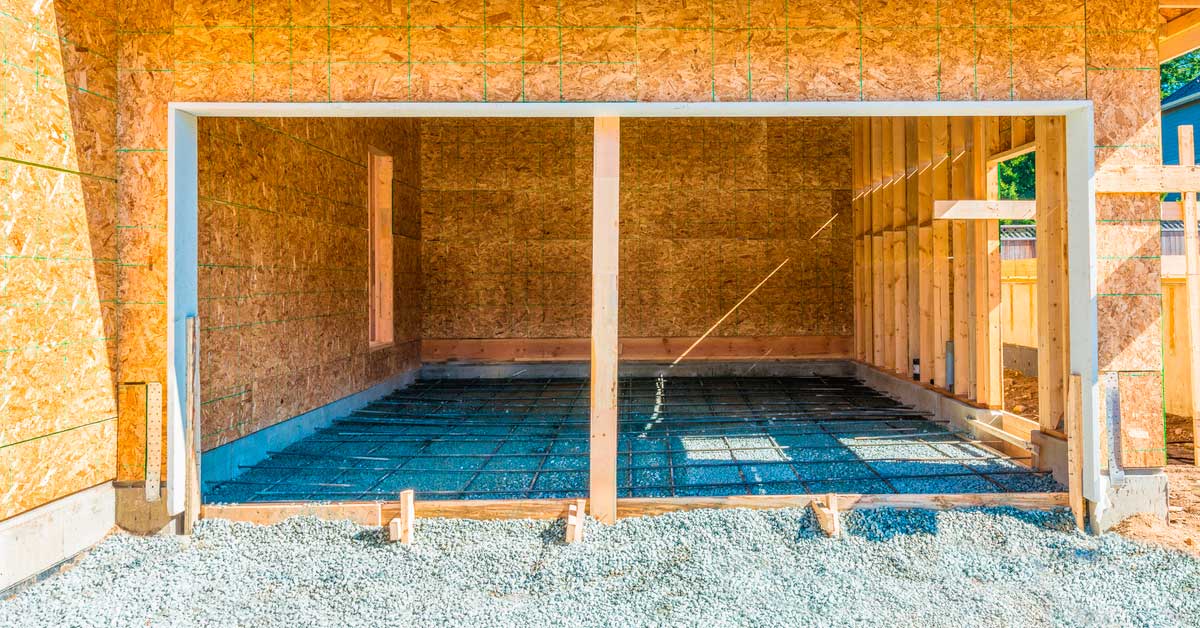
3. Footings and concrete slab
Entire load / weight of the garage will be based on concrete structure. Just like a house or commercial building, garage has the same idea of construction.
Before concrete is poured, municipal inspector will be required and check the excavated or formed properly. Architect or engineer will usually create a plan for the size of footing to be able to hold garage structure. In some cases rebars may be needed to make the concrete stronger and withstand heavier garages.
Concrete slab is poured either at the same time or after the footings. Make sure to tamper soil underneath slab and add few inches of crushed stone or gravel.
The cost of concrete work with forming is approximately $10-$12 per square foot, but will obviously vary on size, region and complexity of work.
4. Foundation/Structural Walls
Just like the residential and commercial buildings, garages may be constructed from different materials. Usually you would match what your home is made of. If your house has wooden walls, than it makes sense to do garage from wood as well.
The most popular and cheapest way of building or adding a garage to a house is with wood frame. If you are attaching it to existing house, you would have at least 1 shared wall already and just need to about 3 others.
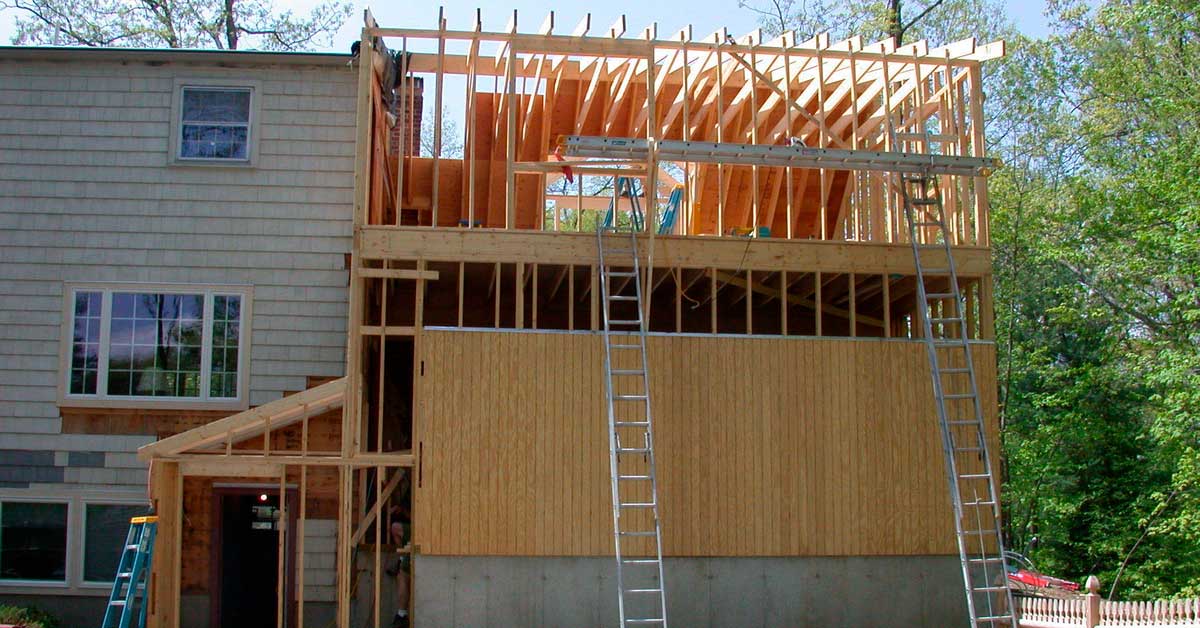
Construction and framing of new garage to the house.
With proper architectural drawings, lumber suppliers can provide take off with exact material and cost. We suggest saving money and time by going directly to lumber suppliers.
Structure walls and framing will cost you somewhere from $15 to $20 per square foot of added garage.
5. Roof and Gutters
First thing to decide about roof on top of your new garage is if it will be flat or sloped. With flat roof the only option you have to finish roof is with layer of asphalt. Sloped roofs have many different material options.
Gutters and downspouts are added to garage to collect and redirect water from rains. They are made of aluminum as basic selection material and can be made from luxury materials like cupper and steel.
Flat roofs can be done for $7-8 per square foot. But don’t be surplice if the cost is higher, only because the overall size of the room is small and roofers charge a minimum amount for day of work.
Shingles on sloped roof cost approximately $6-7 per square foot, and do not forget to measure sloped sides (not floor square footage) and overhang on sides.
Luxury materials roofing like cedar and standing seam metal start from $15 per square foot and go up to $30 or even higher.
6. Doors and Windows with Hardware
First thing that comes to mind when you talk about garage is the automatic door for car. Besides that there may be a side entrance door when adding a garage to a house or walk in door in between.
Windows may be added on side of garage or on top of roll up door for more lighting inside. If you choose to install a window we suggest doing it on higher level for safety reasons for others not to see what you store in your new garage. Same goes for the side door. Make it solid door without any glass.
Simple exterior door in garage would cost you around $500-$1000 with installation. Single car garage door should cost between $2000 and $3000 with installation and mechanism. Double car garage door will cost around $5000.
7. Electrical Connections and Wiring
There are many features in new garages that require electrical connection. It can be simple light switch or connection to garage door mechanism or even electrical car charger station.
It is much simpler to run power lines to garage that is added on the side or back of the house. For detached garage you may need to dig a trench or set up a pole for wire to run. Detached garage could also require sub panel for all the electricity away from the house.
Electrical work in attached garage can cost up to thousand dollars, while in detached garage you are looking to spend several thousand dollars for connection and all extra work to run lines.
8. Plumbing Lines
You would not need plumbing lines in garage for most of the times, but when you do the cost will depend garage being attached or detached. Similar to electrical lines, water has to be run underground in a trench.
Three reasons to add water lines in garage are: sprinkler system for fire; water hose for washing the car and other surfaces; sink with water faucet for washing hands or anything else inside the sink. If your garage is sloped properly you would not need a drain line, unless you install a sink.
The cost of running the water and drain lines by professional company will be close to $500 – $700 per point and count extras for digging trench in detached garages.
9. Insulation for Walls and Ceiling
To keep your garage warm at all times, the addition process includes installing layer of insulation in the walls and ceiling. If the garage will be part of the building the bylaw may have different R value requirements than detached garage.
There are methods to insulate and ever heat up the concrete floor in garage, but they are very costly and not being done in average garage addition.
For batt and cellulose blown in insulation the costs to install will be between $1 and $2 per square foot of wall or ceiling.
Spray foam insulation much more expensive and costs from $3 to $5 per square foot of wall.
10. Interior Finishing
You have several options of how to finish the garage walls and floor from inside. Often enough we see that builders of cheaper homes and subdivisions do not even finish inside of garage.
On Point Remodeling strongly recommends completing inside walls for practical purposes and overall looks. This includes installing drywall on walls and ceiling, paining everything and adding touches like casings, proper lights or even polishing concrete floor.
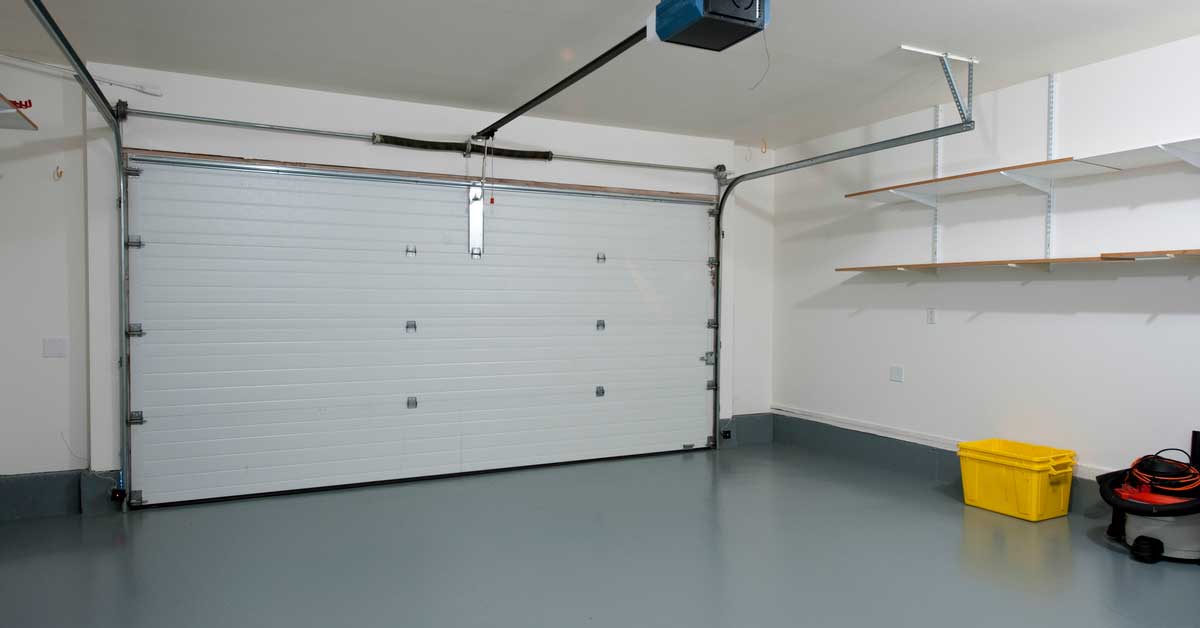
Complete and finished garage interior.
For simple interior finishes in garage you will be spending up to $10 per square foot. See more of our articles on what can you add to garage to upgrade the looks.
11. Exterior Finishes
Just because the walls are up, it does not that garage is finished on the outside. The options are endless and can be done with similar materials as house exterior.
The most obvious decision for exterior finish materials to use something you already have on the house to match the style or to use something cheap like stucco or siding panels. In different regions materials are selected as per weather conditions throughout the year.
Suggested cost for exterior finishes of on garage addition is somewhere close to $8 for stucco or siding panels and $14-$17 for materials like brick and stone veneer.
Conclusion for Adding Garage to a House Cost Guide
Home owners are often surprised with total costs of adding a garage to their home. It has to do more with not knowing all the steps in the process of addition. The construct and finish new garage it can easily come up to $40,000 – $50,000, but some people are not ready to spend that much money.
Be sure to hire professional and trusted contractor as the project can easily spiral downwards if one of the above mentioned stages goes wrong.
editor's pick
latest video
news via inbox
Nulla turp dis cursus. Integer liberos euismod pretium faucibua